Please share your opinions and expertise since we need all the help we can get!

Thursday, January 23, 2020

Another Ikea Addition

The big linen closet project had some nice follow-on effects. The contents of this trunk in the office, my yarn stash, relocated to some plastic boxes in the upstairs closet. It's a bit hard to access but perfect for how often I need to get there (plus it let me sort everything into smaller categories like yarn weight). It also stopped me from cursing out the messy children each time I had to get in the trunk and was stopped by the mess on top. It wasn't really a crafting surface, but of course, EVERYTHING is a crafting surface. So we moved the contents of the trunk and put the trunk itself away and decided what to do with our newfound space.
We knew we needed a space for crafts/art (see above comment) and we had lots of small things to store, specifically blocks and OH SO MANY LEGOS. We figured we'd stick to the rainbow decor (also known as "I've given up and decided to let my kids dictate my decorating") and purchased a TROFAST from--where else--our favorite store, Ikea. We went with the white since our room colors are a dusty gray brown from an old Hemnes line (yes, also Ikea), a white STUVA (Ikea) and D's white and bamboo standing desk. Yellow pine wasn't really the look we wanted. And of course, we went with rainbow drawers.

Building the pieces was the easy part. Sorting the Legos by color, now that took time. By the time we were finished, these bins were mostly full.
I like how it came out. Let's see how long the organization lasts.

Monday, January 13, 2020

Decorations in Review

Though the holiday season is a thing of the past, I couldn't resist a chance to document our decorations for the blog--and for my own reference--before I took them down last weekend. Each year with the encouragement of our little ones, we keep upping the game. This year, we brought out all our normal favorites and added a few sets of lights as well. We stuck to our candy cane and ornament theme, adding some hand-me-down candy cane ornaments to our crepe myrtle and lighting up our path with little candy canes. Larger candy canes that used to light up but no longer do edge our front garden. We have all-weather large ornaments in a bunch of trees and on our lamppost. Finally, our matching wreathes (along with a matching door wreath that I'd already swapped for our standard winter snowflake) are holding up pretty well too. D went up on the ladder to string up our icicles, making that the most time-consuming part of decorating.

I failed to manage a night picture this year but imagine last year's look but with the addition of three more sets of lights. And because I struggle every year to remember what I bought the previous year, I took a picture of this year's new light (as our holiday collection continues to grow). I'm always surprised how a new set of lights will look totally different despite my best efforts at matching. I'm sure that the same set won't exist next year, but hopefully I'll be able to find something similar if we decide yet again that we want to add more.
Indoors looked much the same as always, though we went for silver rather than red garland on the tree (I know, we are SUCH rebels).

The only thing missing was some winter weather, but there are a couple more months to remedy that. I hope you had a happy everything, whatever your chosen holiday.

Tuesday, December 24, 2019

"Turn on Christmas"

We have jumped on the "smart" home bandwagon. Is it a bandwagon? I don't know. But we have some smart plugs and some connected speakers (which we will discuss in a future post), thanks to the power of buying stuff.

Why are we risking opening our home to hackers (as they say the "S" in IoT is for security)? Well, because 1. turning on the Christmas tree lights is REALLY REALLY hard and 2. we wanted to have synced music across the house.

Do you see the plug? It's there....

We are an Apple household, so that means we already own an Apple TV. It also can serve as a home automation hub - functionally that means that it serves as a intermediary that puts all of the smart widgets in one application.

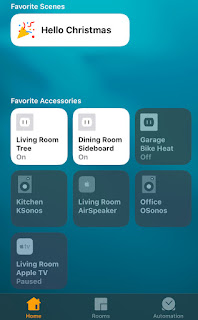
What are the smart widgets? We have two Wemo Mini Smart plugs, one powering the Christmas tree and the other powering the dining room sideboard lights. It was a HUGE pain getting these smart plugs recognized by Apple's "Home" app. Apparently contemporary versions of these plugs have a "HomeKit" barcode which you can scan and connect with immediately. I guess our local Target sells these so infrequently that we ended up with a really old version that pre-dates HomeKit compatibility.

I had to install a "Wemo" app, connect to the smart plugs, install a firmware update, wait 12+ hours for someone or something to generate a HomeKit code, then (while my iPhone was on the exact same network as the smart plug) type the HomeKit code into the Apple "Home" app. I wasted a HUGE amount of time initially because I connected the smart plugs to our "guest" network, which is more secure since it doesn't have access to any devices on our home network. But that was a little too secure as the smart plugs couldn't see the Apple TV it needed to sync with. Oops.


Anyways, once I got that all sorted out we could see our two plugs on our Apple "Home" app. I set up a "scene" that automatically turns on "Christmas" (both smart plugs go from "off" to "on") whenever either of us returns home after sunset.

As the smart plugs also supported the Alexa Smart Home system, I also digitally hooked the plugs into our Alexa (fortunately being on one smart home system does not preclude being on another). So we can also activate/deactivate both plugs simultaneously by saying "Alexa, turn on Christmas" and "Alexa, turn off Christmas."


Practically this means that we have the tree and sideboard on MUCH more now, which makes for a much more festive home. (When you have to lean over a wobbly lamp and reach though a scratchy tree covered in precariously placed glass ornaments to turn something on - you don't do it much.)

Saturday, December 7, 2019

Winter-Ready Playground

At two-year's old, the kids' playground was starting to show its age. It's holding up very well and remains a sturdy, amusing addition to our backyard. But the roof and a few other surfaces had lost their finish in a way that made us worry that it was bad for the wood.
After a little research, we opted to use a spray can of Olympic Waterguard seal, rather than the paint-on polyurethane or deck stain. We weren't trying to do anything too dramatic, just protect it from the weather and give it back a little of its cedar color.
D grabbed the ladder and started lightly sanding the damaged surfaces on a rare weekend day this fall that looked like it would stay dry for a few hours.

It took really minimal prep work, compared to a more dramatic refinish. The results were pretty much immediate. This is beam on the other side of the set. The left picture is the "before," and the right is "after." The color was a bit redder than we expected, but it does seem to be blending in ok to our...let's call it "aged cedar."
Here is the roof, after the treatment. You can see it's a little redder than the untreated places, like the vertical wall below it, but it no longer has that scaley, weathered look that made me think it would become susceptible to rot. Besides the annoyance of having to wait for a dry, not-too-windy day and of having to bring out the ladder, this project took minimal work. For once, a job that took exactly as much effort as we though (maybe even less!). And we have enough sealer in the can that we can probably do it next year with no new supplies needed. Our playground is winter-ready!


Sunday, December 1, 2019

Giant Dust Rabbits

A whopping 10 years ago, I wrote about various strategies to hunt dust bunnies. The kind of bunnies I hadn't accounted for were the hidden, lurking kinds. A few months ago when we flipped our mattress, we discovered an entire warren of dust bunnies. They were so big, I'd like to think of them as dust Flemish Giant rabbits. These must have have been growing under our bed for...years? Our bunny warren was lurking underneath the drawers in our bed frame, which meant we had to open the drawers and pull up the bed slats to see them. I guess that's why we hadn't noticed even when we flipped the mattress other times--it was just luck that one bunny was visible enough to prompt us to explore further. The sight was so gross that I forgot to take a picture before grabbing the vacuum, so the pictures below show much less dust than we originally found.
Thankfully, with a little awkward hopping over the drawers and between the frames, we were able to vacuum up most of the bunnies and wipe down the floors with a damp cloths.

Knowing this has been under our bed for who-knows-how-long is gross, but at least now we know to attack this space every time we remember to flip the mattress. I wonder what other hidden dust warrens are lurking in our house. Most of our furniture is up on legs to help our baseboard heaters be more effective, so usually we can see (and clean) under them. So I hope that while we definitely collect some dust along our baseboards, we don't have quite the giant dust bunnies found here in too many unknown warrens around the house. Because EWWWWW!

It's been a bit quiet around here lately but stay tuned for a few posts we have lined up. We might not be blogging but we're busy around the house, as always.

Monday, November 18, 2019

The Closet Big Reveal

At long last, time for the culminating closet post. You've been very patient as I've struggled to find time to blog (and I'm only getting to it today thanks to a sick day; such is the life of a parent). So to review, we left off with the space painted and ready to go, literally about 6 months after I'd started taking apart the old shelving and begun to spackle and years since we'd wanted to do something with that unorganized black hole of a linen closet. Back in 2016, we paid to have a professional organizer from the Container Store come and give us advice. After a bunch of back and forth (and some successes in other rooms like our kitchen and office), we had the start of a plan for the upstairs linen closet. But we weren't convinced or ready to pull the trigger, so it sat for, well, apparently 2.5 years.

The idea was that instead of using a system mounted to the wall in such a narrow space impeded by ducts, we opt instead for something on wheel that could be entirely wheeled out when needed, to access the things in the back. If you could look from the ceiling, it looked something like this (the gray areas are the vent ducts, the white with Xs in them are the modular shelves):
If you could stand at the ducts on the right and look at the left wall, it would be something like this. Notice that they are all on wheels so that they can be totally pulled out of the closet?
The system, called InterMetro, came in all heights (the poles could even be custom cut) and several widths and depths. We altered the plans a bit when it finally came time to buy, choosing to use two sets of shelves instead of one, so that wheeling them out would be easier. We ended up with a 24'' and a 36'' set of shelves, both at the narrower 14'' depth. They are 72'' high, plus the 3'' or so of the wheels, and just clear the door to be rolled out in the hallway.

Assembly wasn't too bad except for a couple key points. The first was that these stickers, on each and every pole (of which there were 8) were incredibly sticky and took an enormous amount of elbow grease and Goo-gone to remove. Not cool, Container Store. For the prices we paid for this, they could have used something that didn't leave a disgusting residue.
The second thing was that the clips that lock the shelves into place at their desired heights are not nearly as secure as advertised. Once everything was in place, I don't think they will shimmy. But because the locking mechanism could wiggle as you wedge the shelf into place, the shelves are all just slightly off from level. Again, I think, given the price, that the Container Store could have done better.

There was also the added stress of deciding it would be "no big deal" to assemble one of them downstairs while our littlest napped and then carry it up. It turned out that it was exactly just too big to clear the turn into the stairwell and make it up. We got a nice nick in the wall on the stairs thanks to that stunt. Oops.
You'll notice that we also used metal ventilation taping to close off the gap on the right between the duct and the wall, in an effort to mask the fact that there was no way I was able to paint behind there.

The icing on the cake for this simple shelving solution was returning to an old favorite, elfa, for the door. We've used the elfa system in our office closet and living room and the ingenious door storage is something we probably ought to add everywhere. It's now the home to all the medicines and first aid things we've kept in our downstairs closet, sorted by type (cold, pain, topical creams, bandages, etc.). This frees up a ton of space in our downstairs closet to put the kids bathtubs away.

In all, we really couldn't be happier. We now have a place for our linens, pillows, and out-of-season blankets, the content of our medicine cabinet, and some other various things (my yarn stash! extra toothpaste, floss, and toilet paper that used to send us running to the basement!).

It took 3 years, but at least it's lovely to behold now.

Tuesday, October 29, 2019

Finally Painted and Ready

With more than enough paint finally at hand (the original quart plus one gallon), it was time to get down to business. Fortunately, despite the prominent "NOT RETURNABLE" on the can, Home Depot took back the incorrect color and gave us our money back. Still though, whoever thought having Foxglove and Foxgloves should be fired...

As I mentioned last time, this was my first time getting to roll the paint. And not just roll. This was a one-woman job. I cut in and then rolled each wall, hoping to get the paint in place relatively promptly to avoid any weird blending lines. D was here for moral support and picture taking. The children were here for complaining that they wanted to help and then not wanting to actually help (they did paint a bit, but only in the space that eventually was going to be rolled over, to their dismay). You can see their handiwork along the side walls in the second picture:

And within a few hours, it was done! It involved some contortionist moves in the corner near the ductwork, but ultimately, a pretty rewarding and quick job.
But of course, it is never *that* quick. I still had to do the trim and the door, a boring necessity to make it all look white and new. Despite my annoyance at painting glossy trim, I did get a brief thrill when I realized that this may be the last odd custard color left in the house that was so prevalent when we bought it. Begone, yellow!
Next up, with D's help, was to replace this exposed CFL light. Part of me wanted style, the same out-of-place flair that we applied to our bedroom closet. The rest of me just wanted a covered lightbulb so that I didn't risk shattering it and spilling all kinds of hazardous materials all over our sheets and towels.
We agreed that I could finally get something similar to the crystal chandelier I had wanted in the dining room. Because why not? We found a cute one at Target and considered whether or not we could add the pull chain just as we had done in the bedroom. When it arrived though, I realized that even though it was a flush mount, it would occupy too much real estate near the ceiling where we wanted to put some tall shelves. No problem. We used this as an excuse to upgrade our guest bedroom light (that we inherited from the previous owners) and put that light in the closet. Here's the original ceiling light. Not bad, but pretty blah:
 Here's the new crystal one in its place:
And here's our closet! It's not quite as swanky as I wanted, but it's much safer now that there are no exposed bulbs and this swap let us put the crystal light where we can appreciate it more.
Last in the closet series, a post where I'll finally tell you what we ended up doing with this space, now that it was painted and ready for use.

Monday, October 14, 2019

The Rules of Painting

Continuing on our closet adventure, we reach the fun part. After months of taking down hardware,  spackling, sanding, and caulking, it was time to paint! Painting, while not the most enjoyable activity, is for me one of my favorite home improvements because the drama is immediate. The whole space changes within just a day or two.

Step one, not pictured, was to paint the ceiling. After not painting for several years, I forgot our painter rule #1: use good tools. I started out using no tools at all. As I started gathering up our painting tools, scattered around our basement since our last paint job almost three years ago, I realized that our paint roller tray was covered in rust. Probably not a good thing to ix paint in. I also couldn't find any stirrers or paint can openers, even though I knew we had many lying around. So we sent a runner to the store and ended up with a paint tray that came with rollers and brushes. I should know better. I do know better. But it was so temping to just open the kit and go. So rather than use my much better Purdy brushes and rollers, I used the cheap ones that came in the kit. Big mistake.

It probably isn't noticeable to anyone but me, but the ceiling (my first foray into painting for years) looks too textured now, because the roller nap was cheap and a bad fit for our smooth ceiling. But hey, it's a ceiling and it is now white rather than light yellow. And after I pulled yet another brush bristle off the edges where I was cutting in, I finally remembered to seek out our good brushes and dump that one in the craft bin for the kids.
Another fun side note about this project--this is literally the first time I've ever used a paint roller. Yes it's true. After painting an apartment and then a whole house, this is--to my knowledge--the only time I haven't been just the "cutting in" person. D has always done the rolling (see examples here, here, and here.) Since this has always been "my" project, I did it all. And so, ladies and gentleman, after about 15 years of painting, I felt the reward of rolling. (Seriously, it's so much more fun. I'm not being sarcastic here at all. All that painful cutting in for such small payoff and then roll and BAM, new look.) So first, the ceiling. A lot less fun and a lot less payoff than the walls, but it was a start (moving from vaguely yellow to slightly-too-bumpy white--not quite the drama I was looking for).

Then it was on to the REAL painting. I already knew that I wanted a color, despite this being a closet (I have a history here--see my lovely aqua walk-in bedroom closet). I thought I would go for a super light, almost-white purple. Here were the swatches we selected from Home Depot.
Do you have a favorite? Here's where we broke painter rule #2: don't let a kindergartner pick your color. I would probably have picked the one on the lower right or any of the pale ones along the left. But those were too light for my kid, who'd come to the store with me with promises that she could select the color with minimal parental veto. So she chose Foxglove, on the back right. It was on the same scale as the one I preferred just below it--just one notch darker. Her sad little face when I tried to convince her to go lighter made me relent. Foxglove it was.

Then I broke painter rule #3: buy all the paint you need. I somehow believed that one quart would be enough for such a small closet, especially when I saw how expensive the paint base was. And so we came home with one quart of paint. I thought I was ready to go. Then we did some math for square feet of wall space vs. what the can said it could cover. Suddenly we weren't sure. And I definitely did not want to run the risk of having to buy a second can when halfway complete, given that dye lots aren't always consistent and I might not be able to just start on a second can seamlessly.
So armed with a picture of the first can, Grandma went to the store to buy a second can before we started (that way we could mix the paint before beginning, to even out any color inconsistency). What did the paint department employee send her home with? Take a good look and see if you can spot the problem:

Apparently Behr paint comes in Foxglove and Foxgloves. Both valid colors for their Marquee line, both purplish (i.e. not particularly noticeable if you're not paying attention) and both very different. In addition, Foxglove (no "s") had a one-coat guarantee but Foxgloves (with the "s") did not. We discovered this difference, of course, roller and brush in hand, dressed in paint clothes and ready to go. *Big sigh.* It was off to the store again.

To be continued...

Monday, October 7, 2019

3 Years Later

This year, I made it a goal to clean out the upstairs linen closet. It was never pretty, but the addition of extra duct work 4 years ago made organization pretty much impossible. I've had a goal of figuring out this space since 2017 at least (and probably unofficially for even longer). This is how it usually looked:
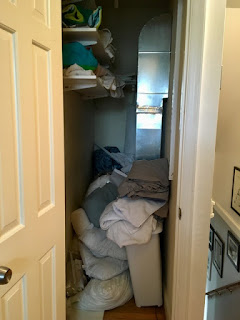
This is no exaggeration. Because of the extra duct on the right, we couldn't get to the back easily. We'd already pulled off a few of the shelves so that we could squeeze into the back if necessary, so we lost shelf space, and what we kept was so high that I could not reach it easily. So the things we use most just sat in huge piles in the front. And the rest of our extra towels, sheets, shower curtains, pillows, and blankets were just piled up any way they would fit. Even though I didn't have to go in there often, it really bothered me.

The obvious first step was just to move all the linens. It was no easy feat finding them a long-term temporary place while I slowly worked on this project, but we split it up into the two closets in the guest room. It quickly became evident that we had too many extra pillows:
We got rid of a few of the oldest, as well as some towels that were not really necessary. So we were left with this empty closet. You can see the extra shelves just sitting on the floor.
While we've used shelving systems like this before (the toy closet in the office and the shelves above our TV), it was a bad fit for such a tight space.
In the back, above the horizontal duct, was a closet rod and a wire shelf. After some discussion, we decided we should take it all down and start fresh.
This was a project that J (that's me) did almost all alone, taking hidden hours here and there. So I began removing shelving in March. A little elbow grease and then carefully carrying the shelves down the stairs, around some tight corners, and to the curb where I'm sure they found a new home.
After a few days of removing hardware, the really slow part started. The walls were a MESS! The shelving screws were installed in molly bolts. The vertical rods left ridges in the paint. The duct work installation clearly had put a few extra holes in the drywall. The walls and ceiling were separating from each other. It was bad. So I spackled and sanded, sanded and spackled. I spread caulk in all the corners. It was slow going, between waiting for layers to dry and waiting for opportunities to sneak upstairs (but not when the kids were asleep because it's right outside their bedroom). This stage took literally months. In the end, what I got was not perfect because--let's face it--this is a closet, but at least moderately even walls that have no giant holes or dents.

Here's a before and after for the caulking. You'll have to trust me on the spackle--it was too hard to photograph.

Stayed tuned for the next installment, where we reveal paint colors and further plans. (Spoiler alert: I waited until this project was totally completed before blogging it, so if you're someone who likes to turn to the last page of the book then I'll tell you that we are very happy with the final outcome.)

Thursday, September 26, 2019

Shed Tour

Time to take you inside our new shed and show you how we arranged things. At this point, we are pretty much done finding a home for our garden supplies out there, and the garage has exclusively become a zone for tools, bikes, and other non-yard-related things. Most significantly, there is no more dirt in our garage (topsoil, compost, potting soil, etc.), which were in giant containers and bags all over, contributing to a very dirty--literally--floor.

The left side of the shed has built-in shelves. We asked for three, though if I'd stopped and considered how they were attached to the wall (with giant triangular mounts), I probably would have only gotten two. Fortunately we can work within the spaces between the mounts. This wall of shelves has all our gardening supplies. You can see we have gardening tools, pots, trays, gloves, and seeds. Up high and definitely out of child reach (not that we're leaving them in the shed anyway unattended), are the chemicals, many of which we no longer use but are waiting for the right opportunity to through out. This includes Roundup, Weed and Feed, and other various pesticides and fungicides. It's funny, now that I see this photo I noticed that our poison ivy killer is on a much lower shelf. Time to go out and fix that...
Above the shelves is a loft, which gives us an attic space for longer things. Here is where we are storing our ladders, some garden edging, and things we do not use often like our grass seeder.
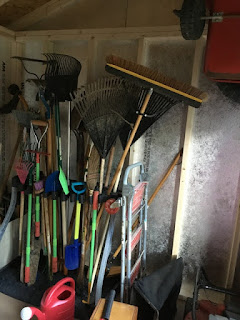
Moving to the opposite wall, we have all our longer garden/yard tools, neatly corralled in a stand. The kids have their matching sets there as well.
Then, above that, are the joists that we can put hooks into. Right now, we're not really in need of this space (besides the single hanging wagon you can see). This high ceiling also gives us the ceiling clearance we need to actually pull the rakes out of the stand.
We have our lawn mower easily accessible on the floor, as well as our little garden cart. In all, it's the perfect amount of space for the things we needed to put in it (which is good, since the size of our shed was all based on the size of the existing concrete pad).

Now if only the weather would cool off so we can go out and garden.