Please share your opinions and expertise since we need all the help we can get!
Showing posts with label exterior. Show all posts

Sunday, September 25, 2022

Flipping the Bird

I was working from home recently, at my sewing table/desk in the guest room. The windows were open and I could hear the birds chirping and the bees buzzing. I love that some volunteer goldenrod has planted itself in this garden bed. It starts growing in late August and really fills in between all the plants that have already died for the year.
Being a late summer/early fall flower, it attracts a lot of bees and other pollinators at a time when there isn't much else for them to eat.
But suddenly, instead of happy chirping, I heard what sounded like a birdy rumble outside. A bluebird and a woodpecker were obviously having a loud argument in the Hawthorne tree just outside the window. There was some kind of turf war going on. The woodpecker eventually flew off in a huff.

Then I heard tapping. Very quiet tapping, at least from my vantage point inside. It went on for at least a minute. We snuck around from the back door to the front to see that same woodpecker, apparently taking out his aggression on our front facade. See him there?
In about two minutes, this little jerk put three sizable holes (two pictured here) in our door! From what I was able to surmise from reading why a woodpecker might have done this, it was likely the conclusion of the turf war, as a way to send a big FU to the bluejay. And a big FU to us too.

We filled the holes quickly to discourage the bird from coming back, but I don't think this woodpecker was trying to build a hole for a nest or find insects, so hopefully he has admitted defeat and moved on. Unfortunately for us, matching the paint is going to be challenging. Apparently I failed to note the color in my 2017 post when we last had our exterior painted. Honestly I may never had known the color. I'm going to scavenge our basement paint collection and hope I can find it. If not, it may require a lot of paint swatches just for a repair no bigger than a quarter.

And this isn't even the biggest pest problem we're experiencing right now. Stay tuned...

Tuesday, May 10, 2022

Exterior Makeover

Almost three months have gone by and most of that time was just waiting for work to begin (and doing other, unrelated, very bloggable projects) and then, a couples of weeks ago, the new siding makeover took place almost overnight. Well within a week, to be precise. A week of a crew of at least 6 people working 10 or more hours each day. It was quite a project. Let's go angle by angle, to walk through the process.

First the most important and changed view, in our opinion. D, who was the brainchild behind this project, was particularly annoyed by this approach to our house, which became all the more visible five years ago when the owners of the empty lot next to us cut down all their trees. With the trees cleared, we lost both our shade to that side of the house and any hope of hiding our white vinyl siding. Despite pressure washing it yearly, it just looked dingy. And even when it was clean, D hated it.

Here are some pictures in progress, which at the time, I intended to post as they went. But they moved so quickly it was hard to keep up.
Bye bye vinyl

In wrapping the house with whatever the pink and green layers are, we were also provided a little bit of additional insulation. Obviously that's not why we made the upgrade, but it doesn't hurt.
And here's the beautiful finished look. You can see in this picture below that the dormers had been updated by this point as well, but I'll talk about them in a moment. Though I was not so excited about this project as D, I have to admit even I get a little jolt of happiness when I come drive this way towards the house.
One comment before we move on, while it's easy to scroll between the top picture and this one, is about our shutters. Part of this upgrade included replacing the shutters, simply because they were old and because we preferred a panel design rather than the louvered style we had. But when they put these up, we immediately felt they were too small. The company will be giving us wider ones, but like everything else right now, there are supply chain issues and we'll get them when we get them. So we have too-skinny shutters for now. 

Now onto the back of the house. Here's our before picture. Everything white. Which, while boring, turned out to be very easy. You'll see what I mean in a moment.

Here's an in-progress shot. The team had to be very careful with the way they set up the scaffolding, since we have a slate roof. Usually, they can traipse all around the shingles. So our job was extra difficult and required much more careful set-ups, so that they could minimize the weight on our roof. We haven't had a slate person out yet to take a look, but we don't think more than a handful of slates got damaged, so that's pretty good. The siding company did warn us before beginning that they would do their best but that we had to accept some risk that slates would be damaged.

And...here we go for the final reveal in the back (complete with sun flare). A few things to note here--first, they replaced our brown metal gutters with white ones. It was a little jarring at first and not something we had discussed at all during the planning stage, but apparently gutters are supposed to match the trim and it really does blend right in. I'll have to get used to the very white downspouts (and, let's face it, they'll get dirty soon anyway--it's like white sneakers right out of the box).

Here's where we really started to question what should be gray and what should be white. It was easy before when EVERYTHING was white. But since we had white trim around the windows and doors, this wasn't as easy as just making everything gray, either. As we look at this, for example, we now think we probably ought to paint more gray around the patio door, like the border around the gray panels and the strip immediately above it. I'm interested to know if you agree. Fortunately, Hardie (the company that makes the siding) partners with Sherwin Williams so we can buy the paint easily (and, in fact, already have a can of it).

The side by the garage was also fully converted from vinyl to Hardie board, not that I usually even remember it's there with all the giant camellia bushes around it. It's pretty remarkable that they were able to get in there without disrupting the plants too much.

And we continue around to the front of our house, probably the most important view, despite my focus on the side. In addition to (obviously) focusing on the siding itself, one other thing we wanted to upgrade was the design surrounding the dormer windows. You can see in the "before" picture that it's just more horizontal siding. Oh horror! (I'm being sarcastic because honestly I did not care about this at all, but D hated it.)

The "after" picture shows how we changed up the design to create a cute little triangle top with white trim and solid gray sides. No horizontal lines for us (from the front view).

The front is where we really started to struggle with what should be white and what should be gray. My complaint was that we paid all this money to change the house color, and the front still was mostly white (we didn't pay for this upgrade specifically to change the color, but still...). As a result of my concern, we all agreed that the picture window should be gray--as it is in the above picture (my complain being before I took this picture). I lost the fight on making our entire frieze board (the wide board immediately above the brick) gray, since we established, after a long walk around our town, that the trim on most houses seems to match the windows.

So that still lives us with some question as to what should be gray and what should be white. I already asked about the back patio door. I thought we should perhaps paint the panel on our front door that is below the four glass windows, to mirror the gray panels in the sun room, here:
But now D thinks we should perhaps make that entire section around the windows gray, so that it's not a small gray panel framed in white but a gray panel (leaving only the window frames themselves white until you get to the frieze board). He's also considering whether to paint the panels of the garage gray, so that it looks like gray squares each framed in white. I think that might start to look a little weird and like a checkerboard.

And so, with the project mostly* done and with minimal hitches**, we still find ourselves wondering how it should look. Fortunately, this level of paint job is something we can do ourselves, so there's no pressure to decide and implement particularly quickly. Please let a comment and let me know your opinions about what, if anything, we should switch from white to gray.

*"Mostly" done because during a very rainy weekend, we noticed some issue with the back gutter, and we are still waiting on the shutters, as I mentioned above. 

**There was a dicey moment when the work crew arrived and thought they were trashing all of our gutters and giving us new ones (not in our contract anywhere, though they said it was--perhaps it was assumed since it's easier to just tear off old gutters than to carefully remove them). Thank goodness D was home to talk with them and emphasize that while we did not care a bit about the back gutters, our front gutters were copper and most definitely should not be replaced. Equally thank goodness, the gutters didn't wander off from our backyard for the 5 days or so that they were not attached to our house, copper prices being what they are.

Sunday, February 20, 2022

Here we go again

Case loads go up and apparently I stop blogging--or doing much around the house for that matter. But it's a new year and we're getting the itch to make an upgrade. In this case, D admitted that he had never liked our vinyl siding, so we decided to look into something different. We already had Hardie board installed on the front-facing section of our sunroom when we had it redone in 2016, and have wanted it on the rest of the house since 2017 when we had to get new (mismatched) siding on the part of the top floor where a tree hit it. Though we have. brick house, we have a decent amount of siding. Here are a bunch of views to show off what would be replaced. We're talking about basically all of the white parts except immediately around the windows and doors:


(It seems unbelievable that we power washed this over the summer, with how dingy it looks)


We're also learning lots of words that I've heard before but never really knew exactly what part of the house they applied to. We're apparently looking at replacing the frieze boards, fascia boards, rake boards, and soffits. We're also doing the siding itself, on the dormers and gables. Here's a cool picture I found that had the parts helpfully labeled:
So now that we're doing this, it's time to figure out exactly what color we want to switch to. Because why keep the house white when we have a whole rainbow to choose from?
OK, but that said, we knew we wanted to stay with a neutral color in the gray category. So really, here are the choices we are looking at:
We've gone back and forth several times between pearl gray, gray slate, aged pewter, and iron gray. The contractor we hired for this job had a good point when he reminded us that our final color choice should not match too closely with our slate roof. A very good point--one we hadn't considered but now we realize is definitely true. We have a paver that is the same color as our roof that we're trying to use for color-matching purposes:
But of course, slate gray really is not a single color, but a blend of a lot of different grays, so it's not exactly easy to make sure that we don't match it too closely


I even tried to take a picture in gray tone, a trick I have used before to help me find similar and different "tones" for fabrics and decor.
It didn't really help.

And so that's where I'll leave it for now. We are leaning towards pearl gray, but let me know if you have any opinions. We also have some plans for how to add some accents around the dormer windows but I'll save that for a future post.


Monday, December 11, 2017

Siding Sighting

Back in May, we had our siding power washed because it looked a little dingy:
 But then this happened in July:
Interior repairs were done a little after Labor Day but you may remember a hint from the end of this post that there were still some exterior issues. Between September when the contractors "finished" their work and November when we made them come back to fix something we weren't happy about, the exterior looked like this. Can you see the problem? It's pretty subtle, which is why I'm posting a bigger-than-usual picture:
Can you find the problem? Does this remind you of those Highlights magazines from when you were 8?

How about now?
They used different siding than what we already had - instead of just coming down just shy of vertical, it comes out at a sharper angle and then goes to vertical. They warned us that they couldn't find identical siding "anywhere" but that they would be able to blend in the replacements. We didn't feel like they blended in well enough and we were pretty annoyed.

So after a bit of finagling with our insurance company and then some scheduling difficulties with the contractor, two months later they were back on the job, to replace all the siding in the whole cut-out area so that it matched.
 We still aren't really thrilled with the results. At least it all matches on all three sides. It doesn't match the siding anywhere else on the house, but there isn't too much and it won't typically all be in view at the same time (remaining siding is on both sides of the house plus some outside our sunroom).
It looks much better than during the two-month interim, and we think that one day we'd like to replace the whole thing with Hardie Board. The thing that made us most mad was this: We didn't actually discuss with them in advance what kind of siding they would use (besides that it had to be white), assuming they were making the closest match they could given the age of our home.  But after they were done the job (which took a whole day, surprisingly) we did a little research of our own and found Home Depot sells siding identical to ours, in shape, if not size (we didn't actually measure). It's just order-only and not in stores. When we mentioned this to the contractors, they made some kind of lame excuse about it not being in stock when they stopped there that morning to buy it. But they knew for at least a month that they would be doing the job.

Well at this point, we're done for now. I don't really want more people wandering around on our slate roof and it looks better than before. But we certainly won't be using the same people again for future repairs. They were nice enough and did an ok job, but just had no eye for detail. At least finally, four months after the tree hit our house, the repairs are done. Now we're just still wrangling with the insurance company for our final pay-out!
Sunday, May 28, 2017

Painted House

We decided it was about time to give the outside of our house a new coat of paint. It wasn't going to be a very dramatic change (and usually I paint BECAUSE I want dramatic change) but was going to require a ton of prep work. We know because we tried this before, and never got very far.

Of course a lot of the worst parts were covered up with vinyl flashing when we replaced our windows - most new window installations now include vinyl and aluminum capping to cover the whole exterior sill. But still we needed a lot of scraping and rebuilding.

Here's an example of a spot we tried to build up that still needed a lot of work:
And here is paint to be scraped. To the left next to the rough patch is where we tried to fix 7 years ago. Even after all this time, I can still see the "ultra" white right out of the un-tinted can and how it's different from the color around it.
In the back, you can see the difference between our older "new" windows (not as old as the originals but installed before we moved in, sometime in the 90s or early 00s, where there is still exposed sill in need of help:
Versus the ones we replaced in 2014 where the sills are fully covered:
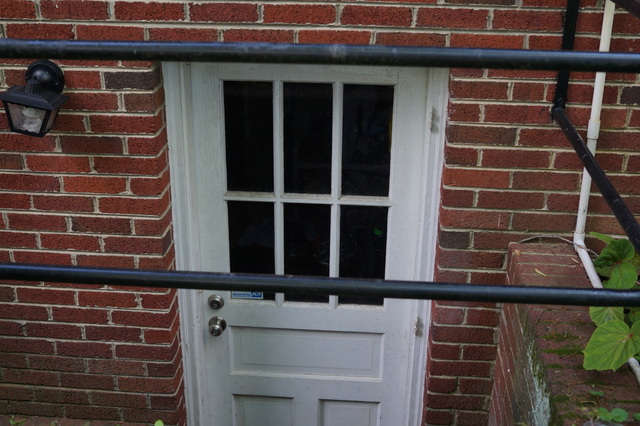
Here's the basement door, that I desperately want to replace, but that we figured was worth painting for the time being (at least it will match until I finally get a new one - especially since I've wanted a new one for years and so who knows when I'll actually get around to it):
This blog post has been mostly delayed while I go through old photos trying to find a "before" picture for the garage, which I apparently forgot to photograph before last week's painting. It was the most dramatic transformation but you'll have to take my word for it since it seems like I have no photographic evidence. Here's my thousand words, in place a picture - a cream color that matched no other exterior color, a lock that had been removed and had the hole filled in with peach-colored putty, and a door panel that was bowed out and cracked. In short, a pretty ugly sight to see (but not one worth replacing, based on the high cost estimates for a new door).

And now the afters:

A garage that actually matches the white color of our new addition, with no weird peach-colored putty. The bottom left panel is still bowed out, but the painter was able to fill in the cracks and leave it mostly unnoticeable (and at a fraction of the price of a new door):
Rebuilt, primed, and painted area under the soffit:
Scraped and painted picture window:
Freshly white area around the front door (he's actually coming back this week to give our blue front door a fresh coat as well):
 Back window sills:
 Basement door (when he comes back to do the front door, he'll go over the panes with a razor):

Since we were giving the house a nice whitening refresh, it seemed like a good time to power wash as well. We have one power washer that needs the O ring replaced, and we borrowed a neighbors that also didn't have quite enough oomph to safely get to our upper floors. So since the painter had to scrub and clean the wood areas to prepare them for painting, he also was willing to power wash the siding areas as well. Here's a before and after. Obviously his power washer had a bit more, well, power. Also he actually used some detergent, which we didn't. Green slime:
No more green slime:
A nice, relatively cheap refresh for our house that has been much needed all these years. We probably should have done it sooner! And now we have a guy to call for similar jobs, and who we'll be recommending to all our local friends.

Sunday, March 16, 2014

Odd Inspiration

We finally got around to something that was on our notional to-do list for a few years - paint the front door. The black was a faded dingy not-so-black. And the dark color trapped so much heat between the storm door that opening it in even a 65 degree sunny day was a blast from a furnace.

I've taken many walks around the neighborhood to try to find inspiration but never could settle on a color. And I recently found my inspiration in the oddest place:

A cute outfit I bought my baby last weekend in the loveliest soft blue-green immediately made me think of what a beautiful color it would be for our front door. And this weekend was the perfect time to do it - warm and cool enough that we could keep the door open and dry enough that we wouldn't have to deal with humidity slowing down the time between coats. 

So armed with a pair of 3-6 month-old pants, I set off off the paint store. We usually stick to Sherwin Williams but a few blogs I read recommended Benjamin Moore, so we decided to try them instead. I purchased a quart of Aura for exteriors after the woman at the store told me that, even though I was painting a light color on black, it was guaranteed to cover in two coats with no primer. Also bucking our usual policy of buying a few sample colors, I compared a few of the paint tiles and picked a color within 5 minutes. Can you guess which?


I went for the second tile from the left on the bottom strip, Sea Mist Green. I almost chickened out and went for the more muted, grayer Covington Blue (top right) but decided against it.

Meanwhile, D was busy removing the hardware from the door:
You can see how much the black had faded from where it was covered by the door pull:
And so the painting began. Since I usually do the jobs that requires a brush and a steady hand, D watched the baby and assisted (and took photos) while I did the work. First, cut in and fill in the panels, doing my best not to create drips:

Then the inner cross beams and then the outside. Here it is after one coat - they were not kidding when they said Aura would be able to cover up the black.
Here it is all finished the next morning with the hardware back on (even though we could recoat a within a half hour - we waited until just before bed to put the hardware back on to really let the paint dry).
The only problem is that whoever painted the door black painted the inside edge of the hinge side black as well:
See it there, with a little of the new aqua where I let the brush go around the corner?
I was planning to use a little artist's paint brush there to cover the black today, but we realized it might look weird with a little strip of aqua paint visible on the inside of the house - the black mostly looks like a dark shadow. Ideally this edge would be white, but we don't have the original white paint used on the door and we learned once before that getting the "right" shade of white is important. So we're just going to leave it black for now until/if we paint the white door and all the trim.

And so ta-dah - here's our cheery door, all for only $25 of paint and a couple hours of effort: