One. The answer is an amazing "one." Seriously. Just watch.
First, here's the big reveal on D's amazing job clearing the pad and laying down pavers. You can see it's not quite done, but the rest can be completed any time because it's not under the shed and just there as decoration and to make the whole pad look even.
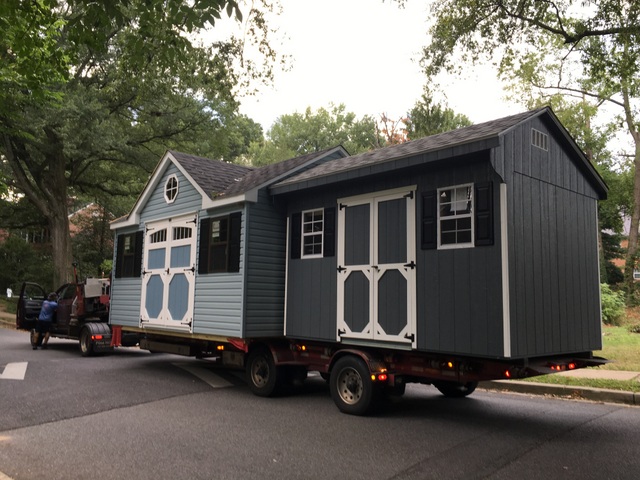
Here it is, the big day! Can you guess which one is ours?
We chose a dark gray with no special dormer on top--or, if you're thinking logically, the one on the edge that can be unloaded. See that guy there? He was the only person on this delivery. We waited, expecting to see a small team emerge from the pick-up truck. But nope.
One person and a remote-controlled "mule" is apparently all it takes. It was pretty magical to watch. He started by picking up the side with the mule, fork-lift style, and bringing it off the flatbed slowly. The flatbed started rising so that it created an incline. Then he added wheels to the other side of the shed and eased it off the flatbed completely.
After that, it was just like a video game, watching him maneuver the shed around various obstacles.
Here it is, going through the empty lot. I guess sometimes it's good that it's
no longer full of beautiful old trees, sort of.
Then it was a tight fit between our
Japanese snowbell and our patio. We had to move a pot of mint to make room as it made its descent from the patio. This thing really seemed to be able to turn on a dime.
Here it is making the turn to the concrete pad.
Parallel parking this beast is apparently easier than parking a car. Despite us leaving almost NO extra clearance next to the log pile and sand box, he put it exactly in the right position between the crack in the concrete and the other edge. The poor guy was smooshed up against the sandbox when he removed the tires. Oops.
And here it is, in all its glory. Since it arrived earlier this week, we've been busy loading it up. Stay tuned for the tour inside our shed next time.
Edited to add this beautiful artistic rendering:
Spoiler alert--it holds everything perfectly and our garage is starting to look amazing as we clear out yard stuff and sweep out the dirt. Spoiler alert part two--we realized we forgot to take "before" pictures either inside the empty shed or inside our disastrous garage. Trust me, the garage looked awful.