Please share your opinions and expertise since we need all the help we can get!
Showing posts with label dining room. Show all posts

Saturday, November 22, 2025

Drinking Problem - SOLVED

Wow so this post has been in draft now for 18 months--I definitely thought I already blogged about this one, but apparently I only completed this post in my own head. This is a follow up to a post from three years ago about trying to organize and display our liquor bottles. We found the solution, as usual, at our favorite store--IKEA! The BAGGEBO:

It's a petite display cabinet that had a good amount of shelf space and fit neatly in our dining room as book ends to our sideboard. (Fun fact, it's $5 more expensive now than it was when I took that photo in-store almost two years ago.)
We installed a lighting system on a smart plug that turns on about a half hour before sunset every evening. It provides good ambient lighting and displays the alcohol that we very rarely actually drink. Lately it is more like art:

One problem with this furniture is that the two sides are a sort of mesh, which looks cool but means that the shelves and bottles get very dusty. And it's a big pain to clean. Obviously no display cabinet is air-tight, but having the two sides more-or-less completely open means that the dust builds up pretty fast.
Funny enough, when I started this post, I figured the story was done. But then in a walk around IKEA (did I mention we go there a lot?), we found this beauty:
The BLALIDEN, which didn't exist two years ago when we found our cabinets, actually solves almost every problem that remains. It is glass on all sides (though, admittedly, I like the white metal back on ours) and is taller, meaning one extra shelf to store more bottles--or space out the ones in the case. Still, at $120 each, it seems like an expensive and unnecessary upgrade to something that works almost just as well. Still, will this post have a sequel? Who knows...

In other kitchen news, we recently upgraded our cabinets by installing soft-close stops on them (by "we" of course I mean "D"):
Now we don't have to gently close the cabinet doors--we can just swing them and let the soft-close mechanism take over. This has been especially noticeable on our glass doors. Just listen to this comparison (as I'm sure will be obvious, the soft-close door goes first, followed by one without the soft-close):


Saturday, July 16, 2022

Drinking Problem

We have a problem with our alcohol. No, it's not what you think. We don't drink enough of it. Or we don't drink enough of it based on the rate we buy it. Our liquor, a modest selection, has lived in our pantry closet since we bought this house. But thanks to maturing taste buds and a pandemic that led us to become our own fancy bartenders, we've accumulated more than we can fit. It's starting to become an issue of survival. I recently found myself asking: "Do we really need that rice cooker? I need to make space for these bottles."

We decided that the best solution would be to buy a liquor cabinet or something like that to store at least some of these, but exactly what to buy and where to put it is a challenge. We have filled up nearly all available space in our house for furniture, and it wouldn't really. make sense to move this far from the kitchen/dining area anyway.

This is pretty much the only wall available to us in the area. 
I really love our sideboard and the pictures above it, so we're trying to avoid adding a whole china cabinet-style thing here, or stacking something above the sideboard. That only leaves space on both sides (the small rolling open storage our instant pot lives on can definitely get moved out, especially if said cabinet solution offers some hidden storage for the water bottles and lunch boxes that live on the bottom shelves). The cat water fountain (yes, our cat only drinks from a fountain) could move to the other side of the sideboard, freeing up the corner on the left. And...that's pretty much it for space options.

So I've started exploring our options. As always, I started with IKEA and found I really liked this option, the BILLY/OXBERG:


Or the GODMORGON (I guess this technically is a bathroom cabinet but I think it could look good anywhere):

D is worried that these would look awkward right next to our sideboard, since the styles don't really match and the sideboard has elaborate scrolling and trim that wouldn't let us push this cabinet right up next to it. So he's thinking a corner cabinet might be better, so that we don't have to try to line them up together. Summon good old HEMNES:


This would take some work because we both agree we'd like a glass door to display the prettier bottles, along with maybe some lighting, like a much smaller version of this hack we found on the internet (if you haven't guess already this post is really just my "mood board" and an invitation for you to make suggestions):
I'm also not sure that the HEMNES could hold more than a few bottles, which makes it feel sort of pointless.

Then we departed from IKEA's choices to see what is out there. And oh boy things got expensive quickly. This cabinet, from a furniture company I've never heard of--Ballard Designs--immediately seemed like it was exactly what we wanted:

Over $1,000...great....Maybe I should get back to that $100 BILLY bookshelf and door.

Here's another random internet picture for what I think I want:
Now that we've seen it, D and I both think that a rounded front looks elegant and that having trim would help it blend more into the corner almost like it was part of the house (we've even talked about potentially painting something to match our walls so it looked more like a built-in).

We're not even close to a solution but I thought it would be fun to post this and see if anyone else has ideas. We need something that won't take up much room and offers some storage behind clear glass doors (because some of those bottles are really pretty) and some closed storage, but minimal open storage where things can get really dusty. It can't take up much space and ideally has to go next to the existing sideboard at the edge of our kitchen (either alongside it or caddy corner with it if it's a corner unit). If we can find the time, this is probably a good time to go antiquing...Leave a comment with your ideas (besides the obvious one to buy less liquor--we're too far gone for that one)!


Sunday, August 26, 2018

The Kitchen, Finally

Let's cut to the chase, since I made you wait a few weeks, before I show you some process pictures. The bottom line is that we LOVE LOVE LOVE our new kitchen. We did not, however, love the process. I was too frustrated to blog about the progress while it was going on, after the initial few days. Communication issues, scheduling delays, etc. But it's all done now and we couldn't be happier with the final outcome. So without further ado, kitchen money shots:


So to backtrack a bit from where we left off earlier this month, here are some installation pictures for the counters. They set the join between the two pieces just to the left of the sink, using giant clamps to hold it in place.

I wasn't thrilled with the join. I had suggested going to the right of the sink (which is usually under the drying rack or at least a little more hidden) or at the sink itself, but our installer preferred to do it away from spots that are constantly wet and I think also wanted smaller pieces to work with, though he didn't admit it. The two sides weren't entirely smooth and I could feel a little edge, which was very annoying when wiping things like, say, messy peanut butter, from the counter. He argued that up to 1/16'' was acceptable but agreed to come back and try to smooth it, especially since he had to even something else out as well, and I was much happier with the result the second time.
For paint color, we ended up with Halcyon Green, which if you look at the paint chart from the previous post, is in the second column from the right, second one down. We are thrilled with it - bold but also muted, decidedly cool-toned, and somewhere in between blue and green.
Here it is, with our old light fixture and old (now dreadful) olive-colored blinds. If you scroll back up, you'll note that D mostly won the light fixture contest from our mood board and we went with the Pottery Barn McCarthy 3-Light Pendant. Though I don't dislike it, the finger prints may quite possibly drive me crazy. Though I think back to the original light when we first moved in (the first one we replaced, our first foray into do-it-yourself), and I think of how far we've come.
When the kitchen job was finally done, we did the finishing touches, like swapping out the annoying corded olive roman shades with some beautiful cordless gray ones from Home Depot. I don't remember having such pretty options years ago when we settled for the last ones. Obviously cordless and affordable shades have made huge strides in 9 years. Who knew?
I may delve into some of the smaller details of our kitchen in future updates (the under-cabinet lighting deserves its own post, it is so awesome) but I'll leave it there for now. One more upgrade off the to-do list.

Friday, February 26, 2016

A mouse in the house

Shortly after Christmas, one of our cats escaped out the basement door. Not-so-coincidentally it was the same day this happened. In the commotion of dealing with the water and having the plumber over, the door was left open for a couple of hours. The snuggly kitty stayed in and the mouse-killing-always-trying-to-escape kitty left (we did get him back about a month later, fortunately).

Unfortunately, while he was away a mouse got in the house. I came down with the brave new toddler early on a work day. The snuggly kitty was acting very odd, hunkered down in front of the oven. With a heavy heart, I looked under the oven with a flashlight and .... yeah.


Obviously the mouse didn't get into the house from that area - otherwise he would have disappeared. Since we had one potentially effective cat in the house, I pulled the oven away from the wall. Snuggly kitty rushed in. 30 seconds of squeaking later he came out with the mouse! Then he jogged to the dining room table, released the mouse to play, and promptly lost it. Idiot.

But I did see where the mouse went - it bolted to the corner of the dining room where the baseboard heating pipes run. After waiting a few minutes, I stuck my face in the corner. It certainly had at least an inch of space and was quite drafty. The quick solution was to fill in the corner with steel wool and seal the entire length of the wall with expanding foam.

It doesn't look too good, but it's a bit less drafty and hopefully more mouse proof. I may try to razor off the excess foam in the future and see if it's paintable. If I could paint it black, it would be invisible.


Snuggly cat was disappointed with the solution, though.


Friday, January 28, 2011

Centerpiece Filler

Just before Christmas I got a pretty candle pillar from Pier 1 that made up the main piece of a really great holiday table arrangement:

But now with ornaments and evergreen out of season, I still want to use this piece in our dining room. The question is: what do I put in it?

Here it is, looking lonely next to my very limited selection of table runners:
Please, faithful blog readers, suggest some things to fill it with. One good suggestion from my friend was to fill it with water and cranberries. I think I will probably do that before guests come, but because it will spoil eventually, I don't want to waste it for just myself and D. Places like Target and Ikea sell some fillers, usually potpourri, tiny plastic fruit, or pretty little balls made out of natural fibers. But I would love to be able to showcase something I already own or can make with little effort. It seems silly to buy what is basically a dust-collecting pile of junk. I already own lots of junk!

So here are some things lying around the house that I've considered. I don't think they will work here, but maybe they will help you think of more things that haven't occurred to me yet:
  • Tiny balls of yarn (we think it might look cute in a living room arrangement but don't think it would look attractive in the dining room)
  • Skeleton keys (I have a collection, but I don't think they're the right shape to look good piled together in the jar)
  • Postcards (again, they can't really be put in there in a way that looks nice)
  • Paper currency from foreign countries (same problem as postcards)
  • Herbs from our garden (actually, just rosemary right now), but these will spoil over time, just like the cranberries

So please share your suggestions and help make my dining room table look less like a work-in-progress and more like a finished display.

Thursday, September 9, 2010

the house tour continued: dining room, kitchen, and hallway

Continuing along on our before-and-after tour, here's the dining room, as seen from the kitchen, right when we moved in. Basically, an ugly old ceiling lamp and an empty room:

And now the after. The kitchen/dining room area is the only area where we liked the previous owners' choice in paint color (which is a problem, actually, since I can't seem to find extra in the garage and there are some spots that could really use a touch-up). So instead we decided to tamper with the light fixtures and buy lots of pretty furniture. You can't see it in these picture, but we also hung some lovely Roman shades (but you can see them here).
Nothing really significant needs doing in the dining room. We are going to hang one pair of photos that needs special mat board but those will be on the wall to the left that you can't see from this angle anyway. The wine rack, as much as I love it, has to get hidden in the basement eventually, because we just read that wine needs a much more constant temperature than we keep our house, so we are basically ruining our wine. Down to the consistently cool basement it goes...

The next two pictures, taken this week, are both sort of "befores" because we haven't actually done anything to the rooms since we moved in. First, the kitchen, which was one of the reasons we fell in love with the house to begin with. Not much needs doing here. Maybe one day we will replace the cheap vinyl floor with something to match the level of the super nice cabinetry and appliances.

Next, as a lead-in to the guest room, office, and bathroom featured in the next post, here is the main floor hallway:
It's kinda awful. We like the white painted knotty pine and so are very reluctant to create any holes in the wall to hang pictures. We'd really like to find a way to hang them without hardware. Some sort of wire with clips, like this system (sold online as a curtain rod but also marketed in stores as a way to hang pictures). But that still requires us to screw the lines into the wall. So any suggestions on how to put up pictures without damaging the walls?

Second, we want to buy a really really skinny table for the far end of the hallway (the end with the red dust buster and the cat). Ikea, as usual, sells almost, but not quite, what we want:

It's skinny and thanks to the fact that it has no back legs, is mounted flush to the wall to make it even skinnier. But it's a little cheap and plasticky. So we want basically this, done well.

And finally a new floor runner is a must. You can't tell from the picture but this is actually two rugs overlapping and it's annoying looking and easy to trip on.

So the list:
  • Hang pictures, somehow (suggestions please!)
  • Find a skinny table
  • Find a new rug
Next time, we'll finish off the first floor.

Saturday, July 17, 2010

Another Trilogy

On this blog, I don't actually try to do things in threes, but it just seems to turn out that way, like here and here. And anyway, three is such a nice, neat little number. So today I have another triplet for you, this time, of companies that have gone out of their way to make us happy with our home-related products. Lately I've been amazed at how willing a store has been to stand by their product and offer us concessions when things have gone wrong. I think it's definitely worth clicking on the "contact us" link on a website and calling or emailing when something doesn't go right. You might not get anywhere, but then again, you might be surprised.

1. The first is a pet odor remover called Anti-Icky Poo that saved me a few years ago when one of our cats peed in my brand new car on the way to the vet. It has active bacteria and enzymes that eat away at the residue and actually remove the horrible horrible odor. Last October, one cat had an "accident" (at least that's what we're calling it, in the hopes that it wasn't deliberate) on our new blue rug. We applied Anti-Icky Poo--the same bottle we had kept for 4 years since the car incident. We thought it had worked but as our house started to warm up this spring, we started smelling pee again. So we removed the rug and the rug pad to the breeze-way and reapplied a large quantity of the stuff. It didn't work (we already knew from experience that standard stain/odor removers like Resolve don't do anything). Since Anti-Icky Poo contains living organisms, we figured that they had died and that the stuff was inactive, but we couldn't find an expiration date anywhere on the bottle. D called the company to ask and the woman explained that it was supposed to last for at least 5 years, and that since it had only been 4, they would take responsibility and send us a new bottle free of charge. Not only did they send us a new bottle, but they sent us a whole jug (the original, old stuff is on the left and the new one is on the right). Not bad, considering we spend $10 on this stuff 4 years ago. And even better--this time it actually worked!

2. The next success story is from Casabella, which makes a microfiber duster that we love. I accidentally snapped it in two when trying to shake out some of the water the first time I cleaned it. After sending a photo to Casabella, they sent us a new duster that was even better than the first, with an extension to reach above book shelves and clean lamps and ceiling fans!

3. Last is some impressive customer service from Crate and Barrel, after we noticed a deep split in our dining room table. We called the store we ordered it from (I think having ordered from a store instead of online gave us an edge, since we could talk to them instead of the random 1-800 people) and emailed them a photo of the crack. They agreed immediately to replace the table and scheduled delivery within the week. About a week later, we had a completely new table. I have no idea what would have happened if they did not stock the same model anymore, but hopefully we won't ever have to find out. The seams between the wood on our new table look a lot tighter than on the old one.


I'm really impressed that so many of these companies have been willing to stand by their products, even in a few cases (the cleaner and the duster) where it would have been easy to just tell us to suck it up and buy a new one. It cost us very little time and effort and we ended up with something that worked. Sometimes it's worth it to talk to someone and ask if there's anything they can do!

Sunday, June 27, 2010

Storage Three Ways

June has been a slow month for decorating and repairs, but we revamped three spaces (bedroom, office, and dining room) that I've wanted to show off. The looks are completely different but in the end, all rely on the same sort of shaping element of a storage unit beneath a large, statement piece on the wall.

I've posted pictures of my dresser before, but now we've finally hung the mirror. My very talented mom did the tile work herself. We've already had a ton of compliments on it! The stars (like all the stars scattered around our house) are made of paper with a CFL bulb inside. I've seen them all over the place at independent home decor stores. Oh, and the lamp is Ikea (you didn't think I could design a whole wall without some Ikea product in it, did you?):


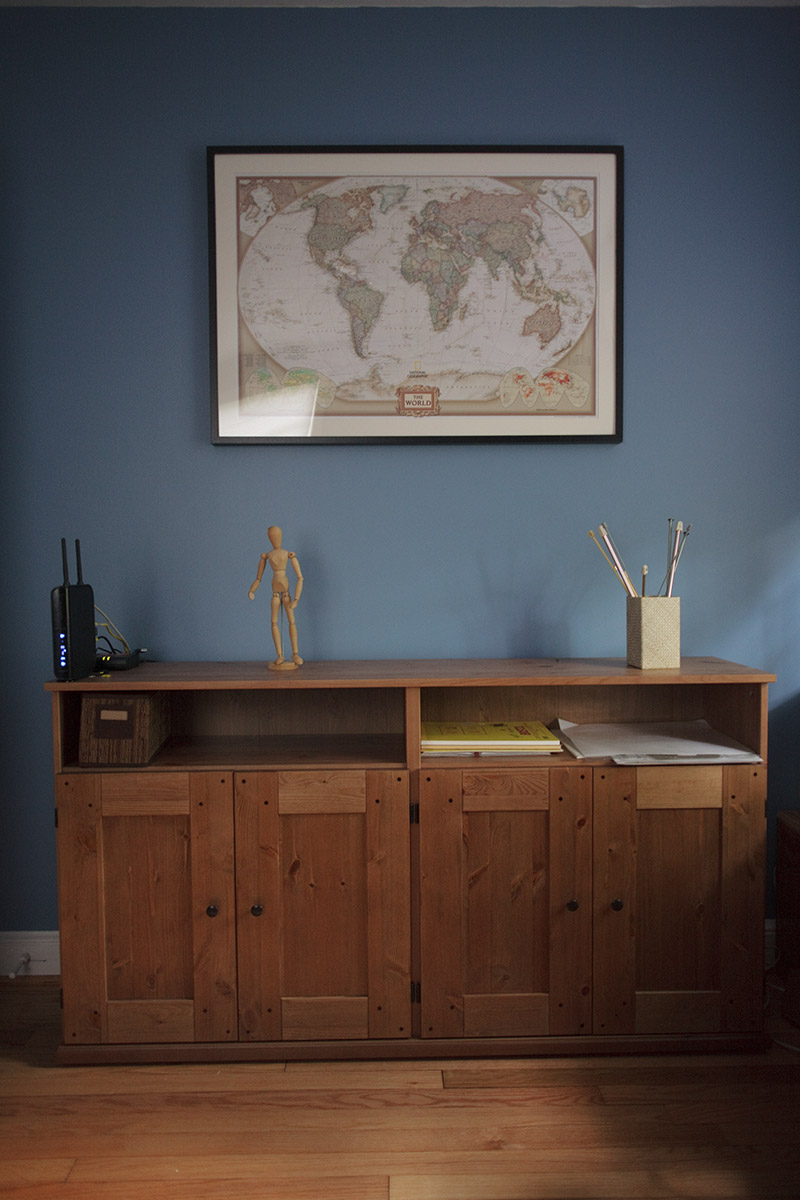
Design two is my super-amazing craft space in our office. You may remember from this post that I was planning to buy a cabinet with lots of cubbies. I stuck to the same Alve line by Ikea (yes, more Ikea) that I was originally considering, but what I ended up with is a lot larger and has a lot more space for my supplies. It was a much better value too, at $200 for a a 59-inch-wide wall's worth of storage compared to a petite 16-inch-wide set of drawers for $169. Drawers will always cost more than just a shelf and a couple of doors, and I really didn't need the drawers since my things are already sorted into Rubbermaid boxes. On the wall is my long-awaited world map--something I'd wanted since we lived in an apartment and didn't have enough wall space to hang one.
Lastly, our new sideboard, which is a Craigslist find by a local furniture dealer who refinishes things in lovely colors with distressed finishes. It was quite a splurge, just like the Ikea cabinets, but I think it works really well with the paint color and painting. A big plus for us was that it is very narrow--only 14 inches deep. We had limited space to work with and most sideboards were closer to 20 inches deep, which would make for a very crowded room. I also like that it is low enough to let me display my precious samovar. It looks a little lonely but I'm sure we will find other things to set out. The art is by this guy.

Sunday, November 29, 2009

A Warm House

I've been meaning to post a quick thank you to everyone who came to wish us well (or wished us well from afar) at our housewarming party a few weeks ago. Over 40 people stopped by and I think fun was had by all, so our inaugural house party was a success. Best of all, we did not run out of food (thank you, Costco, despite your daunting quantities). Here are some pictures, all of which we took before our guests arrived. I planned to snap a few at the party but was too busy having fun!

Thanks to D's aunt, who sent us a beautiful flower arrangement that arrived with perfect timing, our table looks complete.

The only ones not happy about the party? The cats. Can you spot them both? Our skittish one is that lump to the left of the gray one. He dove under the covers the second the doorbell rang.

Monday, November 23, 2009

Chandelier Hanging

Our house included a free, already installed chandelier in the dining room.


Unfortunately, we hated it.

So J got a second-hand chandelier for a nice discount and I promised to install it. I took down the old fixture, begun unraveling the electrical wires, and got a minor case of "electrocution". You really DO have to turn the power off. After tripping nearly all of the circuit breakers (poorly labeled box!), I turned off the power. I took it down, picked up the new fixture, and quickly realized I had a problem, as was chronicled by J on October 2nd.

I resolved (after re-installing the old chandelier) to worry about other things. Unfortunately for me J REALLY didn't like the fixture, so she began pushing me to get an electrician. Which I was 98% against since it SHOULD be easy.

Fortunately for us, my grandfather read the blog and (in short) told me it WAS easy and gave me some pointers. I was concerned because the box we had didn't have the corner screw holes to attach the cross-bar. My grandfather pointed out that these boxes are standard and the holes almost certainly hiding underneath the plaster. Yes, he was correct. The next problem was that the center nut/U-bolt system to hold the fixture up didn't fit together. A trip to Home Depot yielded an adapter to make them work together.

After some gentle tugging and twisting (we have old and crusty canvas-coated wires) we got it installed.


Our cat P immediately demonstrated his confidence in my fixture hanging.


It's been hanging for about a month now with no issues, so I'm calling this mini-project a success.

Next on the agenda are windows! We've still got the original windows, drafty and sans screens. I'm inclined to keep them warts and all since I hate getting rid of something that's lasted 60 years. We plan on getting some quotes for storm windows. That should help with the draft and screen issues.


Sunday, November 8, 2009

A Dining Room, at last

One and a half months after ordering our Basque dining room table, bench, and chairs at Crate and Barrel, they have arrived! We are very excited to welcome they into our home where they will be filling an almost-completely empty room. While waiting for them to arrive, we hung blinds (Roman shades, to be exact. I am slowly learning the vocabulary of window dressing.) and even successfully hung the lamp that caused us so much trouble last month (maybe D will write about that in a little more detail later), after getting more advice and doing more research. We're still working on table decor and other little details, and will eventually get a nice, bright-colored sideboard to contrast the sturdy lines of our table as well as a rug, but otherwise, the dining room is DONE!


Isn't that wine rack cool? A cheap find at a garage sale in our neighborhood. I think I'm going to like living here.

Incidentally, this is so far the only room we haven't had to paint. I love the soft brownish green the previous owners painted in here. We have yet to go through the old cans they left us in the garage--I hope we can find some of this color for some touch-ups.