Please share your opinions and expertise since we need all the help we can get!

Sunday, April 29, 2012

Grout, grout, let it all out!

I couldn't resist a reference to 80s music...

With the upstairs bathroom finished and (almost) spotless (we have a mysterious little black ding in our tub...), it was time to work on the main floor shower. It was grimy and moldy and it seemed like we had to scour it with bleach products almost weekly to keep up. Time for a regrout! And time for some more experienced people (mom and dad) to come help!

Not only did they agree to spend the weekend regrouting our shower, but they also came with their own supplies. Here we have buckets, grout, a latex mixer (we learned from the pros doing our upstairs bathroom that it's much better to use an additive than to use water to make the grout), some grout sponges and a float. Also unpictured are the rags and the grout brushes and razors we used to clean the shower out, and a drill bit that turns a drill into a giant mixer (to mix the grout). Once we had all the ingredients, we were ready to go...
The first step involved just cleaning out the shower and scrubbing each grout line. The lines were too close together to really remove the old stuff, so we only removed the parts that were loose or particularly resistant to cleaner. No before pictures--but I'm sure it doesn't take much imagination for you to imagine a shower with white tile and moldy brown grout.

I didn't get pictures of mixing the grout either, but it is basically exactly what it sounds like, blending the two ingredients in a giant bucket with a giant mixer attached to the end of the drill. I fired up the camera in time to get the real action--grouting itself.

It took practice and the three of us (mom, me, and D) all took turns, with mom coaching us through. We learned that it is worth the money to buy an expensive float, because it was made of a nice firm rubber instead of the cruddy cheap spongy ones. It's only a difference of spending, say, $2 vs. $5 and well worth it.
We finally mastered (ok, maybe not mastered) the diagonal motions and the need to keep the float at an angle to the wall to avoid suctioning it to the tiles. One of us grouted while the other rinsed the sponges used to remove the excess grout.
Finally, the wall was done--but messy.
We let it stay that way until the grout set a little, then cleaned the walls and floors up with a shammy cloth to get rid of the excess. Then we let it dry some more--mostly out of laziness than necessity. Now that we aren't using that bathroom, we didn't really feel the need to rush.

When we were ready to finish this project up for good, we got to work on sealing the grout, to make it resist mold. The grout sealer instructions read like instructions for properly applying mustard gas, so I was pretty intimidated. But D--much braver and apparently much more willing to kill brain cells--opened the window wide, took a deep breath and started spraying. We did two coats over a couple days.
In the end, here is the result--a spotless, white shower! Isn't it nice?! Now, granted, it is also mostly untested, since all our toiletries are upstairs and we aren't actually getting it wet regularly to see if it will resist mold. But it sure is pretty!
Stay tuned for one more post about our shower--we made one more improvement to it that I'll talk about next time.

Wednesday, April 25, 2012

Lilacs!

Another small gardening success (we take 'em when we can get 'em): lilacs!!!

These guys got moved last fall from the back yard where they were covered in ivy and other invasive weeds and got no sunlight. I barely knew they were lilacs, since each bush produced maybe one flower at most all season.

But here in the front we have dozens of flowers! They are amazing. And they smell amazing, right near the front door to see us off or greet us back.

The only problem is that now that they are actually blooming, I can see that we planted a white on the end and then all purples. I probably would have put the white in the middle if I had known. But I think rather than try to uproot them and move them again, it would be less stressful (for the lilacs and for us) to add another white on the left, so that it's white on both ends with purples in the middle. I haven't seen any lilac bushes for sale, so if you find one by mail order or know of someone locally, let me know.

Sunday, April 22, 2012

A little more lawn

Since we bought this place two and a half years ago, we've been slowly conquering some of our back yard from the ivy and ground cover gone wild. Especially now that the front yard looks halfway decent, we thought we should spend a little more time in the back.

Yesterday we took advantage of a beautiful day (and rain in the forecast) to clear away this mess from near our patio and plant some grass seed.
 Isn't it nasty? I'm not sure you can tell from this picture but some of the weeds were almost 4 feet high (and that after mowing it a couple times last fall).
With our feline overlord watching from the house (and meowing his displeasure occasionally), we got to work.
Fortunately nothing will ever seem quite so hard as liriope or English ivy and since this had none of the former and only a little of the latter, we made quick progress. Here's where we were after a little under two hours. Even though we don't like the stuff around the trees (mostly Japanese spurge with some ivy thrown in), we don't know what we eventually want to use as ground cover. So for now we kept a small ring of it around the tree to deal with later.
Fast forward another hour or so and we had the soil tilled and mixed with compost and grass seed down (and covered and watered).
Here's an overhead shot--it already looks so much better and the grass isn't even growing yet. I don't know why we didn't clear this area out sooner.
Of course nothing comes without a price. Apparently despite gardening gloves and generally good practices, D woke up to discover mild painful and itchy poison ivy this morning on his arms and legs. Thank goodness for Tecnu!

Wednesday, April 18, 2012

More fun with spray paint

I thought I'd cut right to the before and after pictures and then show you all the fun work that went on behind the scenes. A few weeks ago we did a mini-renovation of our main bathroom. You already saw one result that took very little effort and here's another. When we were done, I found myself wondering why we didn't do it sooner.

Here's the before picture (it's from a while ago, because I actually forgot to do a true before picture the day of the project). The tile and accents are, as you can see, bold black and white. And yet the vent fan was a dirty mustard yellow. It bothered me, and buying a new vent has been on my to-do list for a while.
It will probably come as no surprise to anyone who has owned an older home that when I checked the measurements of the ceiling box, I found they did not match anything I could find on the market.

Yay for the magic of spray paint!!! Here the vent is again, this time in a nice white:

It makes such a big difference, even though the plastic area for the light bulb is a little singed and brownish. Definitely blends in better with the ceiling.

Now for the work on parts of the vent that you can see--when we took the cover off, this was the dusty mess that awaited us.
But we didn't stop there (that was as far as I had gone a few years ago when I painted the ceiling). We pulled off the whole contraption. We did it for a few reasons: to clean it, to measure it and see if we could find a replacement (see above--no, we couldn't), and to find out if the vent actually went anyway. We suspected that it didn't, given the fact that the upstairs vent within 2 feet of the roof didn't lead anywhere either.
Lo and behold, we were unfortunately right. In fact, the wood jousts are arranged as to actually block the space and lead air AWAY from the soffit (we expected, if anything, for the vent to lead out the soffit since the back wall of the bathroom is an outer wall). Three sides are stopped up.

The good news is that the house is 60 years old and there was no sign of wood rot or mold. And since we don't plan to use that bathroom regularly anymore for showers, we decided that this venting problem could be safely ignored. Hope I don't eat my words in a few years!

Sunday, April 8, 2012

A Phlox on this House

This weekend we rid ourselves of the last vestiges of the overgrown front gardens we got with the house. This patch here, made up of what I discovered later is called Japanese Spurge, as well as some English Ivy and Creeping Myrtle, has mostly stayed put since we cleared the rest of the garden patch last fall, but it was still an eyesore. And the ivy kept creeping, as ivy does, up our oak tree, so keeping it off the trunk was a constant battle. But not any more...
 Fast forward about two hours and this is the new view:
It took longer than I expected, because even though the spurge came out fairly easily, it turned out that the overgrowth was home to dozens--if not hundreds--of baby oak trees. They were rooted deep and it took a lot of shoveling and pulling to get them out of the ground (I almost named this post something like Baby Killer but figured that might attract the wrong kind of readers).

Finally with everything cleared away, it was off to Home Depot for some new plants. Ever since a helpful reader identified the cute little flowers in this post, I knew that phlox was the way to go. It will spread but it doesn't root so deeply that I'll be back in the same boat in a few years with hours of wearying labor. Plus it's much lower to the ground than the spurge (if ground cover is so high that small things like tennis balls can get lost in there, then they're too high). And it flowers, so it's even colorful for a few weeks of the year.

I also tried an experiment and bought some German thyme for around the tree, because it's also a nice low-lying plant. Here's what they looked like all spaced out and ready for planting--3 pots of thyme and 8 of phox. I have some pink and some purple phlox, so I tried to space them out so they'll blend together as they eventually speed out. The recommended spacing is 20'' in between to give them room to grow outwards. Hope they spread quickly...
One hour more and ta-dah! planted and mulched. I split the thyme plants into 3 so that there are 9 ringing the tree.
A particularly funny moment occurred at Home Depot when I noticed one rack in the garden center selling ground cover plants: English Ivy, Creeping Myrtle, and Japanese Spurge (that's how I learned what it was called). You mean people buy this stuff?!!!
I also came home with this pretty new addition:
I WILL have my climbing vine, I tell you. The first year, I tried jasmine. Last year, I tried sweet pea seeds followed by clematis. This year, I'm back to clematis. I thought that with the liriope finally gone and after our hard work with compost and soil conditioning, this poor little guy might actually stand a chance, unlike the last few attempts. Keep your fingers crossed!

Monday, April 2, 2012

An amazingly simply solution!

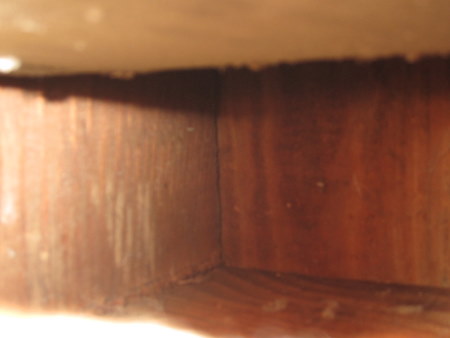
This is what a corner in our downstairs bathroom looks like:
We searched for a replacement but the weird corner angle was nowhere to be found. So my next method of coping was pretty much just to ignore it. Fast forward several years.

While I had forgotten the whole thing, the cracked tile continued to bother my very crafty mom and she finally came up with a do-it-yourself solution to fix the problem. The first step was to remove all the old tile (without cracking the neighboring tiles...). We proceeded carefully with a chisel, a razor, and a flat-head screwdriver. After a few minutes of careful cracking, we got all the pieces out:
We chisel right to the trim, because the tiny sliver of tile on the right wasn't in great shape either.
Next (and this is the really genius part), we mixed Plaster of Paris to a thick but pliable consistency and I got to work as sculptor on this masterpiece you see below. It wasn't as hard as I thought it would be to  slap the plaster up and shape it more or less in the shape of the missing tile.
The instructions said it would only take 20-40 minutes to dry and could then be sanded, but I don't think they accounted for the amount we used. It definitely wasn't dry after an hour and was still cool and slightly pliable the next day. When I tried to sand it, the layer immediately under the surface was still damp. So I waited a week before attempting the next step.

After the week, I did my best to sand the "tile" smooth. I also used the screwdriver and razor to clean up the edges and recreate "grout lines" where the plaster got onto its neighboring tiles. After the lines looked straight and clean (and after wiping off the plaster dust), I got to work on the paint. Mom suggested spray paint because it is so opaque and durable, which seemed like a good idea. I didn't think we'd want to try anything like a washable acrylic.

I taped the edges but definitely didn't want to spray the paint on directly, so I sprayed into a cup and used a paint brush to apply. The first coat went well.
The second coat? Well, not so much. Here's a little reenactment of what happened:

--Put on gloves, pick up red cup, shake spray can and begin spraying into cup with my head turned away to minimize inhalation and fumes in my eyes. Glance down to see spray paint dripping everywhere onto the floor. SCREAM!!!! Keep screaming, mostly incoherently, but with words enough to summon D and get his help to put the cup into a trash bag. Start scrubbing the floor with the nearest rag in attempt to remove spray paint, to no avail. Imagine that instead of one missing wall tile I would have to retile our e entire floor, all the while continuing to scream and while running into the kitchen for additional cleaning supplies. Grab dobie pad and baking soda, then, in a moment of clarity, grab Magic Eraser (D is still frantically scrubbing with a rag). Scrub Magic Eraser on floor with near-supersonic speeds. Take deep breath and black starts to fade. After a little more elbow grease, the spray paint on the floor is totally "erased."--

Thank goodness for Mr. Clean. Also, apparently, spray paint eats through plastic cups...There's no picture of all this because of the panic that ensued. But after what was probably only 60 seconds of horror, we were back to where we were with one coat of paint and ready for second coat. With a new cup (two stacked together actually), I started on round two. Then I pulled off the painters tape, got out the screwdriver again to etch back in a smoother "grout" line" and here is the result:
I waited a few days and then decided to try and match the shine of the surrounding tile with this product, Triple Thick Gloss Glaze:
 Here's how it looked after a couple coats:
I think it's a better match glossy. The only problem is that now that it's reflective, you can tell that the surface isn't that smooth. See? Here's the wavy effect exaggerated by the camera flash:
But in the end, it was an incredibly cheap and effective solution to the ugly cracked corner. And even though it sounds like a long process, it really didn't take much time at all. t can't believe it took us two and a half years to figure it out.