Please share your opinions and expertise since we need all the help we can get!

Monday, June 25, 2012

Gray Glaze

Fortunately the red table spray paint mess didn't mean I'd lost my touch completely on refinishing furniture. I forgot to take a "before" picture of this table from a distance, but just imagine a honey pine, boring old end table with a drawer. We got it right when bought our house, when I was trying to fill the space with whatever cheap craigslist furniture I could find. The shape and size suited us for our corner table, but the color was boring, so I always knew it was destined for something more.

First, I filled in the scrapes with wood filler. This was my first try with wood filler on furniture and I must say I need practice. The scratches got shallower but are still evident on the finished piece. I'll do a better job next time of putting in extra and then sanding it flat.

No spray paint this time, just a quick brush coat of Kilz Clean Start primer:
Then two coats of Sherwin William's Blue Mosque. Bonus points to anyone who knows where this paint came from. Anyone? OK, well I'll just tell you and save you the suspense: it was the first color we tried in our bathroom back in 2009. You can find the post here. Turns out it was too bright for a bathroom but the perfect turquoise for an accent table in our living room, almost 3 years later.
This project was more than just an ordinary paint one. I wanted to branch out into special effect glazing. I already had the Martha Stewart Painting Tool Kit and decided I wanted to try herringbone texture.


To start, I used 2'' tape to make even strips across the top surface.
Then I removed every other strip--instant stripes! I did this on the drawer as well.
I mixed the glaze with Sherwin Williams Peppercorn paint (the same color I used on this). The ratios is 4 parts glaze to 1 part paint. For some reason, I lost all concept of how much glaze I would need on the project, and mixed a whole jar full. I used probably about a quarter cup, so I have a lot of extra.
I applied the paint one row at a time and used the herringbone tool (the bottom-most right one in the kit above) to make lots of angled stripes. The glaze is basically thick and slow-drying paint, so I could manipulate it and wipe it away as much as needed for about 10-15 minutes.

When that side was totally dry, I switched which row had tape and then applied the glaze angled in the other direction (so that it would make the "v" of a herringbone pattern). These pictures show the difference between the wet and dry glaze:

I didn't bother to show you the part where I coated it with polycrylic. For that, I did use spray--it's much faster than applying with a brush or a sponge. I did three or four really thin coats to seal the paint and (hopefully) prevent chipping.

Here it is, all done! I hope to find a quirky drawer nob, but until I do, I just painted the old one gray. You can see from the varying thickness of the gray on the surface that the glaze isn't as even as maybe it should be. But I kinda like it--gives it character and creates almost an optical illusion look.

I was surprised by how little effort this cool effect took. I would definitely do it again. It definitely has more character now than it did before.

Monday, June 18, 2012

Things that go growl in the night

Here's a tale of two hopefully not unrelated episodes--

The first is that every once in a while, usually in the evening, I have been hearing scurrying behind our kitchen cabinets. I know I'm not imagining it, because the cats also seem to respond to the noise, looking around curiously like they know something is there, but they're not quite sure exactly where or how to get at it.

The sounds was coming from this set of cabinets:
This is an exterior wall, so when I couldn't find any kind of mouse/rat/bird/bat/crazy big insect activity coming from inside the cabinets, we checked the gutters on the other side of the brick, but also saw nothing. We did a quick inspection for any holes nearby, but besides the microwave vent, which is tiny and louvered, nothing is an obvious entrance. We never did figure out what's going on behind there...

But then a couple of nights ago, we woke up to the sound of one of our cats yowling and growling (yes, growling--it was a spooky sound coming out of a cat). He would come in and growl at me in the bedroom and then when I tried to see what was the matter, he would run to the stairs. I wanted to ignore him, since it was 5am, but the sound actually made me scared we had some emergency health issue. D finally went to investigate and let the cat lead him downstairs. Then I heard him shout, so of course by then my adrenaline was racing and I went down too.

A mouse, very dead and partially devoured, was stuck in kitty's teeth. As we ran for paper towels, gloves, etc, I obviously was too busy to get a picture. But let's pretend it was something like this:
Because seriously the real picture would be much much more disturbing.

D pulled it out of the cat's mouth finally (after a brief moment where it looked like the cat was going to try to swallow it whole and had just its behind and tail hanging out and I had visions of how we might have to do the kitty Heimlich) and threw it outside in the garbage.

Since then, I haven't heard any noises. Now I'm not saying the two incidents are related, but it sure would be nice to have that loose end tied up.

(Even if the sound I was hearing was that mouse and it is now in mousy heaven, that still doesn't really solve the question of how it got in to begin with. But I'm trying not to think of that right now.)

Sunday, June 10, 2012

Refinish Fail

I really wanted to wait to post this project until it was done. But if I did that, at this rate I might never post again. So here goes--you get all the sad details about how hard we are working to transform this table into our new coffee table.

It all started when my friend bought a house complete with furniture, since the previous owners were retiring to Florida and didn't want their things. One of the pieces was a coffee table that they handed over to us. It was the perfect shape and size (no drawers, but hey, can't complain about free furniture).
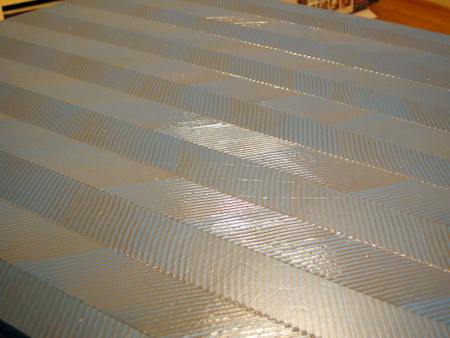
 Not so much the perfect color or design. Check out those flowers and that awful golden beige.

Obviously we were going to have to refinish it. My first plan was to paint the legs brick red and strip the surface down to bare wood. First interesting set-back (and probably the root of all the other set-backs): I sanded and sanded and sanded but never got to wood. I got through the paint to white primer and then just reached more beige. It turned out that the top was some kind of artificial fiberboard. By the time I figured it out, I was left with a top surface sanded to varying depths--some exposed fiberboard, some primer, and some spots that were just scuffed up. I figured that would be sufficient for the primer.

I decided that for this project, I would try spray paint. It sounded more durable, which is important for a coffee table where we put our feet, our dinners, our late-night snacks, etc. It also sounded faster, with quick dry times.

First, I put on the primer--heavy-duty Zinsser Primer/Sealer to try to even out the different finishes of the surface. After two coats, it looked ready for the next step.
We used Rustoleum in Claret Wine. We noticed it was spraying unevenly, but figured that was just the first coat:
Coats two and three removed the white but still didn't look even.

We finally decided to try to disguise the uneven finish on the top (the legs came out just fine). I used gray stain and some sand paper to distress it. I liked the way it looked overall but was still unhappy with the top, which continued to look uneven:
Fast forward two weeks. I tried to get used to it but still didn't like it. So I decided to redo the top, sanding it lightly to rough it up and then taping it off from the rest, because I liked the way the legs came out.
 This time we propped it up to see if spray at that angle would help:
OK, primer looked okay...This time we tried Kilz oil-based primer.
 Redid the red. One coat, then two. Verdict: Still uneven!!!
Back to the drawing board, I guess. Our plan now is to try to paint brush on a primer, so we can get a thicker application. I can definitely conclude that spray paint is not faster, though I don't know if I can judge from this one project alone. It certainly seems durable--if only I could make it look nice! If you have any suggestions, please send them my way.