Please share your opinions and expertise since we need all the help we can get!

Wednesday, July 21, 2021

Bunnies!

With a title like that, this post could really go in a couple different directions. So I'll warn you now, rather than get your hopes up, that this post is not about how adorable these fluffy little angels are. Oh no. These evil jerks, after being allowed to nibble clover in our "pollinator lawn," have gone full Peter Rabbit and are destroying my garden and even some tree saplings. This family is out to get us and clearly does not feel threatened by our sad attempts to chase them away. Let's look at some of the damage and how we are (ineffectively) combating it.

This year's garden started out well in the spring:

We got some beautiful Royal Purple radishes that I will most definitely plant again. It was a bumper crop, coming up just as the snap peas were starting to flower.
And then, suddenly, we started noticing the tops of some radishes getting chewed. Which was weird because we have a fence. Then the radishes themselves. And then, horror of horrors, the bottoms of some of our snap pea plants got snipped right at the base! We were puzzled until one day when I stepped outside and saw the cutest baby bunny. IN OUR GARDEN. It was small enough to hop through our fence (as I watched when it saw me) and had been feasting in there on our greens!
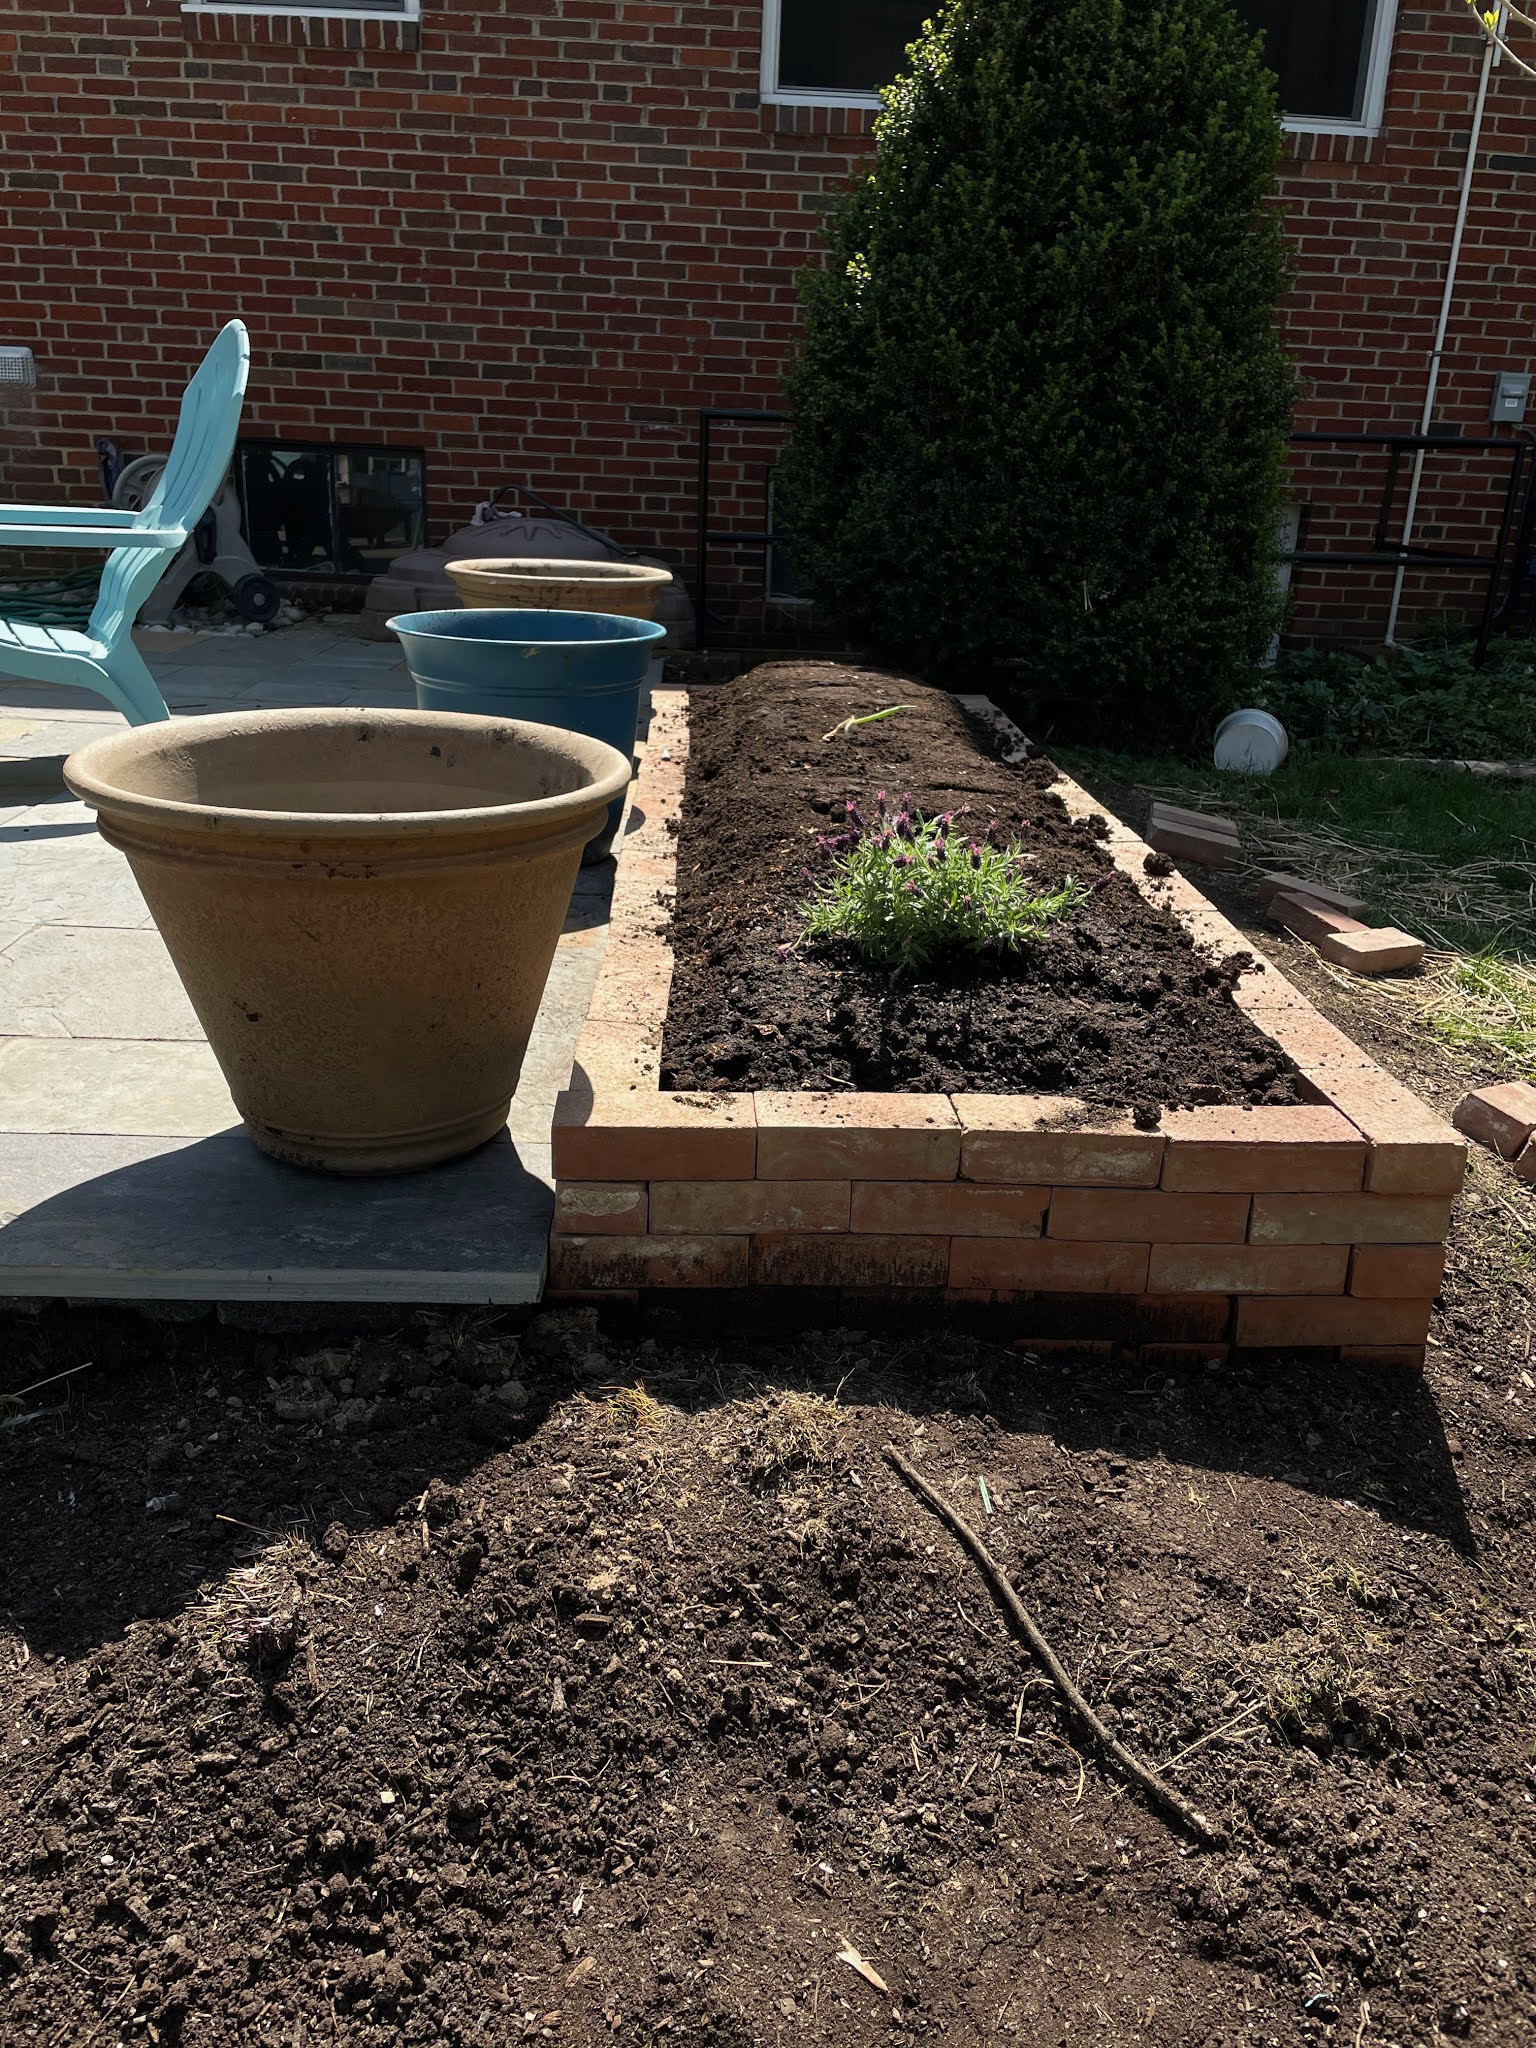
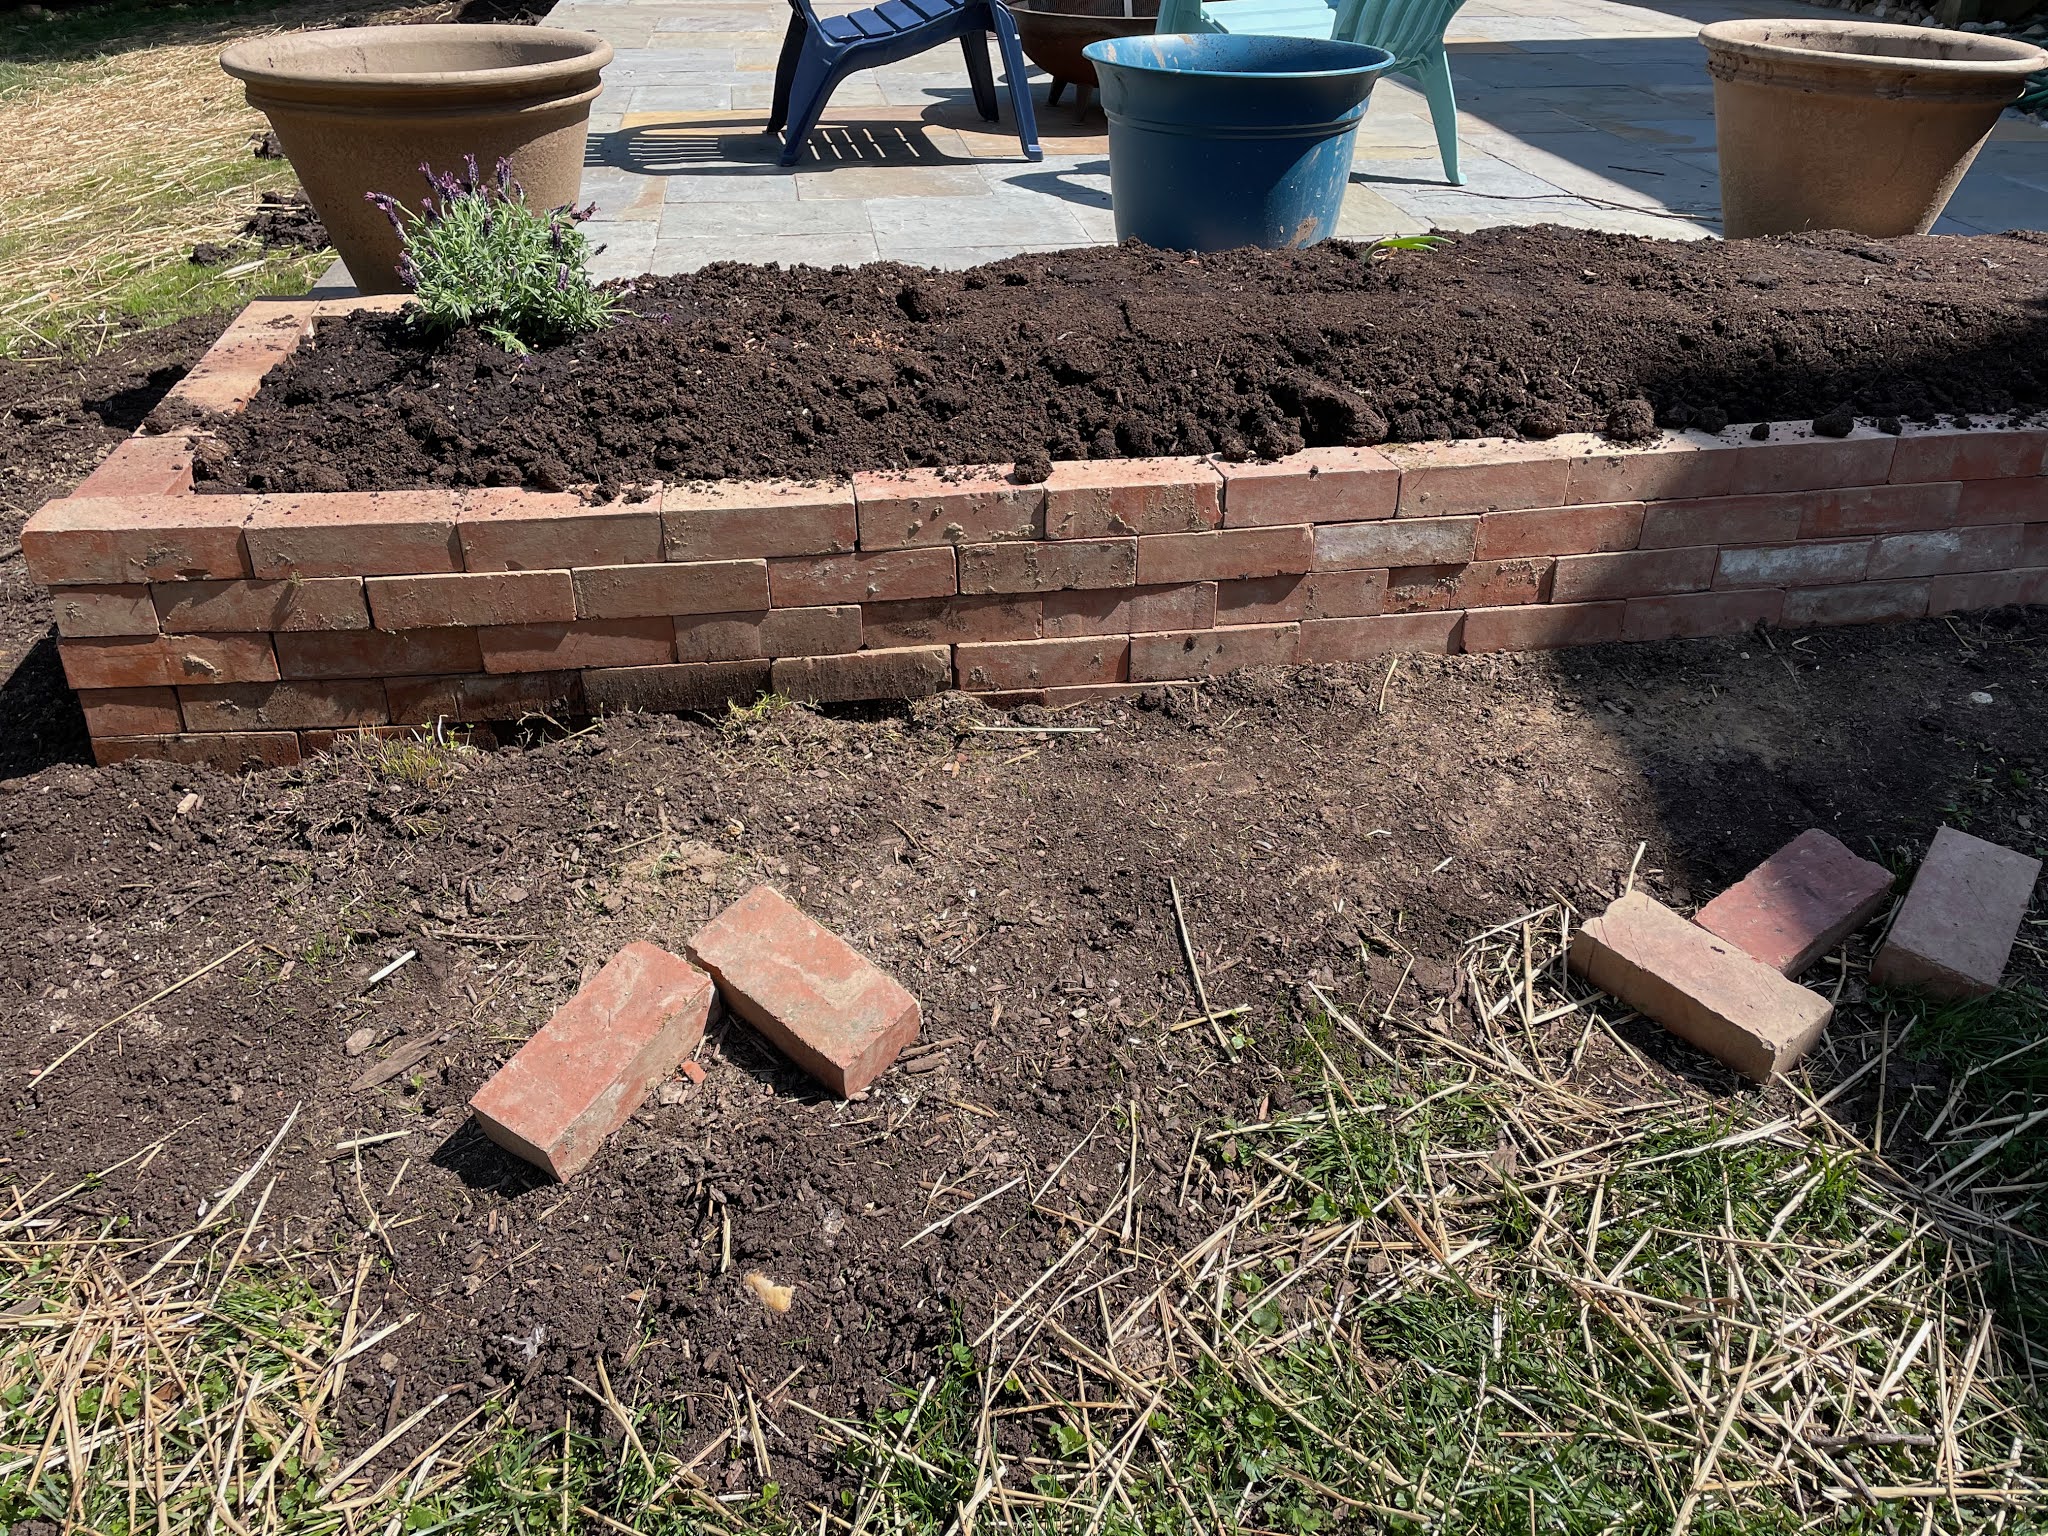
We cleared the dead snap peas and I planted some pumpkins in their place (the dark circle at the front of the garden). After a trip to Home Depot, we were ready to turn our garden into Fort Knox for bunnies. No one gets in here. 
Or so we thought. Until the following week when we saw a very tiny bunny INSIDE the wire-coated garden. And almost all our snap peas murdered. (You can't really see it in this picture, but almost everything tall in this picture is actually no longer attached to their roots.)

We have no idea if someone left the door open the tiniest bit or if the bunny was able to slip under or between wires. However it got in, the bunny was so scared that it had a lot of trouble escaping as I approached, and I did have a pang of sympathy watching it panic as I tried to flush it from the garden. I'm not actually heartless. But all those snap peas ruined! 

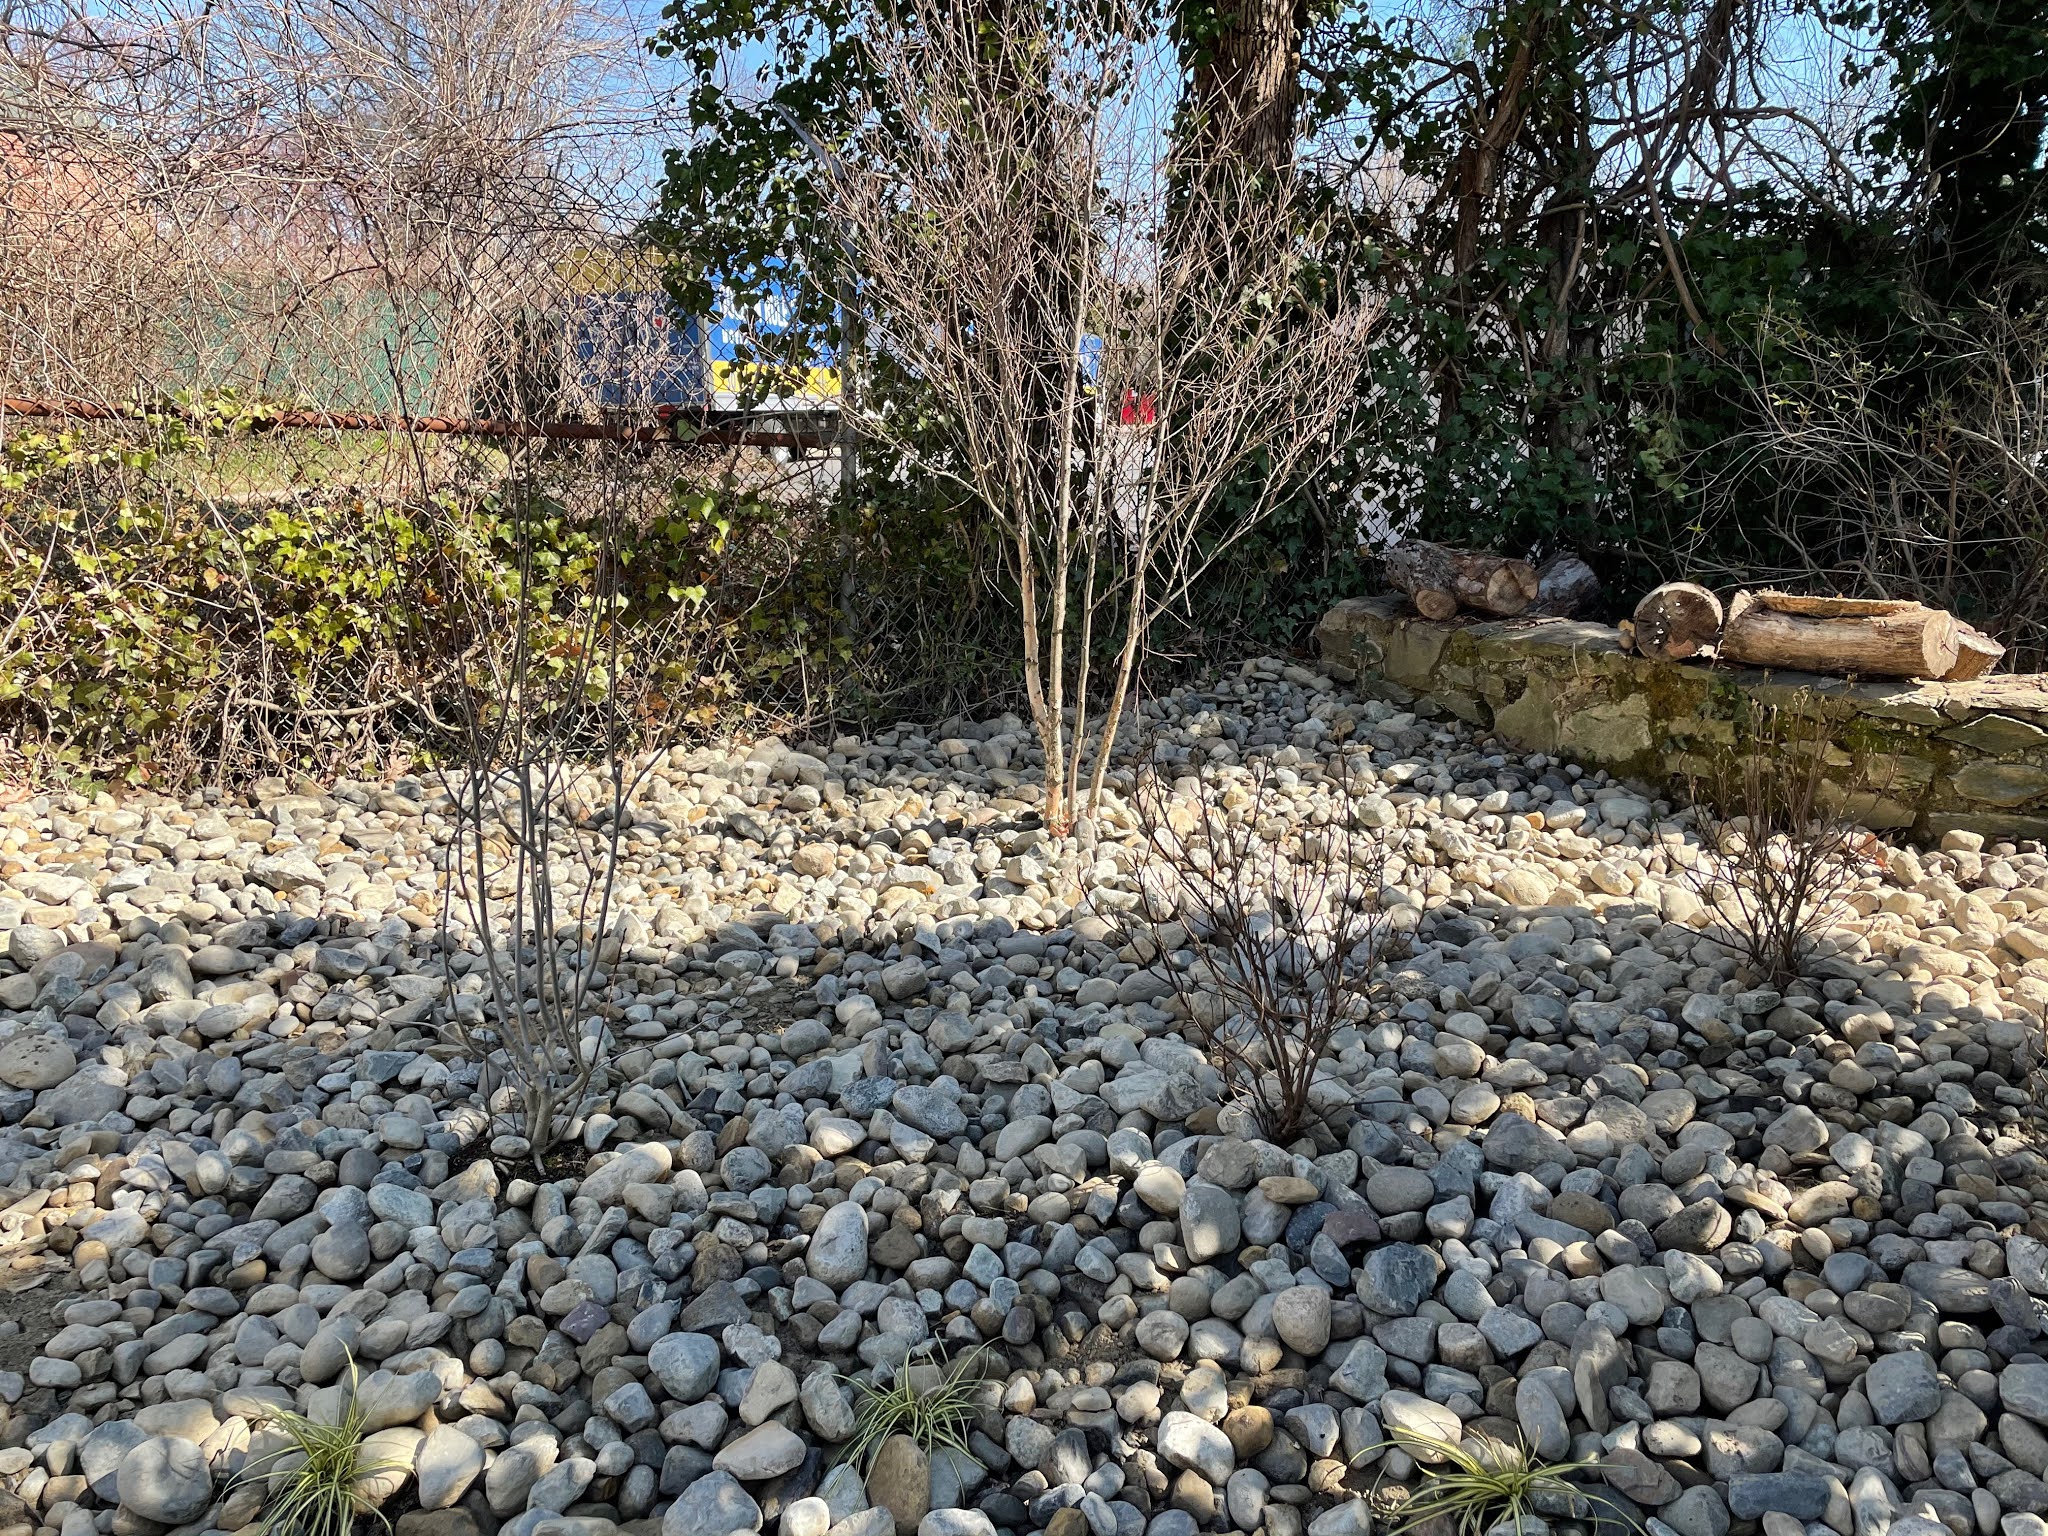
Another victim, beginning last year, seems to be our Black-eyed Susans, which have stopped coming up in our front garden and seem to keep being snipped. We thought it was a deer but I've since become convinced that this is also the fault of bunnies:

The few that are coming up are buried in other plants, so our thinking is that those are more protected from bunny predators:

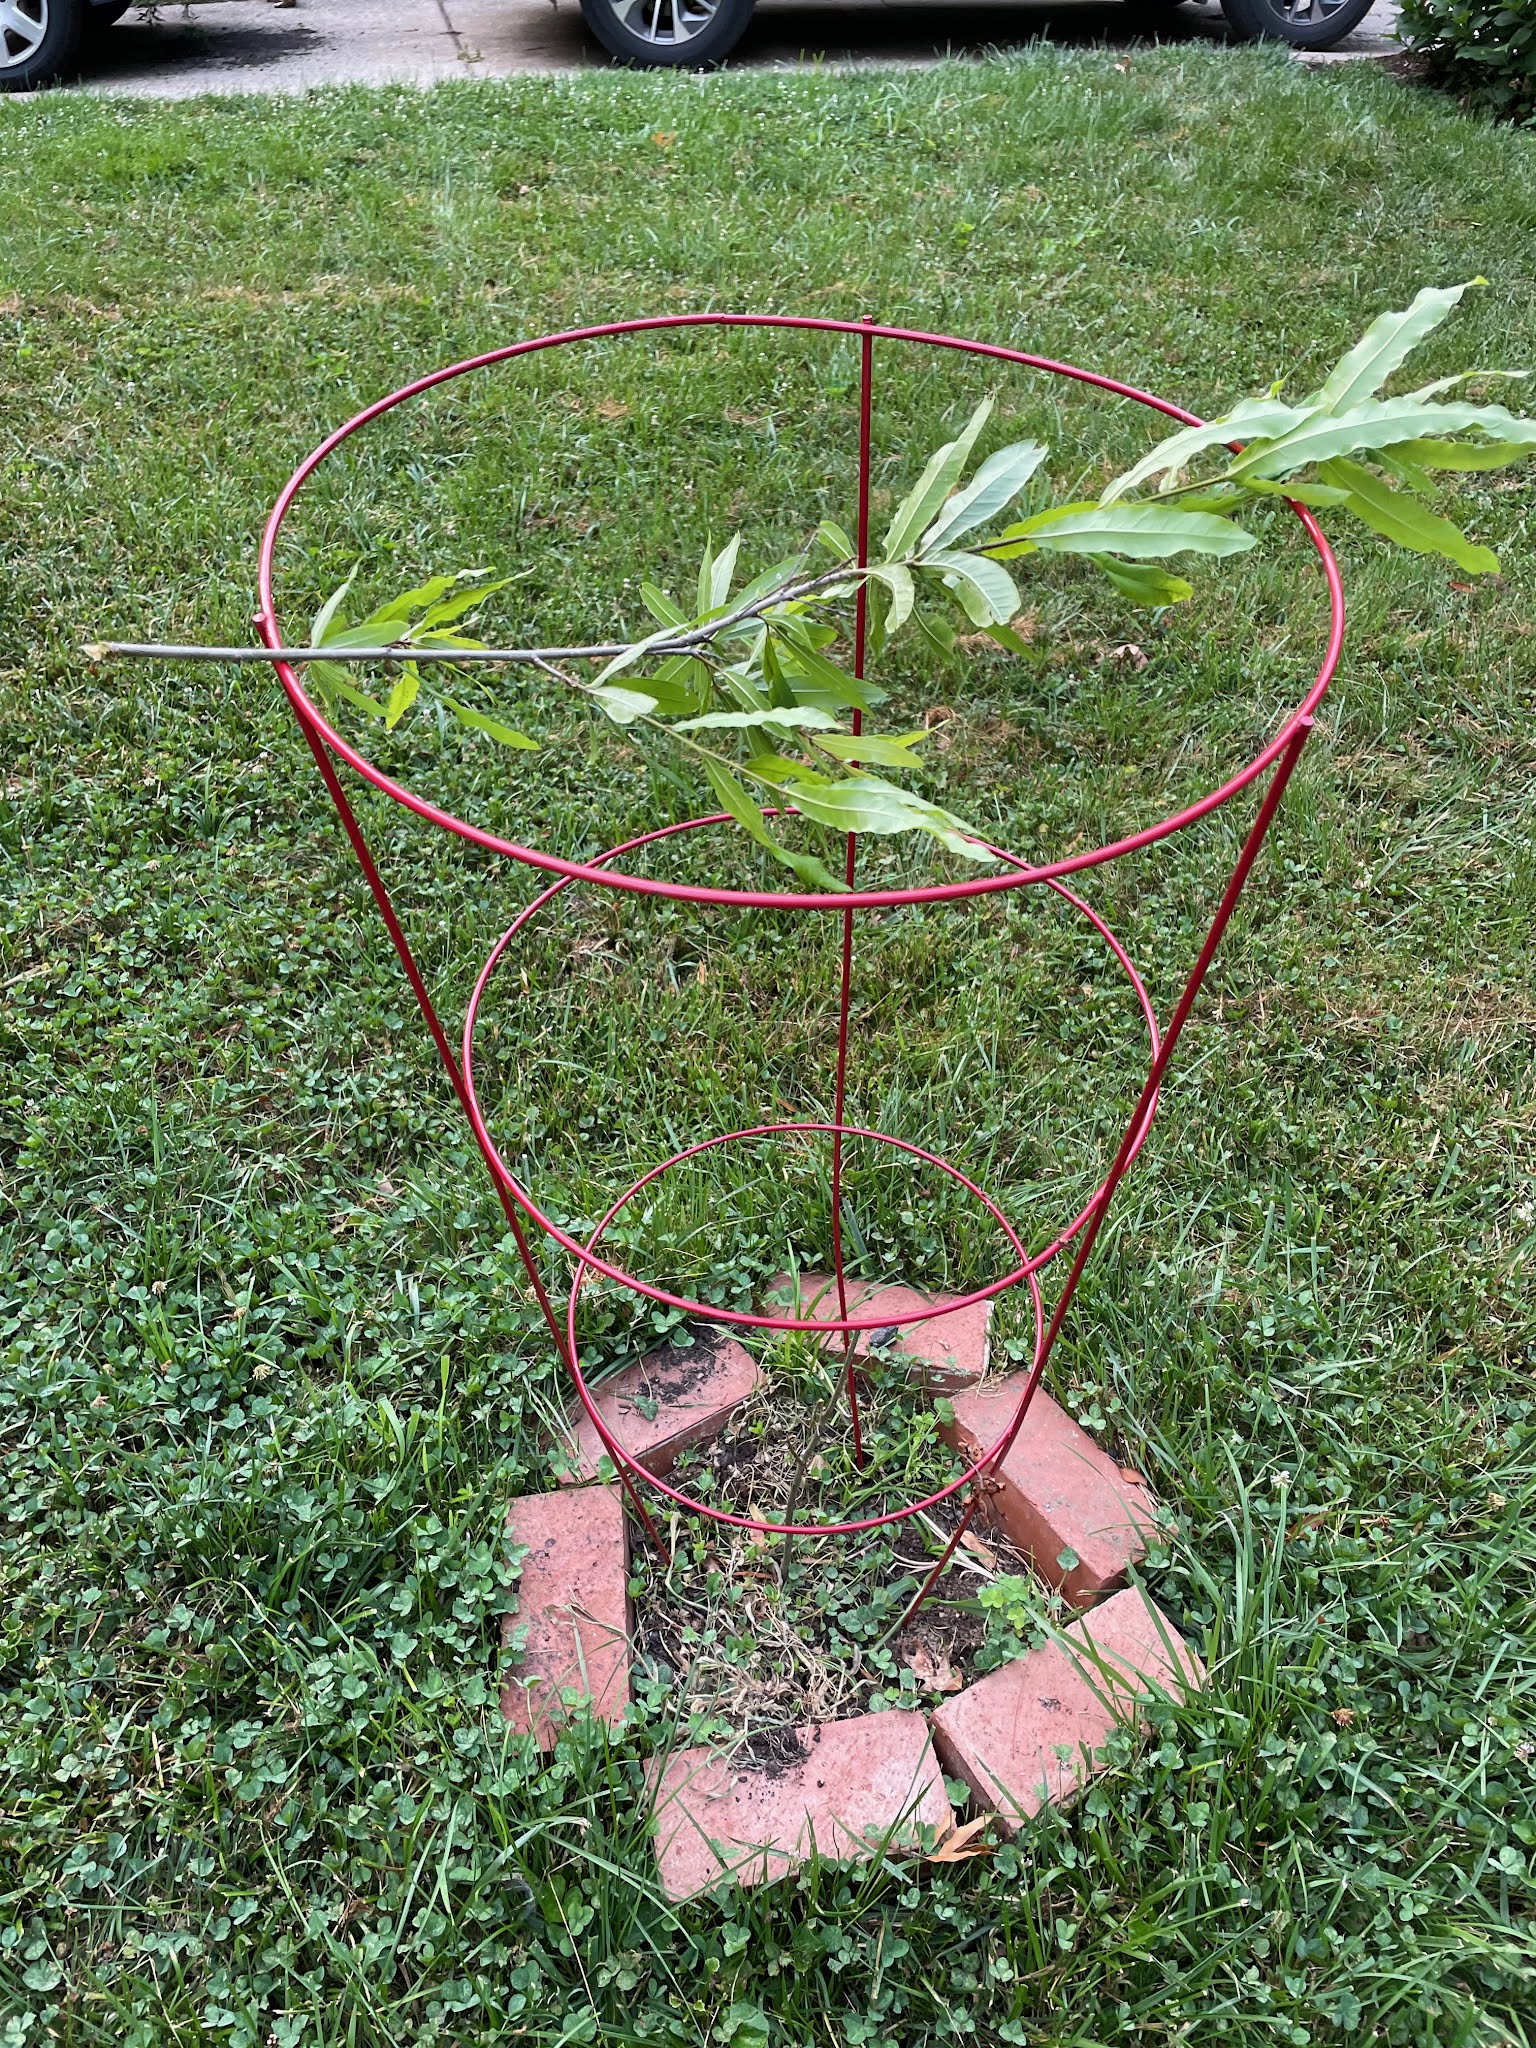
And the latest victim, from earlier this week, of this willow oak that we planted in April. It went from being a stick to a hearty, leafy little tree. We were excited that it was thriving and that we might end up, one day, with a giant oak tree in the middle of our yard. Here it is in April, a little twig:

And in July, just a few mornings ago, when I walked out of my house, I saw it leaning on the tomato cage we'd installed around it to discourage animals (and make it easier not to mow over). Here it is, propped on the cage. See how happy it was? As if to rub salt in the wound, the bunny who almost certainly committed the crime was right there nibbling, inches away. So if nothing else, it proved that the bunnies are to blame.

And despite all this, we can't resist follow the ins and outs of the bunny family, which numbers at least four members, but likely more, including an adorable baby (probably a second litter? since the one that got into our garden over a month ago is probably bigger by now)

One of the adults, up close:
This is not our house but it is nearby and where I managed to grab a picture of baby bun:

So what do we do? Generally I'm fine with yard wildlife but they really do seem to be decimating everything we plant. A quick search online suggests things like bone meal and black pepper. I'm curious if anyone has experience with something that works.


Saturday, June 12, 2021

Gazebo Glory

To continue from last week's post about our gazebo, I thought I'd go past the rest of the building part, which meant fitting the dozens of panels into the roof frame and cupola frame and bolting them in--because really what else is there to say about that--and talk about how we anchored and decorated it.

Because this gazebo has a vented cupola, it has an escape valve for windy weather and is at less risk of blowing away. Of course that doesn't mean we should trust it to fate. We decided to bolt one pair of legs to concrete blocks that we dug into the ground and anchor the two that sat on the patio with heavy flower pots. So step one: dig a hole (actually, step one was to shopping for the supplies was step one). We bought and glued together two concrete retaining wall blocks for this leg. At 22.4 lb. each, that seemed like a good additional amount of weight. The other leg only has one block because we hit a tree root and didn't want to damage it. It still seemed pretty good. Getting it level to the patio took some time, and we did not bolt the leg to it right away, to give us a chance to adjust if everything settled. To actually bolt the leg to the block, D used a hammer drill, which was a new one for us. It hammers the bolt in while turning, and is for exactly this kind of very strong material.

Then it was time to deal with the other legs, that would sit on the patio. For these, we bought 12'' x 12'' pavers and shopped around for thin, tall, heavy flower pots. That turned out to be a challenge, because most people prefer light, easy-to-maneuver flower pots. Or super expensive flower pots. We ended up deciding on ones made from recycled tires--less environmental impact AND heavier than resin and plastic.

Then we put some bricks at the bottom, for good measure, loaded it up with dirt, and found some pretty flowers to plant: cat's meow, petunias, and vinca vines.
I also added what I thought was a nice touch with some decorative pebbles in whites and sea-glass blues. We love seeing the bees enjoy our new flowers too.
Pollinator friendly!


Next up was getting some electricity and mood lighting into the gazebo. After thinking of all sorts of complicated ways we could try to run an electric under the ground in PVC pipe (and then reading lots of warning about why you should never do that with cheap, non-professional wiring), we decided for the most obvious route--above our heads.
After reading a bunch of string light reviews and learning that pretty much every option will fill with water eventually (and therefore stop stressing about finding the perfect solution), I decided on bulbs filled with little fairy lights. Instead of a single lightbulb inside each bulb, they contain a strand of lights. We strung them up along the cord leading into the gazebo and all around the ceiling. We love them!

Then after obsessing over trying to find the perfect light to hang from the hook in the center of the gazebo (long-time readers might remember that I LOVE fancy lighting from here, here and here), we found what we decided was an even better solution: a fan! It plugs in, which is perfect, since obviously we don't have an electrical box out there. At the time we purchased it, it was the only option. A second decent-looking choice has since come back into stock that might be a little better, but now we've already committed. The fan has been great at helping to cool us off and to help keep bugs away from us and our food when we're dining al fresco.

And with that, we are done! We love sitting outside in day or night. 


Ta-dah!

Saturday, June 5, 2021

We Built a Thing

I mentioned back when we had the patio installed that we had "plans" for it. One was the herb garden we built along one end. The other is the real masterpiece--a gazebo! I'll cover our progress over a few posts but, cut to the chase, it's done and we LOVE it. Let me tell you about it.

The purpose of the gazebo was to find a relatively cheap way to create a sort of screened-in porch. Because the back of our house has the slope of a cape cod and no back porch, there really was no realistic way to add on a porch without making major structural changes. We liked the idea of our brick (and now stone) patio but hate how the bugs feast on us all spring and summer (and fall). We liked the metal ones, usually made from aluminum, since they don't need treating the way a wood gazebo does, and opted for one with mosquito net curtains--they're not particularly stylish but they'll hopefully help do the job. 

We were torn on size between 10x10 and 10x12, but when the color we liked only came in 10x10, our decision was made. The purchase: Sojag Messina Sun Shelter in "champagne." The darker brown that seems to come more standard and is featured on the manufacturer's product page was nice, but we thought that the lighter color might keep the inside from heating up--a fear we had with the metal roof. It is probably true, now that it's all installed, that the extra two feet of the 10x12 would have fit just fine and been helpful, but oh well. Soooooo many parts.

And so, the construction began. This time, no professional crew, just two adults and some child labor. It became quickly evident that building the initial square was going to be a problem--holding the parts upright and attaching them and praying they didn't fall over and twist irreparably was...nearly impossible. Thank goodness we had helpers:
Soon, thanks to those helpers and a cordless drill with a hex set, at least the basic frame was upright.

Then the kids were sent off to play while D and I got the roof in place. We really liked the cupola design on this one--it should also make it a little less likely to get picked up by strong winds (but, as I'll discuss later, we're aren't just relying on this design element for that).

That took us until about the end of the day. "Good progress," we thought. Until we realized how many parts the roof panels came in. So many more parts and so many more bolts. But I'll save that for next time.

Friday, May 28, 2021

Herb Garden

Once the patio was built by professionals, our real work began. We took on two fairly large projects to help turn our patio into what we wanted. The first was building a raised herb garden on one side. We used lots of bricks we'd saved from our old patio and started stacking. D resisted using adhesive except at some of the corners, just in case we decided we didn't like the outcome. But the weight of the soil on both sides and the patio itself seem to be holding it in place for now. Because our yard has a slope, we built the bed up 5 bricks high on the low side and X on the highest side. We decided that higher than that would definitely require gluing the bricks in place.


We hauled in a lot of compost to help build up the sides and also to fill the garden and swapped out bricks that had too much visible mortar on the exposed sides, to make the whole thing look neat.

We planted a bunch of herbs, moved the big pots nearby, and called it a day (weekend, multiple weekend).
Stuff started popping up pretty quickly, but I'd gotten a late start on planting when I realized that many of the herbs said to start indoors in February, so I also cheated and bought some baby plants.
We moved a very sad looking, leggy rosemary from the front yard and bought thyme, sage, oregano, lavender, and dill plants, plus an additionally happy looking rosemary. We planted cilantro and borage (it sounded cool and has pretty blue flowers) directly from seeds. We planted kale in the pots and had various mint varieties growing in two other pots already. We have basil (Thai and Italian) also, but that's been planted among the tomatoes in our vegetable garden.
My awesome friend made me these beautiful markers that go with the blue furniture we seem to be acquiring (more on that later).
Here's the whole scene, freshly watered, back in April when we finished it.
Fast forward a month and everything still looks healthy and green (except the kale - that never seems to grow well for us). We rearranged our flower pots to tuck our giant shade umbrella in the middle, but otherwise have been very happy with how this garden has turned out. We find ourselves going outside regularly to pick herbs as needed.

Next year, I will add parsley to the mix as well. I didn't think we used it very often but we've needed it a few times this spring. Anything other herbs I should plant?

Thursday, May 20, 2021

Rocky River

So after the final tree at the back corner of our yard died and we were unable even to keep grass there due to the damp, we realized that we had to do something a little different. As we got quotes for a patio, we asked for suggestions for what to do for this back corner, as well. First, we considered a true rain garden that could pass a perc test and maybe even qualify for some rebates and grants. But one of the landscapers pointed out that you don't want to create a rain garden where there's already too much water - it already attracts too much water and has trouble absorbing it. Rain gardens are better suited for areas where you can redirect water to help spread it out. So we abandoned that idea but still decided to put in water friendly plants and replace the grass (actually, mud) with rocks. And finally, we wanted high enough plants to help cover up the fence line and provide privacy. Here was the proposal we went with, which included 4 cubic yards of river rocks:


They put it all together pretty quickly, given the little trucks that they were able to bring through the yard to deposit all that rock. They put in landscaping cloth too, to help reduce the weeds that might sprout there. Here's the view before everything woke up - you can see the birch in the back corner most prominently.

It makes a lovely sweeping arc from our yard and was the perfect place to move our giant concrete bench.
Here's the sedge, with a red chokeberry behind it. Sedge looks a lot like a spider plant:
There turned to be just one little problem. Apparently, if you raise up a wet spot (by putting rocks on top of it), it just moves the wet stop, it doesn't get rid of it. So the area in front of and to the side of this lovely rock garden ended up being constantly damp--and that included the area next to our shed. That was a big oops. So D took on a huge project. He moved a bunch of the rock, cut into the landscaping cloth, and dug a little channel in between the new plants. His thinking was that this would give the rainwater a place to collect inside the rock area, instead of in front of it. It was a grueling process, made more frustrating knowing that he was undoing work we'd just paid for:
The good news is that it seemed to work pretty well. He left it uncovered for a while, to test the concept when it rained.

Satisfied it was doing its job, he overlapped the landscaping cloth over the cut and put the rocks back into place. Here's what happens now when it rains (and we are going to try to be diligent about tossing in a mosquito dunk). The water drains within a day or two, depending on how wet the soil beneath it already is, and the ground in front of the rocky area has been staying pretty dry!
Fast forward to today and here's what the scene looks like. The plants have all woken up and there's a little (dry) channel running through it. You can even see the random metal sheet that D uncovered when he was digging the channel, resting on the fence.
I'm not sure why the landscapers covered the old tree trunk with landscaping cloth (after they took another couple of inches off the height of it) and left it like that. We put a flower pot on it but didn't love it. We could free it from the cloth so that it at least is a tree trunk and not a random gray circle. Any ideas?

Sunday, May 9, 2021

Another Two Trees Come Down

This post is necessary just as a scene-setter for the next one, since it's about stuff we did last year when I wasn't blogging. Sometime last spring or early summer after all the leaves came in, we realized that two of our trees that were fine the year before were definitely not fine anymore. The mimosa (the arrow on the right) didn't grow any leaves at all, and the oak (on the left) either leafed out and then died or maybe just never dropped its leaves from the previous year. This corner of our yard, always damp (more on that in future posts), appears to be a major tree killer. A small one fell about two years ago and 9 years ago, several of the trees there died off.

D climbed up into the mimosa to see if it was still alive, despite having no leaves. We wondered whether we should give it another year. Nope, brittle and dried up. We probably could have cut down the mimosa ourselves (or ignored it for a while) but the other tree was too big to ignore. It couldn't hit the house but could potentially fall on the shed, so it had to come down.

And so in the pandemic year without too much to entertain us, we have a fun afternoon show watching the tree come down. We have a perfect view from inside our sun room, looking out the back patio doors. They cleared the lower branches first and then started taking the main trunk down, chunk by chunk. We even got some action shots:


And nothing fell on the shed, yay! They removed the mimosa for us too, while they were there, but it was much less dramatic and pretty much all from the ground.

So that was last summer. Then affter a very wet fall and watching this corner stay muddy for months, we realized we needed a better solution. It was too wet there even to sustain grass (or weeds). Time for something else.