Please share your opinions and expertise since we need all the help we can get!

Monday, February 20, 2017

The rest of the office

The closet solution is holding up well and we are still putting things away there and keeping the rest of the house relatively toy free, so I call that a success (even if we're only talking about a couple of weeks). The room, however, is far from done. With no desk and no seating except one very random desk chair, it doesn't really have a purpose except storage of things (file cabinet, yarn trunk, etc.):


Our Container Store organizer suggested using Elfa along the wall to create a sort of versatile desk space, something like this crafting area from the below catalog picture:

Using Elfa in a similar way would mean we could have drawers and shelves below, a surface top at whatever level we want (we were thinking of doing a standing desk, for example), shelving up above, and have it all be customizable and changeable. In particular, she suggested, to use the above catalog picture as an example, of doing a split surface top, so that one could be an adult height and one could be lowered when toddler starts wanting to craft in there or do homework, to create a second, lower desk space alongside the higher one. Drawers, shelves, etc. can all shift around to compensate.

Here was the plan she created, for the wall currently occupied by the china-cabinet looking shelving unit with doors and the desk chair:
We like it, but we don't love it. It does keep all the equipment off of the floor and above the baseboard heater, so that is nice. It does provide a decent amount of storage and desk space. It does not, however, look nice. A simple fact of these systems, as you can see from our closet photos and the catalog picture above is that it just is not very attractive. Closet organization? You bet! Centerpiece of a room? Ehhhhhh, maybe not. There's a reason that we used the Elfa skeleton for the living room but stained wood for the shelving ourselves and used a completely different system for the cupboards below. We actually wanted it to look nice.

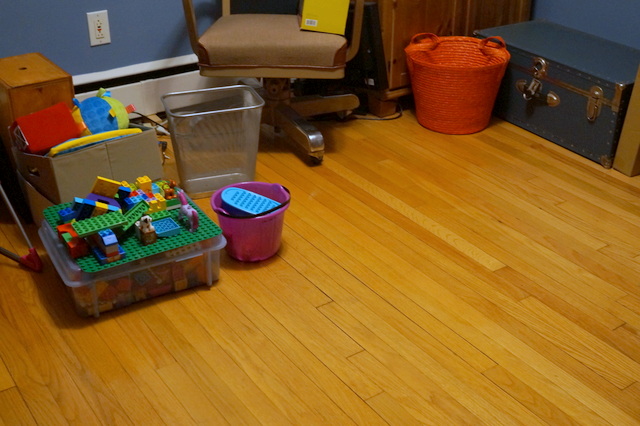
So we think that in the end this is not the way to go. While amazingly functional, it is a little too functional for us. The plan for now is to clear out the china cabinet of books, magazines, and binders from college. Then buy a very simple standing height desk that is just 4 legs and a surface, to go along that wall exactly where the Elfa system would be. We plan to put toy boxes, along the lines of those blue lego boxes (see top photo) and other modular pieces below. It's not hugely elegant but we can pick whatever kind of simple desk we want and balance design and function. If we go 100% functional (read: ugly) then at least it won't be a $500 system. 

That's the plan at least. We surprised ourselves by finding no good solutions at our good old standby, Ikea. So if nothing easy surfaces, I can imagine going the Elfa route. Either way though, we plan to empty out the cabinet and get rid of it to free up space along the wall and then go from there.

Tuesday, February 7, 2017

A Thing of Beauty

The boxes were unpacked...The mess got worse before it got better. But in the end, we have a closet.
Elfa was indeed easy to install, as we remembered from when we did the living room. Small details, however, seemed pointlessly cheap, especially considering how much the whole system cost. For example, we have shelf liners, but they were not pre-cut for our shelves (they pre-cut other things, like the horizontal and vertical tracks). So I had to try to trim them with scissor and an x-acto knife but couldn't really get them precise enough to lay flat without over-cutting.
The cover for the top track also needs to be trimmed, and the top of the drawers need to be stuck on with (literally) tiny squares of double-sided tape. These things all could use improving.

However, the closet it done and already in use! We also coincidentally inherited a cute rainbow set of drawers from family, and my toddler loves both and is eager to put things away (I'm sure this will fade, but I'll take it for as long as it lasts).

We have the door of the closet set up with a hanging area and a deep container for crafts.
Inside the closet - shelves, drawers, and a hanging rack (for now I've just got some smocks and a halloween costume there, alongside the drawers).
We haven't decided what to put on the top shelves so obviously out of reach of the toddler (and to a large extent out of our reach as well without a step-stool). So there's more space once we figure out what to do with it.

The real question - did it work? Are we more organized? Well, there's certainly no guarantee that we'll continue to put things back into the closet, but at least a space exists for toys where it did not previously. I think this before and after puts how far we've come into perspective (keeping in mind that it got way worse in the weeks leading up to the new closet while I decided it was futile to keep obsessively stacking things just to free up floor space, knowing a solution was in sight).

The office last week:
 The office today:
There's plenty more to do, along the main wall, as well as some additional big storage boxes we need for legos and other things, but hey, there's a floor now.

Saturday, January 28, 2017

Dream Closet

One of the unexpected conclusions of our consultation with the Container Store "professional organizer" was to make better use of the space we had. So though she suggested a complicated redo of the main wall of the office, we decided to use her side point to take our clean-up in a new direction: the closet.

With a shoe rack on the door that we inherited from the previous owners (a very inefficient circular knitting needle holder) and a simple shelf and hanging bar, this became the closet for coats that were out of season and original boxes for things we felt we needed original boxes for.
The bottom was beach stuff (collapsible chair, umbrella, etc.) and also the place where we piled items we planned to donate.
In short, not a very good use of space.

And because we were now on the Container Store's mailing list (tricky how they get you like that), we saw a catalog image that we fell in love with:
So well organized! So efficient! Be still my heart! (I realize that no child will ever put his or her things away that well, but please allow me a moment to dream.) We decided this would be a much better use of space than the single bar/high shelf that we had going in there already.

We took some measurements (our space is smaller than the closet in the model picture) and chatted with a store consultant until we got a customized plan and a list of parts. We had a few obstacles - literally and figuratively. First we had the top shelf of the closet, which was resting on 2x4s nailed into the wall. Those boards would have to go. Second, the back wall of our closet had two plumbing access panels (one deliberate, for the bathroom plumbing, and one accidental from when a plumber had to put a hole in the wall to get to a pipe). The elfa system at the Container Store works by installing a top track into studs and then hanging everything from it. So the wall has to be flat. No access doors or other boards.

So instead of making ours exactly like the picture (or at least as close as possible as the size of our closet would allow), we added rolling drawers instead of drawers attached to the backbone tracks of the elfa system. Like this on the back wall:
Here's the shelving wall view:
And here is the door, pretty much exactly like the picture (because door sizes are standard). They convinced me that we can use an "over the top of the door" attachment, but I'm not sure we have enough space for it, so fingers crossed.
At any rate, it was time to start cleaning out the closet before we committed to our several hundred dollar reorganization. Could we even get the closet into the initial shape it needed??

Step one, take out junk - a relatively easy step now that we have the garage attic. And pull off the shoe rack:
Step two (and the step we had to complete before we were willing to order the system) - pry off the boards that were holding the top shelf in place. D was unable to find any nail holes when he poked around, but finally was able to pull them off with a crowbar.
No surprise - it left lots of holes in the walls. But at least now we knew that we could get even walls with no obstacles in the way of the elfa hanging tracks (I'll talk about that more in the installation phase).
We debated trying to patch the big hole on the right, to give us more wall from which to hang drawers and shelving:
 D tried to cut straight edges out of the hole to make patching easier, but it just wasn't happening:
It did make us wonder exactly what kind of walls we have in this house. It definitely isn't drywall but the lath structure we expected to see just isn't there - no framing at all. It looks like drywall layered onto plaster layered onto drywall. Huh? In any case, it was thick and unfriendly looking, and we decided that it simply wasn't worth the effort. This is just a closet after all.
So we decided that if we were going to leave the panel in place, we could put trim around it just like on the panel to the left, so they matched and felt a bit more...deliberate. Here's the left panel:
D bought some trim at Home Depot, pulled out the mitre box, and got to work. Here's the first edge nailed up:
 Then side two and some wood filler. Once it's painted you would never guess it wasn't intentional:
Fast forward a few more days of more spackle and wood filler followed by two layers of Kilz primer (we only cut in once on the edges but D rolled twice), and a layer of Sherwin Williams base white in satin that we had lying in our basement. The closet is a clean canvas ready to go!
Which is good, because I think our work is just getting started...

Sunday, January 8, 2017

Resolved

2017 is here so it's time to look back at last year's goals and set some new ones for this year. In looking at how we did, I see we managed to reach both our top-2, so that's pretty good! 

The first (in case you don't want to click back) was to undergo our most extensive remodel to-date and convert the breezeway into an indoor space. Done and done! And we couldn't be happier. I was skeptical that the project would be worth the price tag but it turns out that has become one of our favorite rooms of the house. And the additional attic space that we created overhead has had a follow-on effect that has let us move junk out of other rooms to hide up there, freeing up space in the garage and the basement too. Hurray!

The second goal was to hire cleaning help. Well we went through 3 cleaning people but finally found someone that we like (plus a back-up if necessary). I'm happy to report that I haven't scrubbed a toilet in about a year now (I just put away tons of baby and toddler messes all day, every day). Worth it! I don't think I can go back to cleaning all by myself. Now can they just come nightly to cook me dinner?

Goal 3, converting to natural gas, turns out to be impossible without some very pricy structural changes. We had someone come look and because our furnace is right below our kitchen window, it's not a simple matter of just bringing the gas line to the house and switching out the appliances.

Goal 4 - those darn doors again! It's been on the list since 2013 and apparently will be for yet another year...

Enough looking back, time to look forward - 

1. 2. and 3. Organize, organize, organize! This is going to be an ongoing theme for the year, and one we started about a month ago. This is a multi-step plan to thin out what we have plus put it away more efficiently. We have blueprints, we have items in our shopping cart, and we have weekend plans to tackle the toy problem (i.e. the office), the linen closet, and the kitchen.

4. Automate and make life easier - this one is already mostly accomplished thanks to a purchase we made a few days ago (does that count? it's like making a to-do list just for the satisfaction of crossing things off). Stay tuned for an update later this month.

5. Fix the doorbell. It's annoying. But it is also probably expensive.

Happy 2017! Do you have any house-related resolutions?

Sunday, December 25, 2016

Happy Holidays!

New decorations this year - window wreaths to match the door wreaths (so thrilled that Pottery Barn got them back in stock!), and one of those red/green laser lights. Of course with a toddler who loves Christmas lights, we had to put out everything. The lights are mismatched and the application is sloppy but hey it's the twinkle that counts.

Indoors, we moved the tree to the fireplace wall (we rotate every once in a while, it seems) and went with silver ribbons instead of red. We got a new star when the old one decided not to turn on. Most exciting - with our family complete, we all got new stockings thus forever christening us as Mommy and Daddy.
Our village inherited an ice rink (we mostly keep it off because it plays music continuously when on) and our thrilled toddler helped me set the whole thing up and requested "more people" (little does she know that this village is just a small subset of the stuff I keep at my parents' house...). The cats aren't thrilled to lose their window seat but have found other places to sleep for the holiday season, fortunately.
From our family to yours, Merry Christmas and a Happy New Year!

Thursday, December 22, 2016

Dead as a Door...bell

Can you tell the difference between these two pictures? It's more obvious in person:

On the top, our doorbells is glowing. On the bottom, it isn't.

Right around when we were getting the electrical work redone for our new room, our doorbell stopped working. There had been a short - the crew admitted to that. Though they didn't think the two were related.

Well whatever it was, we now have no electrical power to the doorbell, which had magically just worked, emitting a constant glow and chiming an actual manual bell.

Our electrician friend managed to get it working partially - one of the two bell tones seemed permanently fried but the other started working  if the whole unit was loaded up with C batteries. So we got a "ding" instead of a "ding dong." That seemed a decent fix.
 The problem was that it was short-lived. Within a week or two, the doorbell was dead again.
Apparently the constant glow sucks up 4 C batteries in about 10 days. Obviously not something we wanted to sustain.

So we're back to no doorbell. This has not been a bad thing what with a newborn napping at various points of the day. But because it's there and people expect it to work, it has also meant that we haven't always answered for people we actually want to see, like our neighbors (by now I think most of them know it's broken). I probably at least should put a little sign on it or a piece of tape.

The options now are to purchase a fake add-on bell or pay an electrician to fix it, which might involve a whole new unit and new wiring. Neither are great solutions. Since the builders for the new room denied it was related even then, I don't think we can convince them now to come fix it, so we are on our own for whatever costly solution we decide on.

But I miss that glow...

Monday, December 12, 2016

Empty (?) Basement

We briefly tried keeping tools in the garage, once. But separated from the house by 3 locks and a messy breezeway that required shoes to pass through, not to mention a coat, meant that we never wanted to go out there. So we would bring in what we needed - a screwdriver, hammer, etc. - and then it would in the kitchen or otherwise inappropriate spot for weeks before we finally put it back. That got old quick. So when we acquired a fancy tool chest, we agreed we would use it more if it went in the basement.

Now that the garage is so much more accessible to the rest of the house and separated by only a simple toggle lock, we wanted to start making more use of it. And thanks to our new attic over the garage, we've been able to clear out some space. That meant the tool chest could finally migrate to its rightful place.

We love it there, and it makes so much more sense. D even hopes that with better organizing and as we move more upstairs, he can really start to use the work bench area along the back wall. It's already been built, we just have to clear it out.

And that suddenly meant more room in the basement, too. We cleared out the additional drawers (and moved what we couldn't trash out to that oh-so-spacious attic) to create another totally empty basement wall. Plus not having a giant metal tool chest full of sharp tools made the room a lot more child friendly. So what did we do? Immediately buy a gigantic jungle gym.

We don't really intend to make the basement into "the playroom."  We'd rather have the kids playing up on the main floor and don't want the toys stored on a separate floor where we'd have to haul them up and down. But it is a really nice space right now to let her climb and run and spin and get out the energy that, this time of year, she might not be able to exhaust by playing at a playground.

Find new space, fill new space.

We really have to start clearing out from what feels like a massive accumulation phase.

Wednesday, November 30, 2016

A Plan and a Few Random Things

We caved in and called professional help from the Container Store for organizational advice. While we work back and forth with her on some ideas, we realized that our number one plan should be thinning out our own unneeded stuff and giving up that space to the kids. We have so many bookshelves and cabinets already that will work fairly well for hiding toys, but they are full of old binders, magazines, and other things. Between the added attic storage in our garage for things we don't want to throw out but rarely (if ever) need and a new sense of having to throw out things we will truly never need (is there really any reason to keep my notes from my high school AP Calculus class when it all looks like gibberish now? probably not) might give us at least some solution at no cost. Then at least we won't need quite so many additional shelves and drawers. So we will see how that goes.

In the meantime, we have made a few small adjustments to our home decor that I'm excited to share. After looking online for a Turkish lamp, I found this beauty at a local store and knew the price was not too high, so it came home with me immediately. I've wanted one for ages but just did not have a good place for it. Good thing we have a brand new room!
Here's some more eye candy of my lamp. It has a warm LED bulb in it so the glass stays cool to the touch and isn't using much energy. I just want to figure out a way to better hide the switch, which is down about one foot along the power cord. 

Isn't it gorgeous? At least now I have a nightlight for when I need to come downstairs with a screaming baby at 3am...(silver lining?):
We also changed up our hallway. It used to have pictures strung up with yarn to minimize holes in the wall (we don't have the white paint so we wouldn't be able to fill and touch up if necessary). Here's the before picture, from this post - which totally coincidentally was exactly 6 years ago from today.
Unlike what I said in my post about refreshing the pictures on a regular basis, they were the exact same last week as they were 6 years ago. So much for that.

We inherited a beautiful picture that a family member painted (two actually - one is waiting to be framed) and decided the hallway was a perfect place. I think it makes the place feel a little more grown up than the sort of "just out of college" look of the unframed pictures hanging on yarn, don't you?
And not a "decor" update exactly but this Thanksgiving we had a roaring fire in the fire place thanks to our old oak tree. It is aged and dry and we have lots of it for the winter. Gone but not forgotten:

Wednesday, November 23, 2016

Thanks and Giving

Been doing lots of small upgrades and decorating things around the house but every time I sit down to write, I realize I'm short a picture and the light isn't right (or I have a baby asleep on my lap - that's a pretty common excuse these days). So allow me a post of a slightly different nature and a question for you, my dear reader (as I assume there is just one of you).

I've been blogging as a "new" homeowner now for over 7 years, so I probably should remove the "new" from the moniker. But there is never really a stage where any homeowner feels like they know it all and don't need help or are *done* and don't need to continue to work on things. It just doesn't happen. I think that what starts to remove the newness of the thing (besides having lived somewhere along enough that the things you upgraded or replaced need upgrading or replacing again...) is that you build a team of people you can call when things get rough or when you need a little extra help. The plumber, the electrician, the roofer - these folks come and fix things that we can't, no matter how "experienced" we are. The chimneysweep and the energy company that comes to service our boiler annually - they keep everything running. We are grateful that in many cases, we know who we can call. Or, if we don't, our neighbors do. And don't even get me started on how incredibly grateful we are for our amazing neighbors.

This year we needed a little extra help, with a new baby and a messy toddler that takes up all our free time (because of course we'd much rather spend time with her than spend it cleaning, raking, etc.). So we hired regular help to clean our house and keep our yard looking good (ok, maybe not good, maybe just not embarrassing). And we are grateful they are there and we are grateful that, for the moment anyway, we can afford it.

So what should I do to express my gratitude? I'm always afraid that any extra money will be the wrong amount of money: maybe so little as to seem stingy. "Stuff" or cards or homemade gifts seems like it might be unwanted, just unwelcome junk or calories. Is it better to give something/anything extra that expresses how thankful I am to have their help? How do you put a price tag on "thank you"?
So many leaves - where would we be without help?!
And this is not to mention all the other non-home-related helpers in my life: massage therapists, financial planners, teachers, nurses, etc that sometimes go the extra mile.

So tell us your tipping/giving ideas. What has worked for you and what hasn't? What would you want to receive?

Tuesday, November 1, 2016

Blind Saga Resolved

We resolved our blinds saga by throwing a lot of money at the problem. By the time we decided the blinds.com blinds weren't working out, we were already fully using the room for baby number 2 (surprise, we have a new human "addition" as well as a new room addition). The bright sunlight needed filtering periodically during the day when it shone into the crib, and the street light needed blocking when one of us brought her down to sleep there in the middle of the night so that at least one parent could catch some precious zzzzzs. Without any willingness to shop around ourselves, we brought in a local decorating store that had recently advertised that they did house calls for window dressing.

And so they came with binders. Lots of little samples that could be un-velcroed and held up to the window to see the way they filtered the sunlight (thank goodness it was sunny that day).
We picked a lovely gray that complemented the wall color in a cellular blind that can be raised and lowered from the top and bottom. We decided not to pay extra to have them installed for us, despite the frustration from installing the set from blinds.com. Fortunately, as we expected and hoped, these were much simpler. D had them both up within 20 minutes or so, with minimal hardware.
I love that we can raise and lower them from both ends, so we can get full sunlight but privacy (bottom half covered only) or as much light filtering as we need. They are magnetic at the top, making it easy even for someone short like me to snap the top edge into place.


We couldn't be happier, though I doubt I would go this route again, given the price. We definitely would have shopped around and done it on our own if the first order hadn't taken so long and we hadn't been in a rush for blinds in there. It is a sign of how much we love the room though - we couldn't wait to be able to use it around the clock.