This project has been a long time in project and I'm so glad to finally present it to you. So glad, in fact, that I'm spilling all the minute, gory details and splitting this into to posts!
Remember this guy? I fell in love with the style and shape but found the color hideous in our gray, blue, and brick red living room.
With the help of photoshop, we decided to see what it would be like to paint him turquoise:I even came close to hiring someone to do it. I'm sure she would have done an amazing job, but the price was a little too high and my sense of pride made me think that I could do it myself and then have something to really show off.
After considering what shade of blue to use, I came across a few inspirational photos that made me think that gray was the way to go:
 |
| Found here (original source unknown) |
 |
| Design by Primitive and Proper |
Well, except for this first step--roughing up the glossy surface to make sure the primer adheres.
I may have gone a little overboard on the protection (yes, that's ear covers, glasses, and a face mask, as well as a hoody to protect myself from the last of the mosquitoes). But after last time I sanded something and noticed colored, snotty sawdust in the tissue every time I blew my nose the rest of the day, I decided to play it safe.
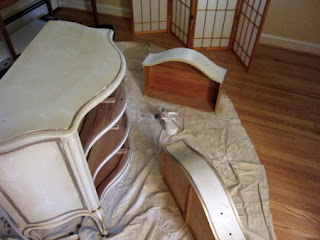
From there we moved everything into the house so that I could work "round the clock." I scrubbed off the debris with non-TSP cleaner, laid everything out on a drop cloth, and got to work.
Round 1: thin coat of primer (you can still see the color underneath a little):
Round 2: another thin coat of primer (it looks totally white now). Round 2.5: One extra coat of primer on the top for good measure, because I could see some color just barely peeking through.
Round 3: Peppercorn! A thin coat of paint.
Round 4: A second coat of paint (this would look a lot less dramatic if I took these pictures at the same time of day, but the evening lighting exaggerates the color). Still, a beautiful and rich finish. Round 4.5: A third coat of paint for the top, just in case.
I'll leave you with that for now with a hint of what is to come: the hardware! (I read somewhere that it was easiest to handle the hardware by screwing it into a piece of cardboard and let me tell you--that is a good trick to know because it really works!)


No comments:
Post a Comment