Please share your opinions and expertise since we need all the help we can get!

Tuesday, May 10, 2022

Exterior Makeover

Almost three months have gone by and most of that time was just waiting for work to begin (and doing other, unrelated, very bloggable projects) and then, a couples of weeks ago, the new siding makeover took place almost overnight. Well within a week, to be precise. A week of a crew of at least 6 people working 10 or more hours each day. It was quite a project. Let's go angle by angle, to walk through the process.

First the most important and changed view, in our opinion. D, who was the brainchild behind this project, was particularly annoyed by this approach to our house, which became all the more visible five years ago when the owners of the empty lot next to us cut down all their trees. With the trees cleared, we lost both our shade to that side of the house and any hope of hiding our white vinyl siding. Despite pressure washing it yearly, it just looked dingy. And even when it was clean, D hated it.

Here are some pictures in progress, which at the time, I intended to post as they went. But they moved so quickly it was hard to keep up.
Bye bye vinyl

In wrapping the house with whatever the pink and green layers are, we were also provided a little bit of additional insulation. Obviously that's not why we made the upgrade, but it doesn't hurt.
And here's the beautiful finished look. You can see in this picture below that the dormers had been updated by this point as well, but I'll talk about them in a moment. Though I was not so excited about this project as D, I have to admit even I get a little jolt of happiness when I come drive this way towards the house.
One comment before we move on, while it's easy to scroll between the top picture and this one, is about our shutters. Part of this upgrade included replacing the shutters, simply because they were old and because we preferred a panel design rather than the louvered style we had. But when they put these up, we immediately felt they were too small. The company will be giving us wider ones, but like everything else right now, there are supply chain issues and we'll get them when we get them. So we have too-skinny shutters for now. 

Now onto the back of the house. Here's our before picture. Everything white. Which, while boring, turned out to be very easy. You'll see what I mean in a moment.

Here's an in-progress shot. The team had to be very careful with the way they set up the scaffolding, since we have a slate roof. Usually, they can traipse all around the shingles. So our job was extra difficult and required much more careful set-ups, so that they could minimize the weight on our roof. We haven't had a slate person out yet to take a look, but we don't think more than a handful of slates got damaged, so that's pretty good. The siding company did warn us before beginning that they would do their best but that we had to accept some risk that slates would be damaged.

And...here we go for the final reveal in the back (complete with sun flare). A few things to note here--first, they replaced our brown metal gutters with white ones. It was a little jarring at first and not something we had discussed at all during the planning stage, but apparently gutters are supposed to match the trim and it really does blend right in. I'll have to get used to the very white downspouts (and, let's face it, they'll get dirty soon anyway--it's like white sneakers right out of the box).

Here's where we really started to question what should be gray and what should be white. It was easy before when EVERYTHING was white. But since we had white trim around the windows and doors, this wasn't as easy as just making everything gray, either. As we look at this, for example, we now think we probably ought to paint more gray around the patio door, like the border around the gray panels and the strip immediately above it. I'm interested to know if you agree. Fortunately, Hardie (the company that makes the siding) partners with Sherwin Williams so we can buy the paint easily (and, in fact, already have a can of it).

The side by the garage was also fully converted from vinyl to Hardie board, not that I usually even remember it's there with all the giant camellia bushes around it. It's pretty remarkable that they were able to get in there without disrupting the plants too much.

And we continue around to the front of our house, probably the most important view, despite my focus on the side. In addition to (obviously) focusing on the siding itself, one other thing we wanted to upgrade was the design surrounding the dormer windows. You can see in the "before" picture that it's just more horizontal siding. Oh horror! (I'm being sarcastic because honestly I did not care about this at all, but D hated it.)

The "after" picture shows how we changed up the design to create a cute little triangle top with white trim and solid gray sides. No horizontal lines for us (from the front view).

The front is where we really started to struggle with what should be white and what should be gray. My complaint was that we paid all this money to change the house color, and the front still was mostly white (we didn't pay for this upgrade specifically to change the color, but still...). As a result of my concern, we all agreed that the picture window should be gray--as it is in the above picture (my complain being before I took this picture). I lost the fight on making our entire frieze board (the wide board immediately above the brick) gray, since we established, after a long walk around our town, that the trim on most houses seems to match the windows.

So that still lives us with some question as to what should be gray and what should be white. I already asked about the back patio door. I thought we should perhaps paint the panel on our front door that is below the four glass windows, to mirror the gray panels in the sun room, here:
But now D thinks we should perhaps make that entire section around the windows gray, so that it's not a small gray panel framed in white but a gray panel (leaving only the window frames themselves white until you get to the frieze board). He's also considering whether to paint the panels of the garage gray, so that it looks like gray squares each framed in white. I think that might start to look a little weird and like a checkerboard.

And so, with the project mostly* done and with minimal hitches**, we still find ourselves wondering how it should look. Fortunately, this level of paint job is something we can do ourselves, so there's no pressure to decide and implement particularly quickly. Please let a comment and let me know your opinions about what, if anything, we should switch from white to gray.

*"Mostly" done because during a very rainy weekend, we noticed some issue with the back gutter, and we are still waiting on the shutters, as I mentioned above. 

**There was a dicey moment when the work crew arrived and thought they were trashing all of our gutters and giving us new ones (not in our contract anywhere, though they said it was--perhaps it was assumed since it's easier to just tear off old gutters than to carefully remove them). Thank goodness D was home to talk with them and emphasize that while we did not care a bit about the back gutters, our front gutters were copper and most definitely should not be replaced. Equally thank goodness, the gutters didn't wander off from our backyard for the 5 days or so that they were not attached to our house, copper prices being what they are.

Sunday, February 20, 2022

Here we go again

Case loads go up and apparently I stop blogging--or doing much around the house for that matter. But it's a new year and we're getting the itch to make an upgrade. In this case, D admitted that he had never liked our vinyl siding, so we decided to look into something different. We already had Hardie board installed on the front-facing section of our sunroom when we had it redone in 2016, and have wanted it on the rest of the house since 2017 when we had to get new (mismatched) siding on the part of the top floor where a tree hit it. Though we have. brick house, we have a decent amount of siding. Here are a bunch of views to show off what would be replaced. We're talking about basically all of the white parts except immediately around the windows and doors:


(It seems unbelievable that we power washed this over the summer, with how dingy it looks)


We're also learning lots of words that I've heard before but never really knew exactly what part of the house they applied to. We're apparently looking at replacing the frieze boards, fascia boards, rake boards, and soffits. We're also doing the siding itself, on the dormers and gables. Here's a cool picture I found that had the parts helpfully labeled:
So now that we're doing this, it's time to figure out exactly what color we want to switch to. Because why keep the house white when we have a whole rainbow to choose from?
OK, but that said, we knew we wanted to stay with a neutral color in the gray category. So really, here are the choices we are looking at:
We've gone back and forth several times between pearl gray, gray slate, aged pewter, and iron gray. The contractor we hired for this job had a good point when he reminded us that our final color choice should not match too closely with our slate roof. A very good point--one we hadn't considered but now we realize is definitely true. We have a paver that is the same color as our roof that we're trying to use for color-matching purposes:
But of course, slate gray really is not a single color, but a blend of a lot of different grays, so it's not exactly easy to make sure that we don't match it too closely


I even tried to take a picture in gray tone, a trick I have used before to help me find similar and different "tones" for fabrics and decor.
It didn't really help.

And so that's where I'll leave it for now. We are leaning towards pearl gray, but let me know if you have any opinions. We also have some plans for how to add some accents around the dormer windows but I'll save that for a future post.


Tuesday, November 30, 2021

Caulk Talk

This pandemic has gone on so long that things we touched up at the beginning have already worn out. One example is the caulk that we lined our bathtub and sink with back in spring 2020. It was moldy and separating from the wall and time for a refresh. 

We realized one reason it may have worn out so quickly was that we didn't use a mold resistant caulk, so this time, we bought this stuff:

I also thought that being able to just squeeze it out instead of using a caulk gun would be useful, and the fact that it dried quickly would let us get back to using the tub--and especially the sink--quickly. These assumptions turned out to be wrong, as you'll see.

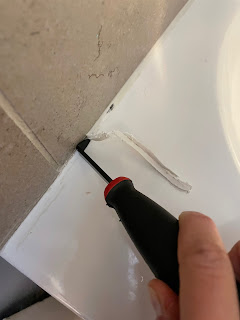
The one thing that did go right with this project was the caulk removing. It came out relatively easily with this $5 tool followed by a straight-edge to scrape off the rest.
Once I removed all the caulk, I sprayed a strong cleaner in there and scrubbed it with a skinny brush, then wiped it dry/clean with a Clorox wipe, a trick I saw on one of the MANY YouTube videos I watched to prepare myself for this project. That was a good way to clean it off without having to use water. Then I waited a while to let all that dry.
The videos also suggested that I tape the line in order to get a good edge. I did this diligently. It seemed like a good idea. The other suggestion I followed was to fill the tub to get a caulk line that would cover the gap even with that added distance between the wall and the tub caused by the weight of a person (or, in this case, a full tub).
And... go! Except - well, where to start. First, the tape did not actually stick very well. So as I was dragging the bead edge tool along, the tape started to crumple and move with me, which honestly had the exact opposite effect that it was supposed to, as it fell into the caulk.
Second, suddenly this "quick drying" caulk did not seem like such a good idea. It started hardening while I was still trying to smooth out the line, making it decidedly worse the more I messed with it. I tried to use acetone to clean up the line as quickly as I could. But at some point at around minute 20 or so, it started to cure enough that any time I touched it, it just got sloppier and sloppier. Oh well, too late now. The only way to fix this is to rip it out and start over....sight. The other problem was that pushing the caulk tube along without the caulk gun (which recall, I thought was a great idea), meant that I was working essentially with a tube of toothpaste. As the tube got emptier, it got much harder to push it out. Add that to the need to work fast and, well, less than ideal conditions. 

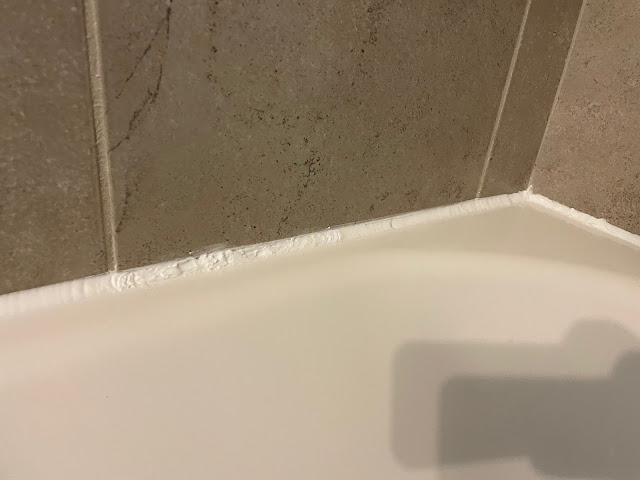
It is far from perfect, but at least it is mildew and mold free.
From a distance, it's not so bad...right?

And then, it was time for the kitchen sink. This one really needed to quick dry, since we use the kitchen constantly. Same steps as before, except no taping. Even if it had worked great on the tub, this was an undermount and would not have been possible to easily tape up that way.

Removal took a little longer and was definitely moldier than the shower:
This time, I tried to do the bead with a gloved hand rather than that little tool. It was, essentially, all the same problems as the tub. I keep hoping that the more I look at it, the more used to it I get. I wonder if it's worth trying again or if I'd end up with exactly the same result. Probably the latter. At least it's not moldy and gross anymore, just goopy looking:

And that was how I spent quite a few hours just before Thanksgiving week. I will admit begrudgingly here that when we re-caulked in spring 2020, D managed the process and I thought he did a crummy job. So this time I was determined to show him how much better I could do it. I didn't. Oh well, lesson learned. It might be worth finding a professional handyman next time, when it inevitably needs a redo in a few years.


Saturday, November 20, 2021

The path less traveled

This update is a bit more of a slow burn - no big reveal or anything. When we had the patio redone last spring they redid the walkway that leads from our driveway to our backyard (of COURSE I forgot to get a before picture - imagine uneven and cracked pavers, many partially sunken under the ground, not as evenly spaced and many no longer close to square). It looked great, but what little greenery we had been able to grow in this area fully shaded by the garage and surrounding trees was just dirt by the time they were done (this was also the path they used to bring all their heavy machinery into the backyard, before they re-laid the path). The company that did the patio put down grass seed (you can just barely see it in the photo) but we were pretty convinced that wouldn't work. And with every rain, we could see the topsoil washing away.
We decided to take a different approach and try moss! We weren't optimistic, since we had moss on our stone wall next to his bare patch of dirt that never spread to it, so presumably the conditions weren't right. But moss does love shade and low-traffic areas, so it seemed the perfect place.

We showered common spaces in the neighborhood, asked neighbors, and ended up getting a few good bucketfuls to lay in place:
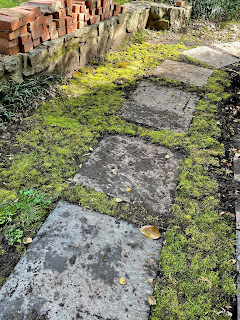
You can see in this picture how dramatic and quick the process was - just unfold and lay the moss and suddenly, it looks beautiful! Right alongside bare dirt:


We weren't sure if it would take hold, but the immediate effect was beautiful! We kept it watered and made sure to stay on the stones when walking into the backyard. At a minimum, it stopped the topsoil run-off right away.

Checking back over the spring and summer, we saw that some of the moss remained and other greenery had actually started to grow  in as well. Some of it is clearly weeds and not grass, but we aren't picky. Anything with roots to hold the ground in place and create a green space was fine with us.

And finally, here we are this fall - it looks like weeds overtook the moss, which is only just barely there. But I guess in the end, we managed to keep the dirt in place long enough for our natural landscaping (weeds, because we've given up) took over. I wish we could have maintained the soft, mossy look. But I'll take this too, I suppose.  


Monday, November 1, 2021

Dark and Loud and Stinky and Spooky


As if on queue for Halloween, our house decided to become haunted. Or at least act like it was. First, the boiler started making really scary sounds, like an engine turning over. It started doing that a little bit last spring, and we only had just turned it on--apparently the problem got worse. It sounded dreadful and definitely like we should immediately turn off the system, which is what we did.
Even though we turned it off right away, the basement started to smell like oil. I was downstairs doing a workout so I noticed and got quite uncomfortable (and also a little nauseous). I brought down our air quality monitor (long story, was planning to write about it in a different, future post - just roll with it). It did indeed reflect something gross in the air, since this number is usually in the single digits.

We had someone come out and look at it today and he said that either the top (gray) box or the bottom (black) box is busted. We have to remember to go down there next time it makes that grinding motor sound and figure out which it is, and then he can come by and immediately replace it. So that's good, I guess.

During that same workout, just 10 minutes later, we heard a pop and the lights went out. Some transformer evidently had blown down the block. I guess I'm glad it was a sunny day because this was how I spent the last 20 minutes or so of my workout. At first I was afraid it was related to the boiler, but then I realized that didn't really make sense. Fortunately the power came back within a couple of hours, but I did have to spend 20 minutes in the basement where, the night before, I had seen but failed to kill a spider cricket.
Spooky!

Now let's just hope we can sort out that boiler.

Sunday, October 17, 2021

If You Plant It, They Will Come

Last year, we planted butterfly weed, milk weed, and swamp milk weed (all related plants in the Asclepias genus) in the hopes of attracting some monarchs. They bloomed beautifully and attracted a lot of pollinators. See the bee in the second photo? Bees and other bugs were frequent visitors of the bright orange flowers.
 
And then...and THEN the monarchs found us! We saw one caterpillar first, and watched it for almost two weeks before it wandered off, either eaten by a bird or exploring to find a place for its chrysalis (apparently they don't create their chrysalis on their milkweed plant). We loved watching it make its way around the leaves, chomping everything in its wake.

Inspired by a neighbor who raised their monarch caterpillars into butterfly-hood in an enclosure (and borrowing their cage for a few weeks), we decided to raise the other two caterpillars that found their way onto our butterfly weed.

We learned, among other things, that they produce a LOT of poop:
Guess Eric Carle left that part out of The Very Hungry Caterpillar. Not sure why though--kids LOVE to talk about poop.

Then the special day arrived, when the first of our two caterpillars, Stripy, turned into a chrysalis. We actually missed the big moment but we know it took less than two hours from when we saw him last. First caterpillars start to curl up in a "J" shape and expel some sticky webbing that is what the chrysalis hangs from:

And then poof! Chrysalis. Sushi, caterpillar number two, joined Stripy about a week later. Sushi's chrysalis got blown off the spot where he mounted his webbing. Fortunately the chrysalis itself didn't look like it was damaged in the fall, so we did a lot of internet research on how to create a new mount for the chrysalis (spoiler alert - it worked, sort of!). And let us get some funny pictures of a chrysalis held in place with a binder clip and dental floss:
Fast forward 10-14 days from when they were caterpillars and the chrysalises became so clear that we could see the butterfly, almost ready to emerge, inside it (this one is Stripy, still safely stuck to her original location):
And then--BUTTERFLY!
You can see Sushi's chrysalis hanging in the background in this picture of Stripy, who we think is a female monarch because it doesn't have black dots on its lower wings.


Sushi emerged about a week later. His wing (because he was a "he" based on those little dots) looked a little misshapen, possibly from the chrysalis fall, but he did manage to fly away, so the rest is up to him/nature.
Back to the plants themselves. The first place that we planted butterfly weed clearly was not the place for them, since they fell into the sidewalk and driveway. We're planning to move them this winter to somewhere with more space, likely to the garden under the guest room window, that just got its native plant makeover. In a future post, I'll also show you the butterfly weed and milkweed that we planted in the backyard from plugs.
But our new obsession with milkweed (because LOOK! now we got butterflies!) meant that I decided to try to plant a bumper crop on my own from the pods. If nothing else, they were fun to slice open and harvest, and once the seeds were separated, the kids had a great time blowing the fluff around the yard.


I took seeds from slightly different times of the summer and from different varieties of Asclepias since I wasn't sure when they would be "ready." I know they need to overwinter in colder soil before they start to germinate, so we won't really know if it worked until spring. Fingers crossed!