One room that needed the expert help of the Container Store consultation was our kitchen. It wasn't horrible, but we knew that there had to be ways to improve where we stored things - ways to gain space and put things more easily in reach.
Rather than tell you about some of the general suggestions our consultant suggested, I'll go right to before and after pictures. We reorganized about a month ago now, so I can say with certainty that these solutions seem to be working for us, at least for now.
The corner cabinet - this contained all our tupperware, stacked by size with the lids below the containers. We constantly had to shift everything around to get to the size we needed and it was a pain to put things away, but it seemed like the best use of space for that awkward corner space. On the second shelves were all our glass lunch containers, stacked very precariously, and then other lesser used containers behind and above (the top shelf is not reachable without a stool):
The after shot - spices down below, on a fancy
lazy susan that pulls out to get to the things in the center of the circle. It's organized in quarters with similar spices together (for us thats: herbs, indian spices, hot spices, and "pumpkin pie" spices). We lowered the next shelf down a bit so we could more easily reach the largest size tupperware, which is the only tupperware on the shelf. A few assorted containers are behind and above, including jars that were scattered throughout the kitchen.
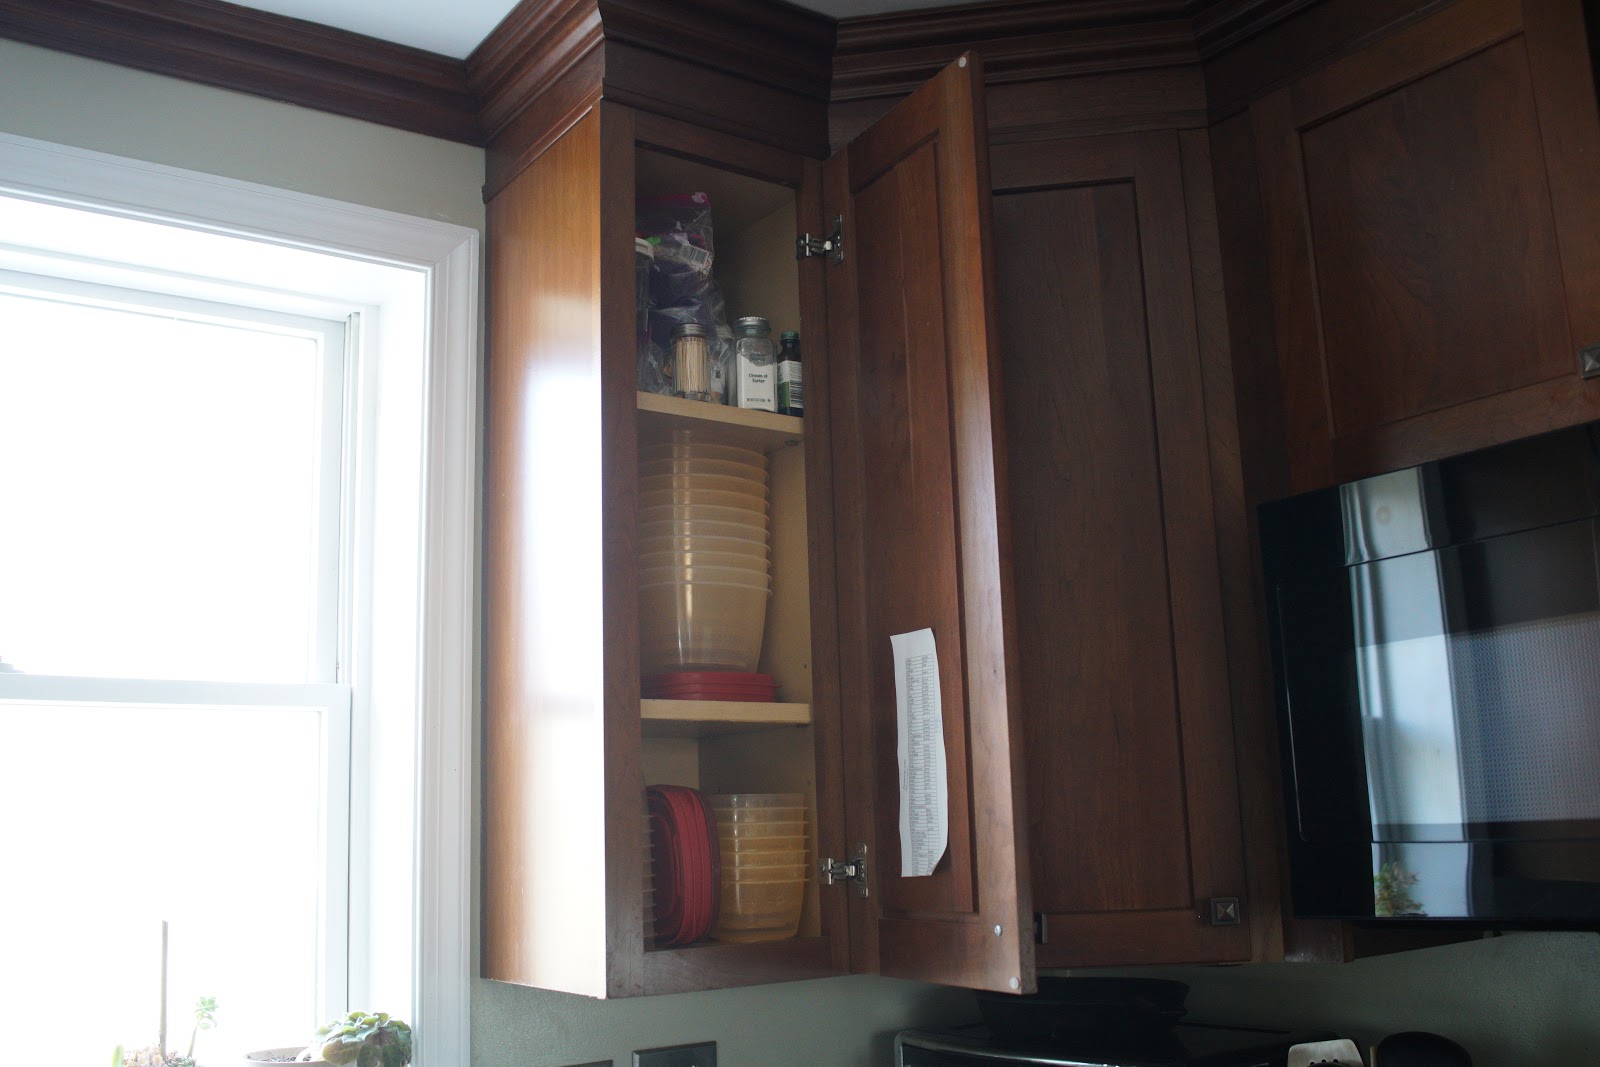
The narrow cabinet - filled completely with spices (with a list on the door of what we have). We largely found things by memory of what the bottle looks like and approximately where we put it, but it was chaos in there and usually searching for one meant having to shuffle around a bunch of jars.
After - a big piece of advice the consultant gave us was to split up our tupperware and put one or two sizes per shelf, to make it easier to grab what we need rather than having to shuffle them around. That made the narrow spice cabinets perfect for this purpose. So we have the small size on the bottom and the medium just above. Baking supplies are still on top, though we moved the more common ingredients over to the edges of the spice lazy susan (baking soda, baking powder, and corn starch).
Now to the counter - one thing we hoped to accomplish was to clear some space, so the first to go was this spice rack, now that we managed to consolidate it all into the cupboard:
That allowed us to bring the bottle drying rack closer to the sink (you can't see it in the above picture but it was to the left of the knives very far from the washing area). We would have put it right next to the sink but I like having the tea kettle as a buffer because sometimes we wash things that should definitely NOT have any risk of splattering onto drying baby bottles, like dishes and cutting boards contaminated with raw meats. The rice cooker moved down from its spot next to the stove (you can see it up in the very first picture, with its lid open).

This is where the pictures get a little haphazard. You see when we started organizing, we didn't think we'd get through the whole plan at once. But inspiration (and long well-timed naps from both the child AND the infant) meant that we did more than we thought. Which meant we didn't really get thorough "before" pictures. But here is one cabinet in the microwave area, being used really poorly. We had child plates here, because the drawer in the desk where said child could get her own place settings did not have room for plates. Then we had a cheese and vegetable grater that we rarely used, and then some random jars above. Inside the closed cabinets were an eclectic mix of larger spices, some tea cups, some containers, etc.

Our consultant advised us to keep our lunch containers separate from our other tupperware and easily accessible. So we rearranged the drawers to make room for the kid plates, to further allow our kid to start setting her own place at the table. The tiny kid lunch containers got put on the bottom shelf and our got put on the middle. Top shelf (largely inaccessible) still contained random containers. We seriously cleaned out the cabinet above the microwave and moved a bunch of jars of grains and legumes there, which had been accumulating in a very visible spot near the cookbooks.

Moving over to there (completely lacking a before picture) - a very picturesque view of the cookbooks we use most often on the bottom and rarely (i.e. when the kids are grown up and we have time again) on top. The jars of stuff got moved away to the top of the microwave, freeing up space for the coffee grinder and milk frother. We use these fairly regularly but they were taking up a lot of real estate on the counter and are easy to move back and forth. It looks so much nicer now that this might be the best visual improvement on the whole re-organization (so of that would be the one that we forgot to photograph....)

Here's the view, in the end. The rice cooker moved out from being cramped next to the toaster oven, the toaster oven got turns to make more workable counter space, the utensils got to go live back next to the stove (they used to live to the right of the stove but once we opened up that space to the new room, I was afraid we would walk past them and knock them down so they had been banished over to the other side of the sink where they weren't useful). We removed the spice rack, the coffee grinder, and the milk frother from the counter and saved ourselves a lot of hassle of finding tupperware by shuffling things around in the corner cabinet. Our kid can now get to her own plates as well as her other dishes, and everything looks a little nicer. Whew! Not bad for one afternoon.

So, funny enough, this kitchen update might have been the most useful part of hiring an organization consultant. Someone with enough distance and experience to suggest new ways to use the space we already had. One month out, we're really happy with these small changes that made a big difference. And the only thing we ended up buying for it was one lazy susan.