Please share your opinions and expertise since we need all the help we can get!

Wednesday, May 4, 2011

A Stinky Situation

You may remember during our insulation day that some plumbing problems were uncovered. When we finally had a plumber come pay us a visit, what he found was very interesting indeed. There was definitely a leak in the sewer pipe and it was definitely somewhere between the second floor bathroom and the basement. After some measuring and estimating, the plumber did this to the wall:

Fortunately this is inside a closet. And even a closet we don't use much--usually it stores our out-of-season coats and random stuff. Still, this was no small hole:
Here I am, for scale.

For that, the plumber charged us about $100. I can put a hole in the wall for free (and probably by accident), but I suppose that a professional hole is far superior. He explained that sewer pipes for houses built in the 1950s came one of two ways. The better (and more expensive way) was a full pipe. The cheaper and more fragile way was with two half pipes soldered together. And of course that was what we had. And we had a crack about the width of a finger. Having hammered a hole in the wall, he left for the day.

Begin round two: the plumber came back another time, much earlier in the day, to take care of all the work ahead of him. He shut the water off to that part of the house, cut out the leaky pipe, and put in a PVC pipe. And that was that. The scary thing is that at some point, this might be the fate of our whole house's plumbing system. The other scary thing was, of course, the price, but we won't get into that here. Let's just say it cost far more than just making a hole in the wall.
The expense didn't even include fixing the hole. Rather than try to replace the plaster, which sounded incredibly hard, we decided to build an access door. We know there's a pipe there, so why cover it. And anyway, this is the back wall of a usually-full closet. So we picked up a nice aspen board at Lowes's that barely even needs sanding (they have a much nicer lumber selection than Home Depot), and will screw it in place through the studs. Maybe one day we'll even paint everything. But again, it's inside a closet, so maybe we won't.

In the end, we're very happy that our energy team noticed the small leak and that we could fix it before anything got damaged. If left unfixed, this could have rotted the wood and caused a mold problem. Plus...well...remember that what was leaking was water making its way between the toilet and the sewer... So really that's just nasty and should not be in the walls of our house!

And now, house, please no more excitement and unexpected costs! Kthxbai!

Saturday, April 30, 2011

Shocking!

When last we left our intrepid heroes (i.e. us), we were dealing with some seriously scary electrical problems. So about a week over when the electrician came to take a look, we were convinced (ok, just me--D is a bit more level-headed) that the house was going to go up in flames.

The electrician crawled around in our attic space for a while, looking at the wiring. (Since our energy guys are coming back to fill this space in and seal the hole, the below pictures probably represent the only pictures we'll ever get of our "attic." None of these pictures are actually of the spliced wire problem--no way was I crawling around in there to get to the problem.)


He came to the splice pretty quickly and noticed that it had been done as a way to bypass a short circuit. He guessed, correctly, that if he fixed the splice with a junction box, he would trip our circuit breaker. So he fixed the problem but created another one: finding the actual source of the short circuit.

We had two options: he could crawl around up there looking for the place where the wires were connected wrong or he could just start laying new wires. The first option could potentially be cheaper if he found the problem quickly (once he started with new wires, it would take a while to get them all laid out and installed). However, if he couldn't find it for a while (or even at all), it might turn out that we should have just put in the new wires. But we opted for the gamble and he started hunting.

The entrance hole to the attic was in our master bedroom, so that's where he started. He checked and took apart (in this order) our closet light, our main light/ceiling fan, our bedroom light switch, our two lights in the hallway, our light in the hallway closet, and our main light in the extra bedroom (which he confirmed was not rated to hold a ceiling fan--more electrical box and joist fun later when we decide to install one)
FINALLY he reached the light switch in our extra bedroom.

All the short circuits and the fire hazards and this was the culprit:
Not only was it the culprit, but it turned out to be a stupid problem. The grounding wire wasn't correctly wrapped and two pieces of metal were touching, causing a short. The attic splice had been made as a work around for what literally took 3 minutes and about 2 inches of electrical tape.

So in the end, about 5 cents in supplies and 4 hours in labor. Oh well, that's how it goes sometimes. The electrician was very nice and we definitely felt comfortable with his work and pricing, so at least now we have someone we can rely on the next time something breaks.

Thursday, April 21, 2011

Insulation and Some Expensive Discoveries

Hi there! We haven't posted much because we've been so busy doing work (and paying other people to do work) that there hasn't been any time to blog! But rest assured that the next few are pretty exciting and reflect some major changes. Today, I bring you the follow-up to my post on our energy audit. We agreed to most of the recommended updates to the house and had some workmen come fix up our attic (both the knee walls and the actual top of our house) and basement (in the laundry room area as well as the crawl space). Five guys spent almost 8 hours helping us stop air flow into and out of our house. How did they do it? Read on:

First they headed to the knee walls, the storage attics in our upstairs bedroom with the tiny Alice-in-Wonderland-sized doors. Originally, their proposal was to fill the knee walls to thoroughly insulate them, rendering them inaccessible and useless. I requested that they come up with a new idea that would let us keep our storage space. And it was a good thing I did--we had to empty everything so that they could get in and work, and it was amazing how much we've managed to hide in there in just the 18 months that we've lived here.

So they brought in these giant insulating boards (all of these things have R values, i.e. how much energy they save, but those figures escape me). The boards were so huge they had to cut them in half just to get them up the stairs.
Next they drilled tiny holes into our attic floors, spaced so that there was one hole over each joist. Why? Well, that comes later.
Next the shiny boards got installed on all the outer walls. As you can see from the above picture, we had some insulation in there already. So they didn't need to add much into the roof joists before installing the boards. The boards got sealed with foam to further block out air flow. Now our knee walls look like little rocket ships!
(By the way, these guys were really awesome and let me take pictures and always were happy to show me what they were doing. Contact me privately if you want their information.)

Just that step took them a while and there was one guy in each of our knee walls for most of the morning. When they finally finished putting up the wall insulation, it was time to "dense pack" foam into those little holes in the floor. They ran a tube from the insulation truck (yes, there was a truck which has a singular purpose of blowing foam) through our windows and into each little closet, filling the joists up with foam to block air leaking in where the wall and roof meet. They had to be careful not to fill joists that corresponded to our over-sink lamp in the kitchen, because it burns too hot, so there was a lot of measuring to make sure that they only insulated in the right places.
The sound and appearance of the fluff traveling through the hose was really cool, so I tried to get a video for your viewing and listening pleasure (make sure you have your sound on):


(OK, not that exciting I guess. Unfortunately Blogger will only upload it as such a low quality that you can't really see the fluff through the hose. I guess you had to be there. But hey, first posted video! Go me!)

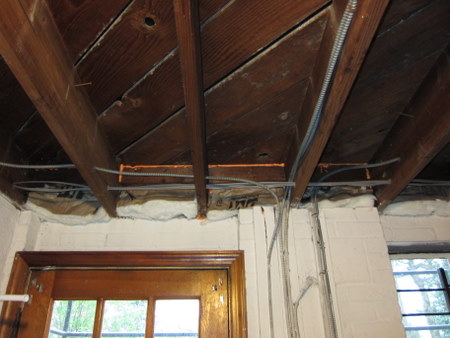
Next they covered up the clothes in our closet and cut what apparently was a man-sized hole in the ceiling to get to our otherwise-inaccessible attic. It was here that we encountered our first snag. Apparently there were some wiring issues up there (not a real surprise, I guess) that actually cause one guy to get a shock! There was a splice or two that needed to be put in a junction box and something up there was shorting out our circuit (thank goodness for circuit breakers). Since insulating up there would make it hard to access these problems and because, in the words of one of the contractors, "the insulation is flame retardant, but I still wouldn't want to put it near a known fire hazard" we had to halt work on the attic.
They installed this lovely "sealed" board that the electrician would be able to easily removed and agreed to come back later once we had the problem fixed. (It has been by now, but that's for a different post.) We still haven't managed to find a time to get the energy guys back out to insulate up there, but I'm sure that will happen soon.
And so it was on to the basement! A team headed downstairs and started insulating our crawl space. They noticed that it was actually possible to see our first floor from up through the boards in the basement and since the crawl space is (was) essentially outside, it's no wonder that the half of the house over the crawl space was always so cold in the winter. So they packed a lot more insulation up between the floor joists and then nailed up panel similar to what they put in our knee walls upstairs. They enclosed the pipes in the insulation too, so theoretically the hot water in the heat system will still be hot by the time it reaches the guest room and office.
This is also where problem two was discovered, though it wasn't something that halted work. One guy noticed that a sewer pipe running down the corner of the crawl space was a little damp. That wasn't good. He deduced from looking at the pipes that the problem was probably in our second-floor bathroom. We immediately stopped using it and started trying to find a plumber (again, already done and the subject of anther post).

In the laundry room, the guys put up some insulation along the outside wall because little bits of sunlight were actually visible. The white puffy insulation was sealed off with more orange stuff and should make the basement a little more pleasant, temperature-wise. There should also be less humidity down there, and in fact we are already noticing that the dehumidifier isn't turning on as often as it was just before we had the basement fixed.
So the final results from all of this work? Well, the guys started and ended the day with another round of blower door tests. Just like back in February when they did the audit, their morning reading was about 7000 cubic feet per minute, which means that a lot of air flows through the house (for reference, new homes are at about 2000 cfm). After all that work, which doesn't even include the attic, we got a reading of 3500 cfm. That was an incredible 50% difference. What this should mean for us is that it will be easier to heat and cool the house and maintain our desired temperature, because we won't be losing our warm/cool air by having it leak through all these cracks. The upstairs should not be as hot in the summer and the half of the house above the crawl space should not be as cold in the winter. So we're keeping our fingers crossed.

What were the cats doing during all this commotion? Well we stuck them in one of the rooms that wouldn't need any work and they spent much of the day trying to escape through the tiny crack under the door:

Tuesday, April 12, 2011

Exhaustion and Desperation

Thatching and dropping seed didn't really do much, so it's time to bring out the big guns. We spent Sunday raking little rows into the ground and putting Scotts Patch Kit everywhere we could. We also looked into getting our soil tested, but it's been way to wet to go out there and dig up some samples. It's on our to-do list, though. We're thinking of sending off three unique samples: front lawn, back lawn, and front flower beds.

Every weekend (at least for now while it's not scorchingly hot with man-eating mosquitos) we've been trying to get out and coax our lawn and garden back to life. Obviously our hard work and desperation seeped through into real life and my parents are taking pity on us and coming to help us this weekend.

Knowing when to quit, we decided that despite the fact that we want to plant edible things, this year we're going to stick to planting them in pots, that way they will take less weeding and care and we won't have to build a garden that would probably just fail anyway.

So here we have basil and cilantro (in theory, one day):

Parsley and cilantro in these little guys (which will live inside on our window once they germinate; for now they live in our upstairs hallway in the warmth and darkness):
(We're growing a lot of parsley and cilantro because they are last year's stock and were stored pretty improperly, so if any germinate at all, it will be a small miracle.)

We're also starting some 2011 seeds: cherry tomatoes and scallions (and more basil) to transplant into large outdoor pots (thank you, Costco).
Even if none of these grow, we won't be out too much money or effort, at least.

Finally, a couple of questions to anyone who might know flowers. I've been operating under the assumption for two springs now that these plants are roses. I've been researching how to deadhead and prune them and what to feed them. I'm only finally coming around to the fact that they are probably not roses at all. Now I realize that there are a lot of kinds of roses. But these don't smell like roses, they don't have thorns, they have barky stems all the way up to the flower, and they bud in twos and threes.

So what the heck are they?

Flower identification question number two: these are everywhere and look a little like dogwood but I'm pretty sure they aren't (dogwoods have clumpy little pistils in the center, don't they?). So what's your guess:

While we slave outside to make the yard look nice, these guys loll about on the window and watch. On a recent vacation, we saw a ceramic "beware of cats" sign that looked custom made for our babies, so we couldn't resist. Don't they look like critters you need to beware of?

Wednesday, April 6, 2011

Plants for a Healthy Home

Interior decorating advice, feng shui, environmentalists, and common sense all suggest that we should add more greenery to our home. Having plants inside can improve air quality, create a calming ambience, and help fill in empty corners.

One problem: we can't seem to find any cat friendly ones.

As I mentioned before in this post, our green cleaning guide lists 7 plants that contribute to good air quality and 6 are toxic. The remaining plant, spider plant, will basically make a cat high (an effect that our black and white cat once discovered and within a day, we had only a tiny little nub of spider plant yet, since he had devoured most of it). We use this ASPCA site for guidance on plant toxicity.

We even ignored the advice, since it seemed our cats ignored the Devil's Ivy (also known as Golden Pothos) plant that we've had for years (it comes from a cutting off a plant that has lived about as long as I have--seriously, this plant and its offspring will live for all eternity).


But when we recently lowered it off a top shelf to a lower shelf on our TV unit, our cats became pretty ill. It took a few weeks for me to realize that they were nibbling on the leaves.

In fact, it seems to me that just about every house plant--at least the common ones sold at Ikea and Home Depot--seem toxic. So besides hanging the plants from the ceiling out of reach of the cats, we need some new suggestions. Do you have pets and plants? What kinds of house plants should we bring into our home*?

*Caveat: I kill pretty much everything, so bonus points for any suggestions that are also hearty.

Sunday, March 27, 2011

Thatch-her, I hardly know her!

OK, that title sounds a lot funnier out loud than it looks on screen. Today's post is about a little experiment in lawn care. D recently rediscovered the thatcher my parents gave us (he used it last winter to try to spike the ice off the roof, but it has only just now been put to its real purpose). He decided to try to clear out the crud in the front yard. It's full of dried dead-looking brown grass and moss. The living grass looks like it's clinging to life.

At first he thought he could do the whole front yard, but after working a very exhausting hour and two full trash cans, we decided to only do one half and see if we could notice the difference in a few weeks.

D found his rhythm and thatched neat little rows into our lawn. My job (in addition, as usual, to taking pictures, was to scoop the crud into the trash.
The difference quickly became obvious to us, though it's not as clear on camera (and so I'm helping you cheat by drawing in a red dividing line). The thatched area is darker because more dirt is exposed and because a lot of the light brown dead grass is gone. Honestly even with the holes, it already looks healthier.
 Giant clumps of dead grass and moss (the most surprising thing, since our front yard is sunny and south-facing) came out. Theoretically, clearing this away will make room for healthy grass to grow. After we had finished thatching, D spread grass seed and we watered. I am against watering, so we put some down today to help the seed stick to the ground but since it is generally rainy this time of year, we're leaving the seed to fend for itself from here on out.
So just from doing half the front yard (to our front walk in the background), this is the how much dead stuff we pulled from the ground. I was surprised to see that none of the live grass (what little we had) came up, which had been my main concern when we started thatching. Apparently the roots are stronger than we though. Hopefully now that we've given them some breathing room, they'll do even better.
We won't get to the other half of the lawn for a couple of weeks, so it will be interesting to see if we can notice the difference.

Sunday, March 20, 2011

The Good Kind of Audit

You may remember that about a month ago, we had our scheduled energy audit. Even after doing some research, I didn't really know what to expect, but it turned out to be a pretty thorough look at our house that gave us a good idea of what we need to do to make the place more comfortable.

The audit seemed to consist of 3 parts. The first (and longest) was the visual inspection. Our auditor circled the outside of the house and then went through every bit of the inside of our house, looking for problems. He went into our crawl space, our mini-attics (apparently called knee walls--I learned all sorts of great things from the audit report), and everywhere in between. He occasionally stopped back in to the dining room where he had parked his laptop and jotted down some findings.

The second part of the audit, done in conjunction with the first part, was the infrared reading. Unfortunately, our audit ended up taking place on a day where the inside temperature and outside temperature were almost identical. So even though we were hoping for something dramatic like this:
Link to original
(Not our house)
We didn't get any cool pictures to show off. Our auditor said that the results were not particularly helpful, though in the end a visual inspection is often all that's necessary to determine problem areas.

The third part, by far the most exciting, was the blower door test. Our auditor installed this funky-looking contraption in our front door, started the blowing, and then wander around the house opening and closing door.
He wandered in periodically to check the gauges. He was very patient with me as I continued to snap pictures.

And that was it! The whole thing took almost 4 hours but didn't involve us much. In the end, he talked to us about his initial findings and what to expect next, and then he sent us our formal audit report a few days later by email. Fast forward a couple of weeks and we had a contract with the same company to do our repairs and a lot of forms filled out with the state and our electric company that will ensure we are eligible for rebates. (There are a lot of rebates out there for energy savings--the government wants us to make our homes more energy efficient. Our audit should have cost $400 but after the two rebates we were eligible for it was free! And our repairs will only cost us 50% of their actual cost.)

The audit pretty much confirmed all our suspicions and gave us ideas of what we need to do to fix them. We got a score of 32 out of 50, scoring worst on air exchange, attic insulation and best on system upgrades and energy management. The most telling figure on how awful our house holds its heat (or cool) came from the blower test, which measures air leakage. An "optimal" house leaks about 2000 cubic feet per minute. Ours leaks almost 7000 cfm. So everything that the contractors do is designed to help stop the air from getting out (or in), mostly in the basement and the attic. We're aiming for about 4000 cfm (because any better is pretty much impossible in our old house without starting from scratch). I'll post more about what exactly we're having done when I blog about the repairs. I'm hoping to get a lot of crazy pictures too!

Thursday, March 17, 2011

100 Pound Footrest

This is an oldie but goodie--back before Christmas, we had an interesting experience ordering a coffee table for the living room. After hunting for a while and finding things we liked at much-to-expensive stores like Pottery Barn, we came across something we really liked from Overstock.com*. Unlike some things on Overstock that aren't traceable back to an actual product, this one even had its own website:Elia Coffee Table by C F Oakton.

It showed up very promptly at our door and shipping was less than $3. It weighed 92 pounds!!
I got home first and told D it had arrived. I managed to lug it inside (also with the help of a totally awesome UPS guy who happened to show up to deliver a much tinier package and gave me a hand crossing the threshold). I tried to unwrap the many layers and eventually gave up until D came home to help.
We loved it! It was a lot heavier than our last table, because of all the drawers (a negative, since we like to move it out of the way regularly to play on the Wii) but it really fit our living room.
The drawers were exactly what I wanted--a place to hide remotes and other ugly clutter.
But there was a small problem--even though the thing was packed like sardines in a can, it somehow got damaged. Nothing major, but some nicked wood on the corner and a slice in the veneer.

D contacted Overstock for the heck of it and they offered him a 15% refund. We agreed to it. Then out of the blue, they decided to ship us another table. We didn't really want it because it didn't seem worth the effort. But it arrived right around Christmas and D's family helped us get it unpacked (much harder this time because we had to keep the packaging in tact to repack the damaged table). It was quite an ordeal (and mostly I just watched and took photos, as always).

All that, only to discover that the second table was actually more damaged than the first!! So we alerted Overstock and they came back to take away the second table, which we managed to repackage in some sloppy fashion. In the end, we got our 15% refund because we decided not to try again with a third table.

In all, we ended up with one nice, heavy table and a good impression of Overstock's customer service. The products may be a little lousy, but they seem to stand by them if you're unsatisfied.

*By the way, have you noticed that we've branched out from Ikea lately? I am proud of us.

Wednesday, March 9, 2011

Oh Pottery Barn!

You've gone and done it again: create a perfect piece of furniture or other that I like and then overcharge for it. First, it was a bed. Last time, it was a coffee table. This time a nice piece for our living room, just like this one:
Daniella Chest
So I guess the real problem isn't that there are no options, but that they aren't in my desired price range. But the hunt is helping me refine a few terms. This piece refashions Queen Anne legs and a traditional bombe structure, so those words are ones I will keep an eye out for. And so will you, right?

Saturday, March 5, 2011

Fire Hazard No More

When my parents visited a couple of weeks ago, we really put them to work! I asked them to help us dissect our dryer and dryer vents to clean out the lint, a project on my New Years to-do list. They came prepared, bringing with them a kit from Lowes with all the parts necessary to make everything good as new. (This is the kit--I can't seem to find it on Lowe's website.) It was good to have the extra help, since this turned out to be a 4 person job (or 3 person plus 1 person to take the pictures....). I'm here to tell you that it wasn't as hard or scary as we thought--actually, it was kinda cool--and it's something you should do to make your dryer run more efficiently (we've noticed an incredible difference in drying times) and safely.

First we unplugged and detached the dryer from the vent and pushed it away from the wall. We tipped it back and propped it up on some food cans, which are conveniently stored in the basement not far from the dryer. D got to work prying the front off the dryer.
 With the front detached, we went to work on the dust and lint. We'd already removed the lint trap and shoved a brush in there to dislodge the lint that remains stuck inside. Now we went at it from the bottom.  See all the dust coming out on the wire brush? In addition to the brush, we used the handheld brush attachments on our vacuum to really get the surfaces lint-free.
Next we unscrewed the black case from the picture above, to clean inside it. You can see how nasty that is. We have no idea when this was last done, but it's been at least a year and a half that we've lived here and it's pretty unlikely that the previous owners went through all this trouble right before they sold the house.
 Die lint! Die! Feel the wrath of my vacuum!

With the dryer lint-free, it was time to attach the vent. The kit included a rotary brush that attaches to a drill with screw-on extension tubes to make the brush be able to run the entire length of the vent. You're supposed to tape the extension tubes and make sure never to rotate them in reverse, to make sure they don't come unscrewed inside the vent. With the extension tubes attached, D started feeding the brush through the vent hole.

As a side discovery to this project, we realized our vent hole doesn't seal completely when not in use. It's supposed to have a little trap door that closes when the dryer isn't blowing air out and that the trap door is broken. Also the vent isn't very well sealed to the house. We need to buy a new vent to keep the cold air sealed out of the basement (score one for increased energy savings), so stay tuned for a future post on that repair.
At the same time D was running the brush through the vents, my parents attached the shopo vac to the bottom of the vent (with a connector that came in the kit) to suck up all the lint that D was dislodging.

Despite all the L turns in our vents and thanks to a little coaxing, the brush made it all the way through the system.
 Here is D pulling the brush back out--but not with the drill in reverse!
Next we ran the brush up from the bottom, just to make sure that everything was clean. Another special connector in the kit lets you run the shop-vac and the brush through at the same time. Again, no trouble getting through those sharp turns.
The hardest part turned out to be reattaching the dryer to the vent. Armed with foil tape, a new flexible tube, and a ring connector, D struggled to get everything back together. Since the dryer was already much closer to the wall by then, all the pictures just looked like a guy trapped behind a dryer, so I'll leave that to your imagination. It is unfortunately a one-man job, so the rest of us just started putting everything else back together. One glance at the contents of the shop-vac (not to mention the regular vacuum, which we used for the more precise clean up for the front of the dryer) proved that it was a good thing we had cleaned everything out. It was pretty full of lint and dust. And now we know we are good for 2 to 3 years until we have to do it again.