Please share your opinions and expertise since we need all the help we can get!
Showing posts with label bedroom. Show all posts

Wednesday, January 28, 2026

Princess Desk and Room

This princess room clearly needed a desk space for the little student. As with the rest of the room, the built-ins and the knee walls with doors to our storage cubbies meant that there wasn't a lot of space to work with, so D decided that this built-in should come out and a custom desk would go in. 

Demolition was surprisingly easy, so we didn't get any pictures of it. Just about everything could be pulled by hand or with a pry bar. There were spots that made us go "huh" though, as with any old house. We learned that the trim on the outside of the built-in was higher than the trim on the inside, which wasn't noticeable until we removed the vertical framing. D trimmed a piece from the front of the built-in to fit and inserted it, plus fitted a piece of wood trim. The floor also had missing pieces, and you can see from this picture that he added a small rectangle to fill in where the vertical front pieces of the built-in had been set into the floor:

We found a deeply discounted desk pedestal from Ballard Designs and then created a ledge to the height of that pedestal by screwing some pine boards around the perimeter into the studs. 

The most challenging (well, scary) part of the whole process was measuring over and over and then cutting the $99 "Floor and Decor" butcher block countertop to the right width. Then ripping it (shearing off a thin slice/plane) as it was a bit too deep for desk usage. The Bosch track saw made it a fairly easy process to make it thinner. Then D eye-balled a few different roundover bits we owned and ran a hand-held router across the front and side edge to give a nice rounded effect. He finished with Danish oil. He started with a very old can which was a huge mistake as it just went on sticky. And stayed sticky. So he had to run some mineral spirits across the board to de-sticky it. Then finish it again with a new(er) can. Still took several very smelly days in the basement (as it was winter there was no hope of using the outside or garage to cure) to get the smell in a sort of OK state--enough to put in a bedroom. For a while, we could smell it (from the basement) in most of the main floor of the house:

The middle hole in the floor was especially challenging to fill in because it got wider as you went deeper. I guess the contractor wanted some wiggle room when they installed the original bench / shelves. It was far too thin at the edges to keep as is, so D took a chisel and carefully widened the hole until the existing wood felt sturdy enough. Then he used some leftover oak flooring from our primary suite addition and cut it to friction-fit into the spot. The finish of course does not match, but no one is likely to notice until the next homeowner or future us rips out the desk.
And here it is, in all its glory. There's a charging station (I think my kids have more devices than I do) and lots of space to work (at least when she puts her junk away).
Without further ado, the rest of the room. You'll recognize the dressers and the bed, now with optional canopy attachment, from the guest room. Moving it up here is what allowed us to empty that room out and put in a Murphy bed instead. (The kids both knew it was now-or-never on this bedroom set--either one of them was taking it or it was going to be sold off.) This was my canopy bed and furniture set from the 1980s and apparently the multitudes of unicorn and Strawberry Shortcake canopies of my era just do not exist anymore. (I think they can be a health hazard because of how dusty they can get--so I try to shake this one off and dust the frame when I change the sheets.) This was one of very few I could find on Amazon, but fortunately, the room recipient loves it.


And of course we added another special touch to make the room even more magical:

And so as we enter 2026, I think I have finally caught up with all the bedroom upgrades that we made as a result of the new addition (guest room and both kid rooms). This all took place primarily in the last few hectic months of 2024, so you can see why we were too busy "doing" to be "writing."

Sunday, October 19, 2025

Main Bedroom No More - Fit for a Tween

I'm yet again faced with the task of documenting an "after" without good "before" pictures. It turns out that after we got the basics of our bedroom put together in 2010, I never took another picture again. So this post from nearly 15 years ago (!) doesn't quite reflect how our primary bedroom looked in 2024, but it's pretty close:

By last year, we had an end-table screwed into the wall (same post as above) and some different throw pillows, but the room looked mostly the same--static for more than a decode. Then last year when we had to move speedily through all the cascading changes, we transformed it in one weekend.

Here is how the room looks now:

You'll notice that we kept the IKEA Mandal bed (which would not have gotten out of the room in one piece anyway) and Brimnes headboard, since that headboard worked great with our oversized baseboard heaters. The walls are Sherwin Williams Hyacinth Tint, though we kept the ceilings and the closet doors the color we had painted them originally, an off-white Fleur de Sel matte. 

We actually started off with our original white IKEA flokati rug, but the cats had other plans and after someone mistook it for the litter box, we went with this all-artificial plush turquoise number from Wayfair. It's machine washable. It also matches the beanbag chair in the corner--both are a soft greenish blue.

My vanity corner, here, has also transformed. You can't see it well here but the vanity without the mirror is what I'm currently using as a sewing table. And the masks have moved. 
It's now a combination makeup and homework space, yet more IKEA furniture: desk (Micke) and chair. And of course the obligatory bulletin board:
Then from this angle, you can see we rearranged things a bit. Where our dresser was, we now have a bookshelf, our IKEA Hemnes from the office, painted in the same Hyacinth Tin in an attempt to blend it into the wall. The dresser, also IKEA, was originally in the kids' (green) room but actually is part of the Mandal series that always went with this bed, so now they are actually in the same room. The lamp was also in our previous bedroom - you can see it in the corner in both of these shots:


We painted the kick board doors the blue that is in our upstairs bathroom, Russian Blue, just for fun. Blue and purple are the primary decor colors, if it wasn't obvious (and this time we went with true black-out curtains, after over a decade of having curtains that let too much light in during the summer months).

In the end, it looks both very similar and eerily different--like an alternative reality. Since both kids got a decor and furniture budget, they were very conscious of trying to reuse things we already had. The bed, headboard, dresser, lamp, and bookshelf were all reused. The beanbag, end table/stuffed toy bucket, and linens (rug, duvet cover, curtains) were new. It's amazing how a change in color scheme can remake a space.

Saturday, June 28, 2025

Where to begin? Primary bedroom

What an almost-year it's been The blog fell so far behind with all the work we've been doing that it was hard to pick up again. We have done so much to the house that three of our pre-existing rooms are nearly unrecognizable as each change led to more change (yay domino effect), and all of it had to get done within a pretty tight timeline. Combine that with slowly furnishing and accessorizing the new addition in waves (obviously we needed things like the bed and the window coverings quickly but could take our time on things like throw pillows and rugs). And so now, about 10 months after the project's completion, it's time to show off all our progress.

When last we left off, we were at this stage in the process (this is the last picture I posted, from July 2024). Family visiting from out-of-town at the same time as a sick kid meant that we had to move in quickly to redistribute rooms. Thank goodness our visiting family was able to help move furniture! (I still don't know how they got my dresser down the stairs and around the turns...)

One thing I did not document last summer was our decision making process on staining the floor. We were excited that for the addition, thanks to the step-down from the office, we didn't feel compelled to stick to the same yellow color on the rest of our floors. The carpenter gave us a few options. Of these two, both quite natural and with minimal tint and we went with the one on the left, Bona NaturalSeal, with even less warmth in it. The product description says it is a floor sealer with the look of unfinished wood. It has a satin finish so it clearly looks "finished" but in a very muted way with no color. We're very happy with it.
So fast forward to some pictures many months later, when we got not only the big items in the room but the little details as well. Besides being undecided on potential artwork, our room is decorated and done.

First, the bed wall. After some skepticism on my part (I wasn't sure I was ready to give up built-in under-bed storage), we got the Thuma Classic Bed in natural. The construction was as advertised and pretty fun to build. The pieces lock together without any need for nails or screws.
The mattress is a natural latex mattress from Latex Mattress Factory. It has organic cotton batting and a wool cover, so it's right up my alley. It came in three layers that we customized for ourselves. The company representatives made it sound like assembling it would be easy, but getting them unrolled and into their cover was very challenging. Since this one has different densities at different layers to better support us, we can only rotate it, not flip it. Also a king-sized latex mattress is no joke--the thing is massive and impossible to lift. Even lifting the corners to make the bed feels like a massive undertaking. We updated the covers on our throw pillows and I added a beautiful bolster pillow I found deeply discounted at Crate & Barrel. The duvet cover is from IKEA. I loved it so much we bought a second one for when the cats inevitably destroy this one. The colors just worked perfectly with the room.

The purple trunk in the corner is this trunk that I bought over a decade ago in a light matte blue and had in our upstairs bedroom. I chose Benjamin Moore's Purple Lotus (Sherwin Williams has a very poor selection of purple shades), but I wish I had gone one shade warmer in the paint chart as it was a bit cooler and brighter than I wanted (despite the color being described as "smoky"). Coating it in gray, just like I did when it was blue in our upstairs bedroom, helped a lot.

Our new nightstands took some time. They needed to be relatively small and we didn't already own a set, using a shelf attached to the wall upstairs because of the baseboard heating. These turned out to be finds from Target done in a pressed tin. I swapped out the nobs to amethyst depression-glass ones instead of the boring silver ones included. They don't hold very much but they work well enough.
Turning the angle a bit, an IKEA Holmstrup rug (that, sadly, was a "last chance" buy no longer available) in a style I love--the new "pebble" rugs I've seen in a few places are usually all wool (yes please) and feel very plush underfoot.  I clearly went all in because the small one on the side of the bed just peeking out of the top picture is a Pottery Barn version of the same style.
We started out with some expensive curtains but returned them because they didn't block enough light, opting for something random from JC Penney's instead. The inner curtains are IKEA Matilda that already have holes in them thanks to the cats, so at least they were cheap. The sizes didn't quite match so I did some aggressive shrinking in the washer and dryer before hanging them up and they still stick out from under the door curtains and drive me a little crazy.

I found a beautifully framed silver mirror at an antique warehouse and bought a purple Turkish lamp for ambience. It is resting on my original dresser from our upstairs bedroom. The painting was upstairs too, and the pinks worked well in the new room.
I was going to describe the closet area but I think this post has gone on long enough, so I'll save that one for another time. Hopefully in less than a year.

Wednesday, December 27, 2023

The Bedroom

A bedroom is really just a simple box. How hard can that be to design, you might ask. Well, it turns out that when designing the bedroom of a primary suite, it can be pretty darn hard. Here's the journey we took to arrive at our final bedroom design, from beginning to "approved permit" (YES! We have a permit!). There are quite a lot of fuzzy screenshots here, but I figured they were sufficient enough that you could get the idea.

First, after hearing our ask, the architect proposed three designs with different bed positions. I hadn't really thought about it before since we've always moved into a previously built home, but I suppose the bed position really is the key starting point to a bedroom. Especially when it's a king size bed, which ours will be (we are SO excited for that upgrade - soon there will be plenty of room for us AND the cats). So to orient yourself, the top of each picture is the back fence line of our yard (north-facing). The right faces out to our patio and the left to a currently empty lot that may one day be something more and which is the view of our house you get approaching up our street.

This look was nice, but we though having a wall with no windows on one of our more public walls might look weird architecturally:

This felt like some awkward wasted space in the entry way:

This one seemed ok, but that's a lot of windows looking out to a space that could end up being who-knows-what.

The verdict from that exercise was that we knew we wanted our bed to be against the wall that is depicted here on the left, facing out to our patio. Next, we considered storage and sitting space. We briefly toyed with some options that would create a picture window or pop-out. With a few different mock-ups (only one shown here), we quickly realized it would overcomplicate the design and really affect different exterior options. We also decided we want to have wardrobes in the room rather than a walk-in closet, something like the IKEA PAX system, but with the addition of some architectural accents and drywall to make them look fully built-in.


We also added in a couple windows back to the left wall. We felt these would be small enough to not be terrible if whatever ends up on the lot is something we don't want to look at, but still help the exterior look and provide a little light.

And that was the state of the room when we paused the project last spring, which gave us all summer to think more about it. After some discussions with some very design-savvy family, we came back to the project this fall with a new proposal that involved putting the bed on a partial wall with the PAX built-ins behind it. So the whole area behind the bed is essentially a really giant walk-in closet (though the cabinets will still have doors also). We started out with four full-size units like this:

But quickly realized that the partial wall had to line up with our entry door or it would look like you're walking into a wall, so that created a narrower corridor and the need to have thinner shelving on one side:

Then we played with adding a window or two back in, first one in the center:
And then one at each end, which we liked better because it would send some light into the main room as well. We also lengthened the entire room just a little bit to allow for enough space on the partial wall for normal-sized nightstands. Also during this process, we came up with a cool way to use some of the space to add another PAX unit immediately to the left of the entry. This will make more sense when I get to the "hyphen" post (the architects have been calling that corridor with the bathroom on it the "hyphen").


And...that's really it. We made an additional tweak once the detailed, more precise drawings came in, when we realized that a third full-size PAX unit would fit against the wall, and we figured out (at least tentatively/for the permitting and for the contractor bidding), where the electrical stuff would go. Here's the final drawing:

We really like how we will look out over the biggest part of our yard (and the space we're most in control of), how we have a wall of north-facing windows that should provide some lovely even light, and how we have a cool area of storage that is separate enough from the bedroom to give us a more open-feeling room. You can see from the parallel dotted lines where the highest part of our ceiling will be, which I think will also feel very spacious as it continues to rise past the bed. Having a floor-to-ceiling wall behind the bed that doesn't connect to any walls feels like a bold move that made me a little nervous, but now I'm already planning how to make that into a really cool accent wall, maybe even with a pop of wallpaper (though we don't even know what color we want the room painted, so that obviously has to come first!).

Sunday, December 1, 2019

Giant Dust Rabbits

A whopping 10 years ago, I wrote about various strategies to hunt dust bunnies. The kind of bunnies I hadn't accounted for were the hidden, lurking kinds. A few months ago when we flipped our mattress, we discovered an entire warren of dust bunnies. They were so big, I'd like to think of them as dust Flemish Giant rabbits. These must have have been growing under our bed for...years? Our bunny warren was lurking underneath the drawers in our bed frame, which meant we had to open the drawers and pull up the bed slats to see them. I guess that's why we hadn't noticed even when we flipped the mattress other times--it was just luck that one bunny was visible enough to prompt us to explore further. The sight was so gross that I forgot to take a picture before grabbing the vacuum, so the pictures below show much less dust than we originally found.
Thankfully, with a little awkward hopping over the drawers and between the frames, we were able to vacuum up most of the bunnies and wipe down the floors with a damp cloths.

Knowing this has been under our bed for who-knows-how-long is gross, but at least now we know to attack this space every time we remember to flip the mattress. I wonder what other hidden dust warrens are lurking in our house. Most of our furniture is up on legs to help our baseboard heaters be more effective, so usually we can see (and clean) under them. So I hope that while we definitely collect some dust along our baseboards, we don't have quite the giant dust bunnies found here in too many unknown warrens around the house. Because EWWWWW!

It's been a bit quiet around here lately but stay tuned for a few posts we have lined up. We might not be blogging but we're busy around the house, as always.

Sunday, September 25, 2016

New beds everywhere

We have some new beds around here! First, in an effort to make the guest bed less of a literal climb to get into at night, we got a 4'' low-profile boxspring. It was build it yourself but we're getting pretty used to that these days (seriously, building that Ikea Friheten sofa was pretty awful). It was straightforward and much cheaper than buying a pre-built one. We actually struggled to find a wood-slat boxspring. Ikea doesn't sell them (yes, we pretty much just start out there by default) because their mattress are all designed for their own beds, which don't need boxsprings. And most mattress stores charge a fortune.
We also bought a new mattress, the medium firm Myrbacka latex (Ikea of course). It was an equally awkward drive home as last time, but fortunately this time we enlisted the help of friends with a bigger vehicle, roof rack, and more skill at tying knots. The new one is much firmer than the one we tried out at the store, which I guess isn't surprising given all the use the in-store one gets. Because of that, and also just to protect it, we bought a plush topper for it.

In the end, the bed is over 6'' lower than it was before, meaning that guests don't need to hop or use a stool to get in or out. And toddler spills from climbing are a bit less dangerous (yup, those have happened).
And speaking of the toddler, this one graduated from a crib with dropped sides to her very own bed! More building...yay...I honestly was willing to consider buying from somewhere other than Ikea, but the little one asked for a blue bed and lo and behold, they actually had one (yes, she is spoiled and usually gets what she wants). And while it was a bit pricy for Ikea, it was still in line with or even cheaper than most other options. And so we got her the Busing extendable bed, which sadly necessitated buying the mattress that goes with it, the Vyssa Vinka, because it's Ikea so of course that means proprietary sizing. At its fullest position, it will be a twin bed. But for now and in its middle of three positions, the size is proprietary. Right now it is actually shorter than her crib bed, though it is wider. She's tiny and keeping it at its smallest setting means less space for her to accidentally roll out or lose her toys. She's pretty pleased with it, though I think her favorite part may have been picking out sheets.
For the first time in a long time, we were missing a piece of hardware from the kit. It wasn't critical to the construction but it was an important component to keeping the side piece near her head stable (the pieces designed to keep her from tumbling out of bed). And of course because of the way it was constructed, it had to be added during the building process and not afterwards. So we followed the (new?) process of requesting the missing piece from Ikea's website. I'm pretty sure that stores used to just stock some extra pieces at the customer service desk, but that does not appear to be the case anymore.

The process was going to take 2-3 weeks. We couldn't wait. Fortunately, it's a common-enough piece and we borrowed one from our bookshelves:
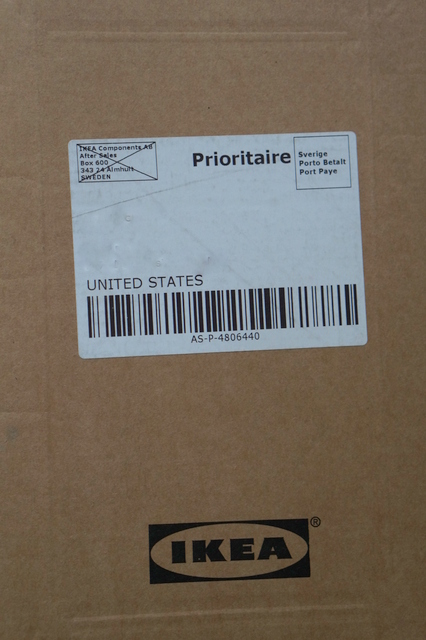
And then, just about when we'd forgotten we'd even ordered a replacement, this arrived in the mail:

Yes, apparently spare Ikea parts travel all the way from Sweden...I find this both delightful and very very strange.

Tuesday, November 20, 2012

Ikea visit treasures

A month or two ago, we wandered around our newly remodeled Ikea to see what nifty new things we could find. I thought I'd share with you what came home with us.

The first thing we saw were these cute little Norrora egg bowls in the bathroom section. We still hadn't figured out where to put cotton balls and q-tips in our new bathroom. We had pretty white crates hanging on the wall for shelves and I was afraid that using glass jars open on top would result in something crashing to the floor whenever I tried to take something out. These were the perfect solution.
Don't they look cute - and the soft white ceramic goes great with the rest of the decor.

Second, you may remember this pretty sewing table that I refinished this summer was missing a knob. I knew I wanted something glassy and transparent and preferably blue. Everything I found cost more than $5/knob. At six knobs, that's more than I payed for the table. So imagine my joy when I came across these cheap plastic drawer knobs called Satta.  They are available in a bunch of cute colors, including the perfect teal for me.
Here's the table with the old wood knobs. Nice but boring. Also missing one on the bottom drawer.
Here it is with some punchy blue accents. So much better!
The quality of the knobs are pretty appalling, but this piece won't be getting much wear and tear, so they should hold up just fine. At any rate, since they are just $2 for all six, they'll be fine until I feel like splurging or can find something more durable on sale.
Last but not least, the most expensive, and heaviest, purchase of the day. Here it is - the mystery box.
 It's Norden!
I was so excited about this table! We had gotten rid of the table that had migrated up from the basement, much damaged after this little incident chiseling glass out of a window frame. I don't think I ever took a picture of this room when the table was in it - but trust me when I say it took up way too much room and was ugly and broken. I was so excited when D allowed me to get rid of it - we put it on the curb and someone took it within a half hour.

Norden is the perfect replacement - it doesn't take up much space but expands to fit a lot of people, with two swing-out leaves. It has plenty of storage (3 drawers on each side) and, the icing on the cake, it was a surprisingly fast assembly.
So we didn't get out of Ikea without spending some mulah, but at least we came away with some nifty treasures.